A 6 Step Basic Setup
15th October 2022, updated 6th February 2024
Introduction
In this Tutorial you will learn how to set up a Lay Theme website in 6 steps.
You got two options. A local setup or an online setup. The online setup is easier, because you won't have to move your finished website to your webhost later for it to be online.
Option 1: Local Installation
When setting up a website locally it won't be on the internet. It will only be accessible from your laptop. However, you can later get webhosting and move the site to your webhost. Then it will be online.
If you want to go online later you will need to do Step 6.
Scroll down to Step 1 for the local installation.
Option 2: Online Installation
We recommend these webhosts: Netcup (budget, choose server location in USA, Germany or Austria) or Kinsta (premium managed WordPress). We are affiliates of these.
Once you got webhosting, install WordPress on your webspace. Most webhosts have a one-click installer to do this.
Then skip to Step 3. You won't need to do Step 6.
Alternatively, tastewp.com lets you create a WordPress installation quickly and without payment, but it will be gone after 2-7 days.
1. Download Lay Theme and Local
Head over to localwp.com and download "Local". You don't need to create an account.
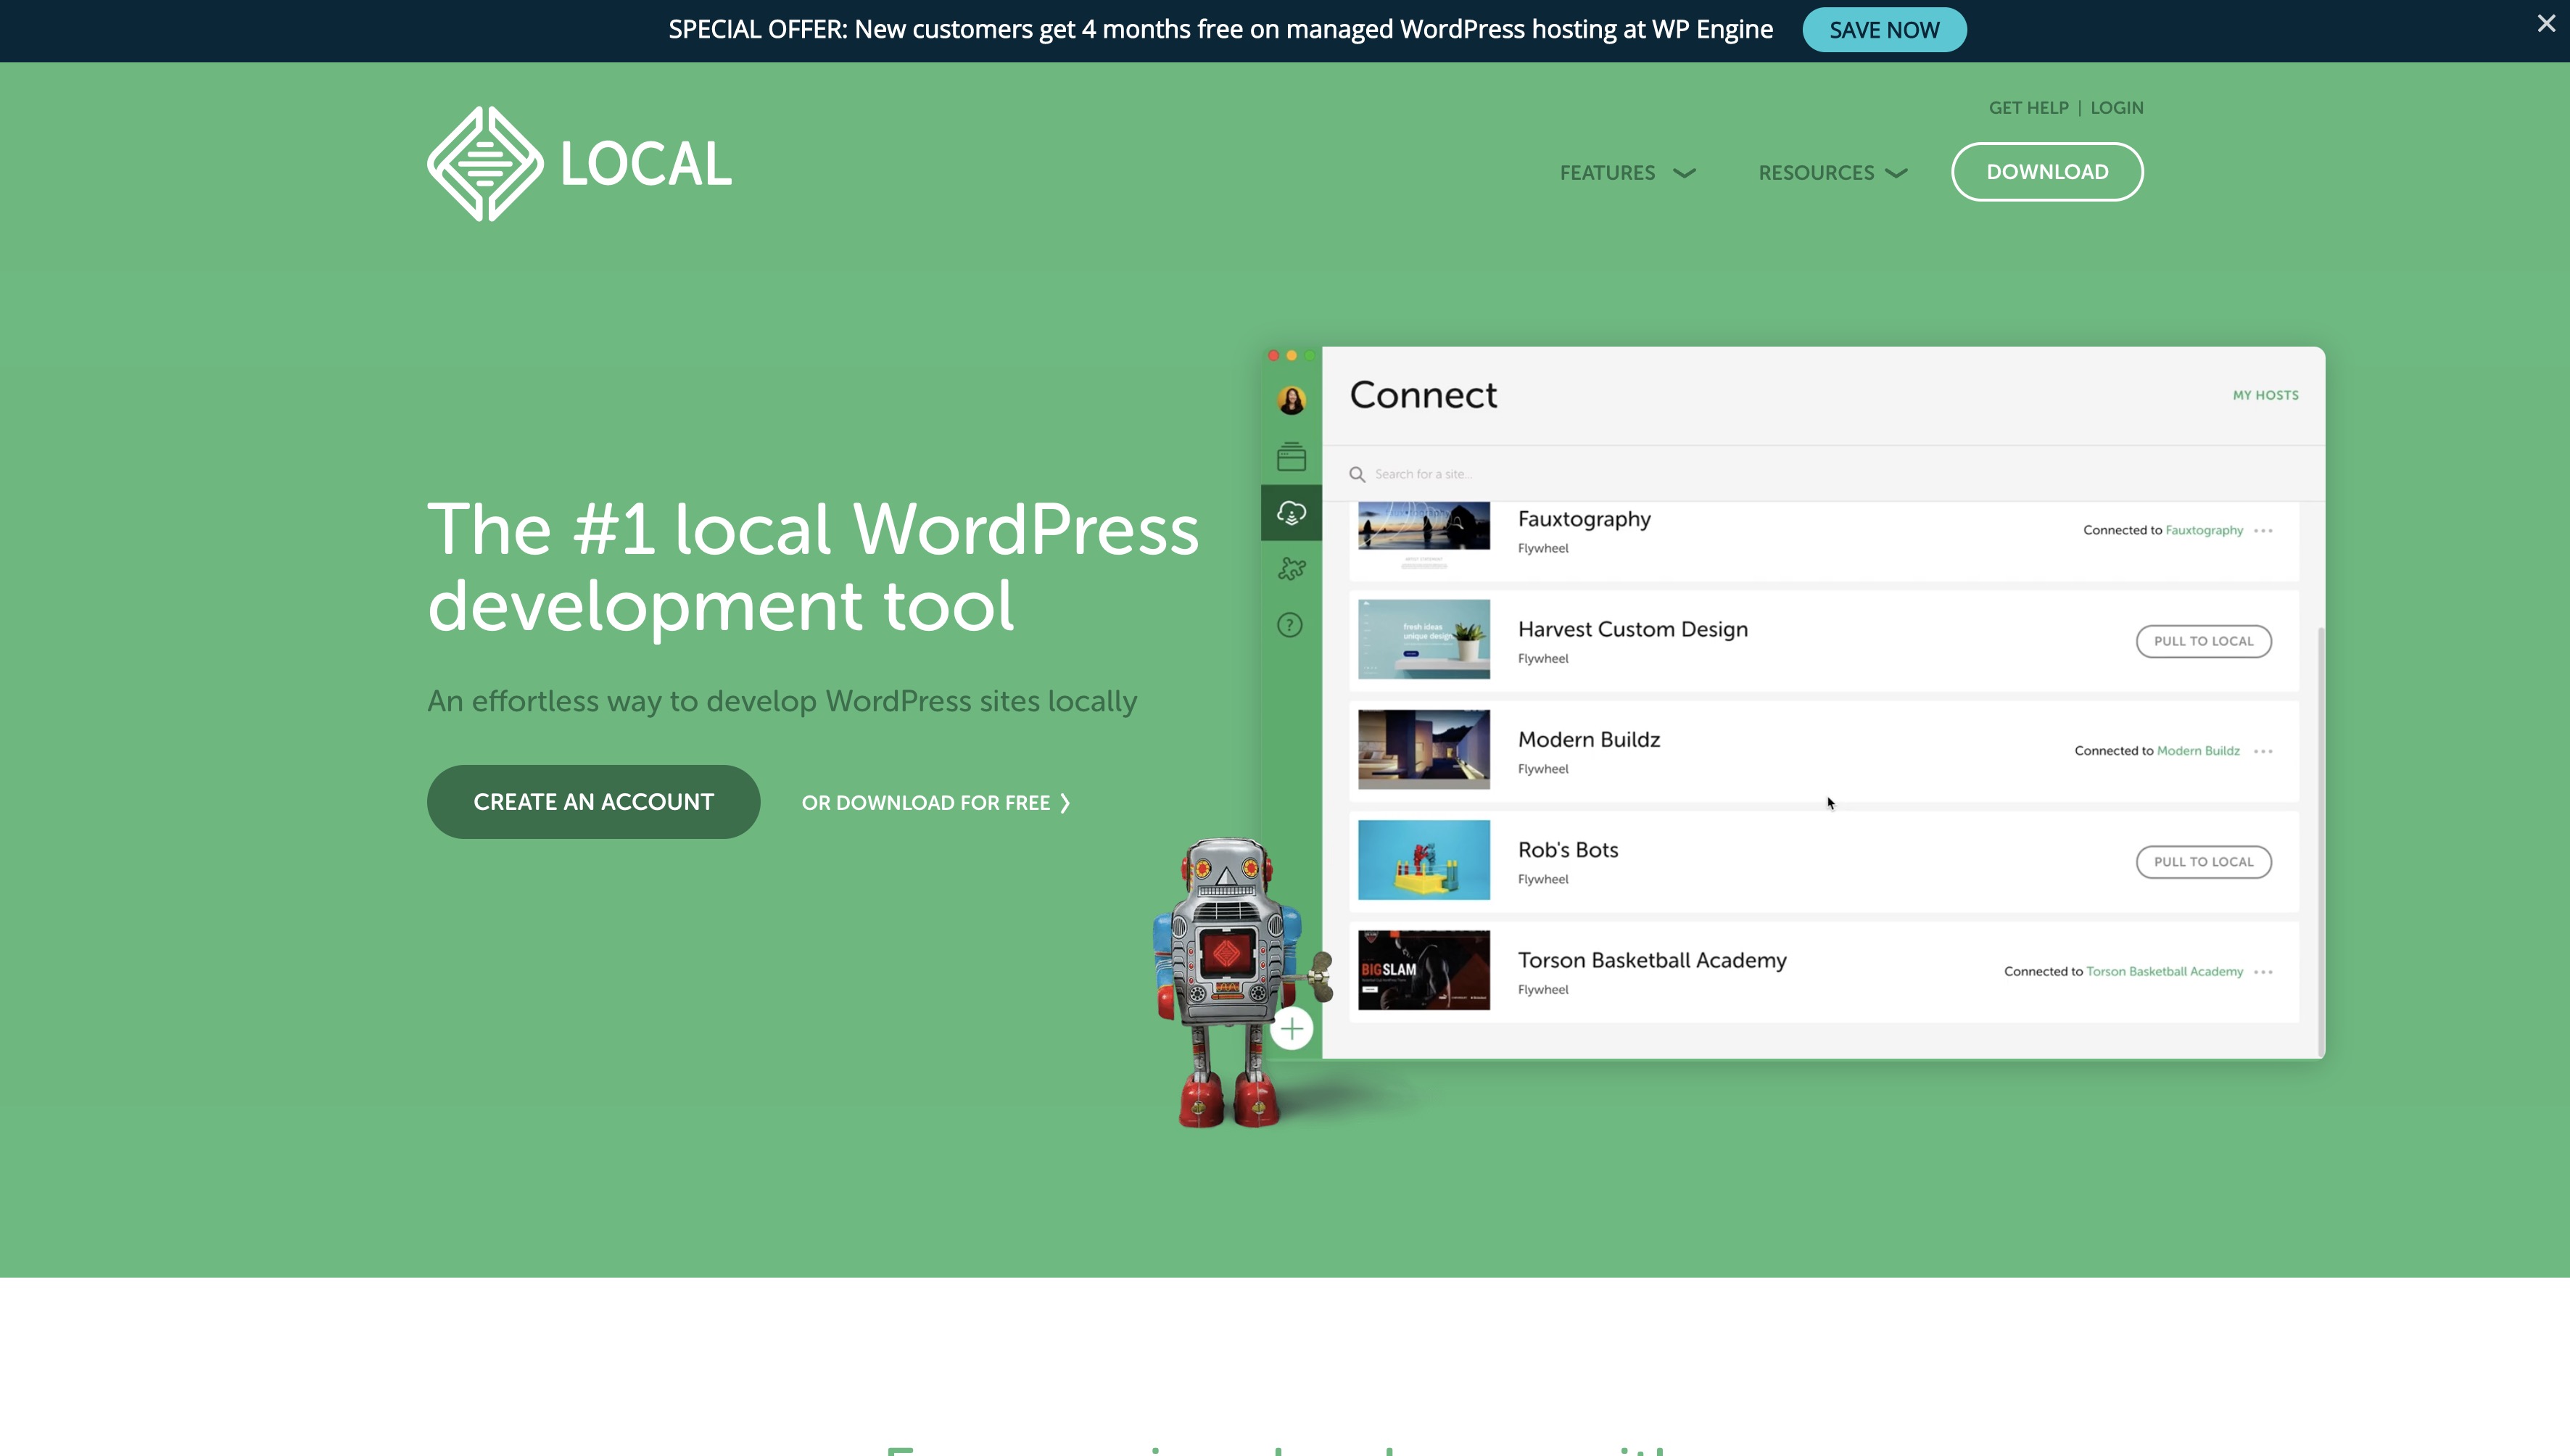
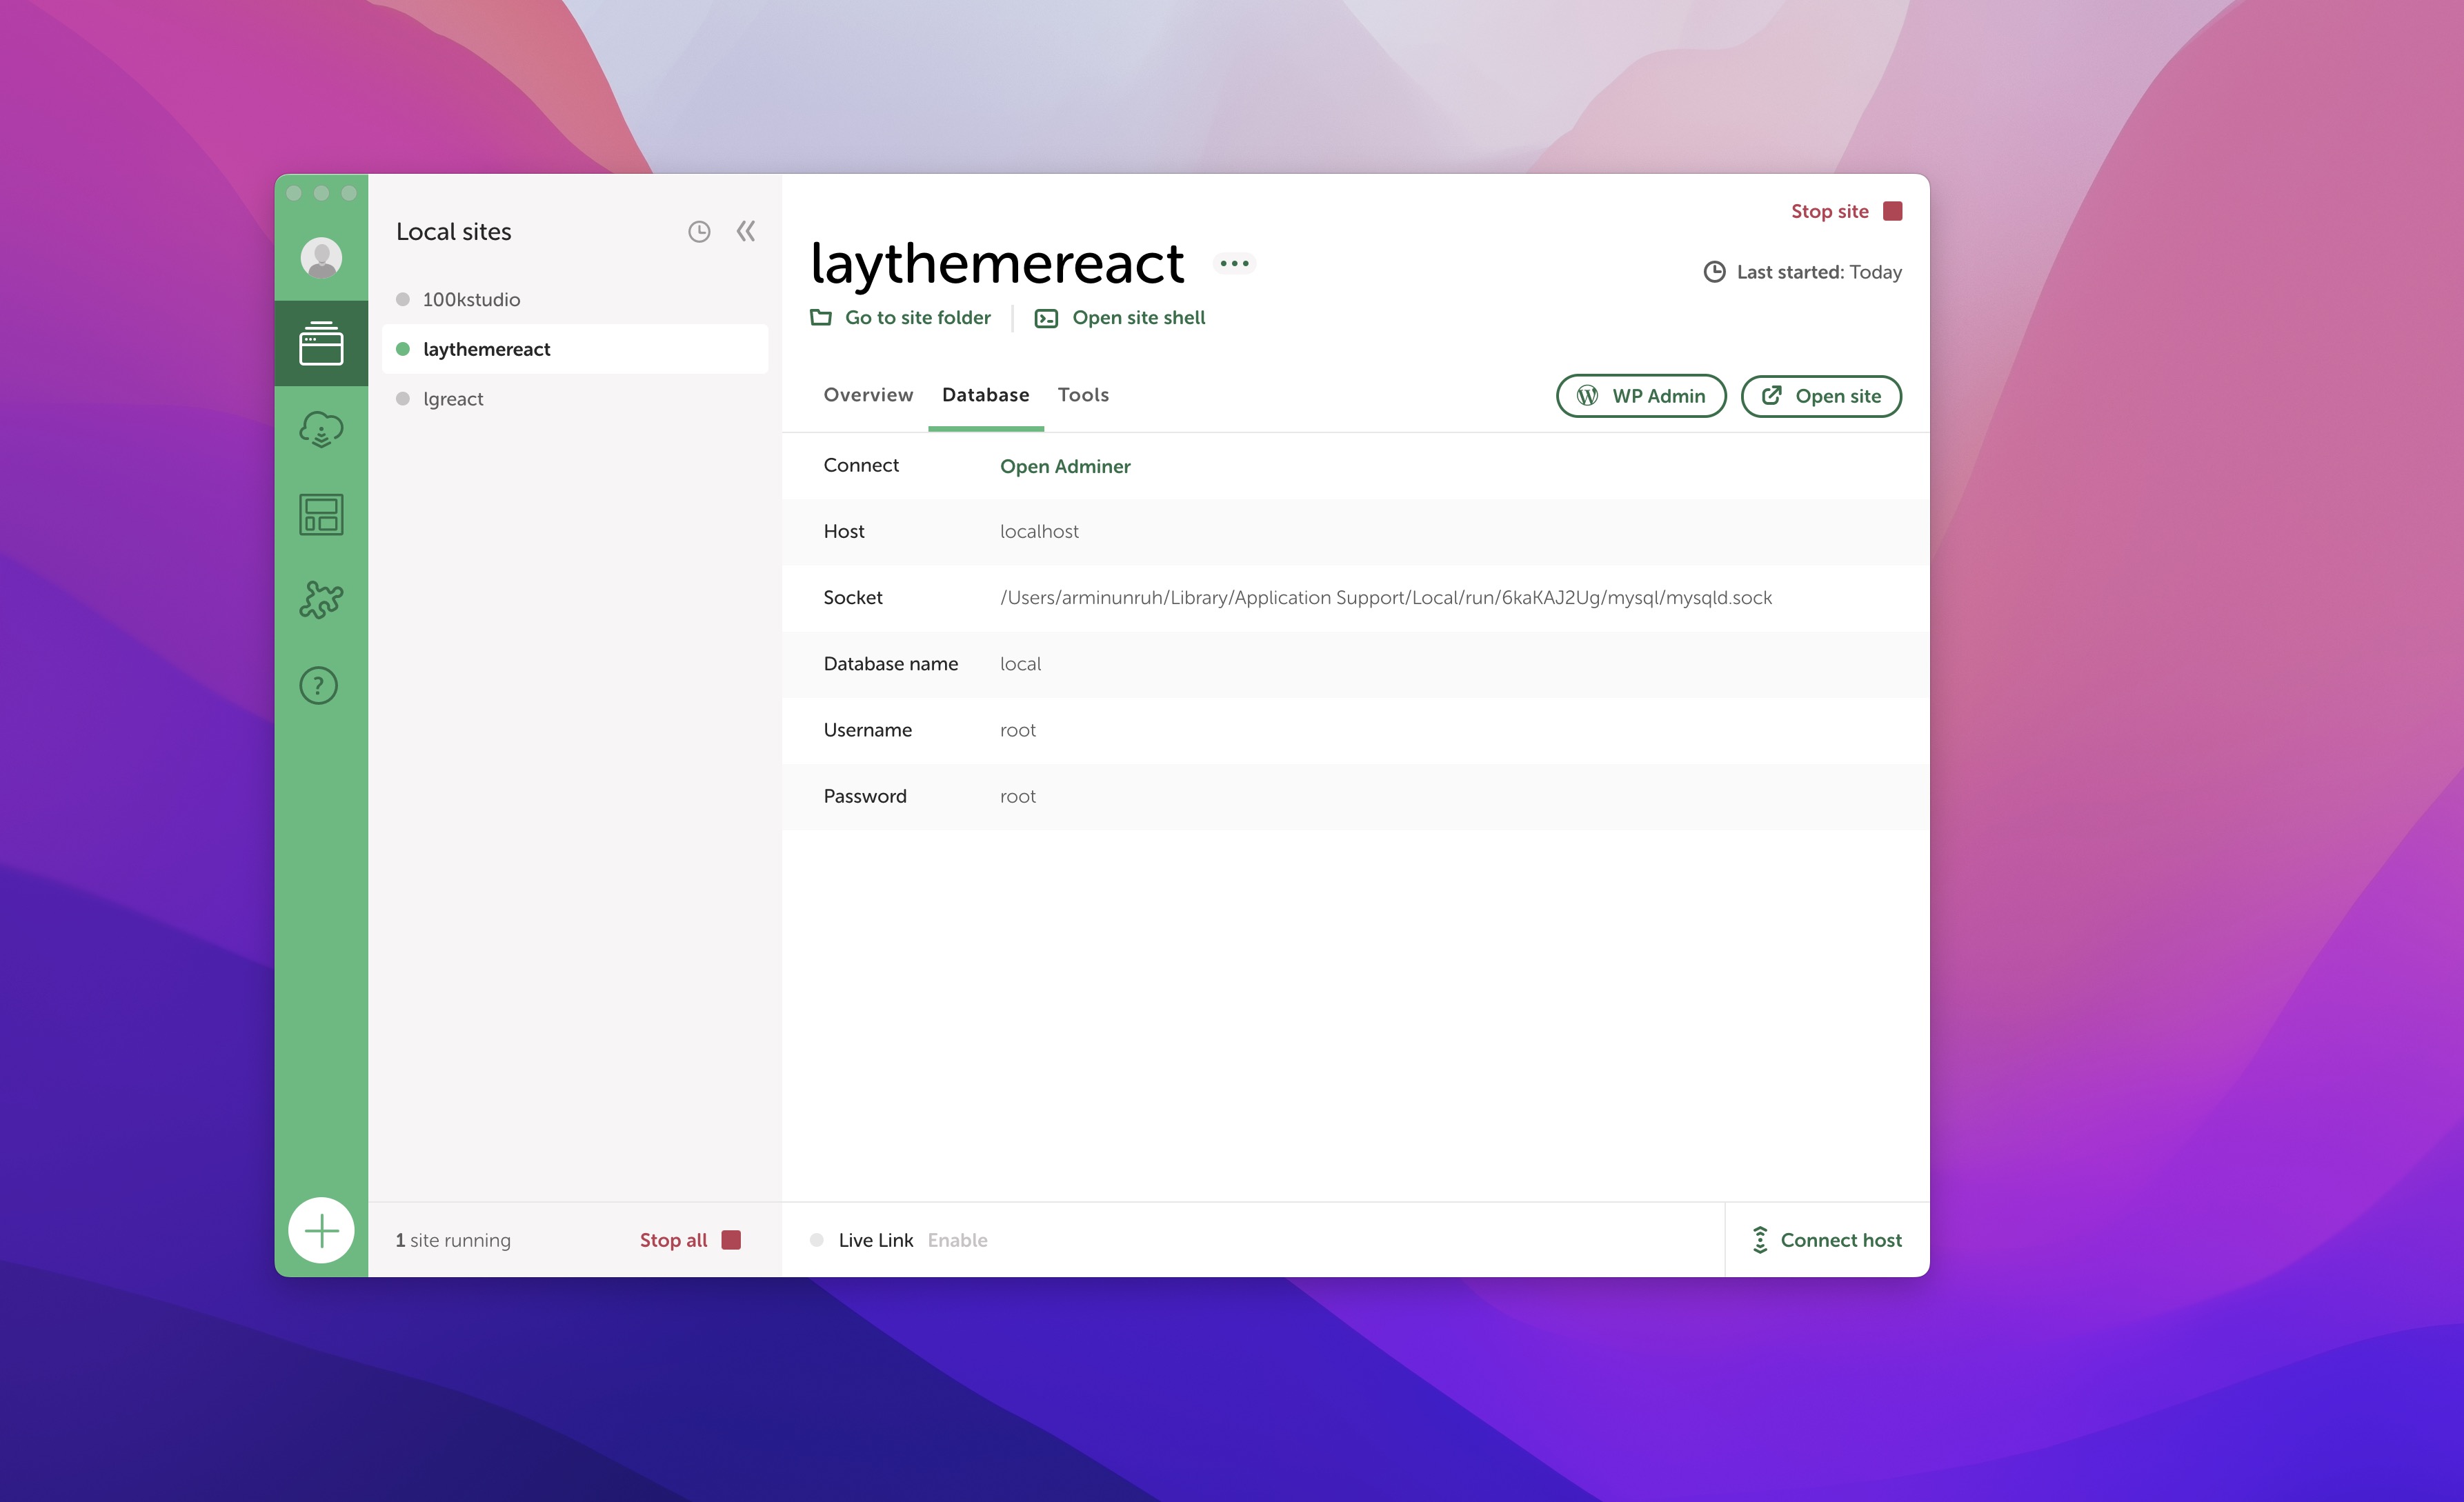
2. Install Local
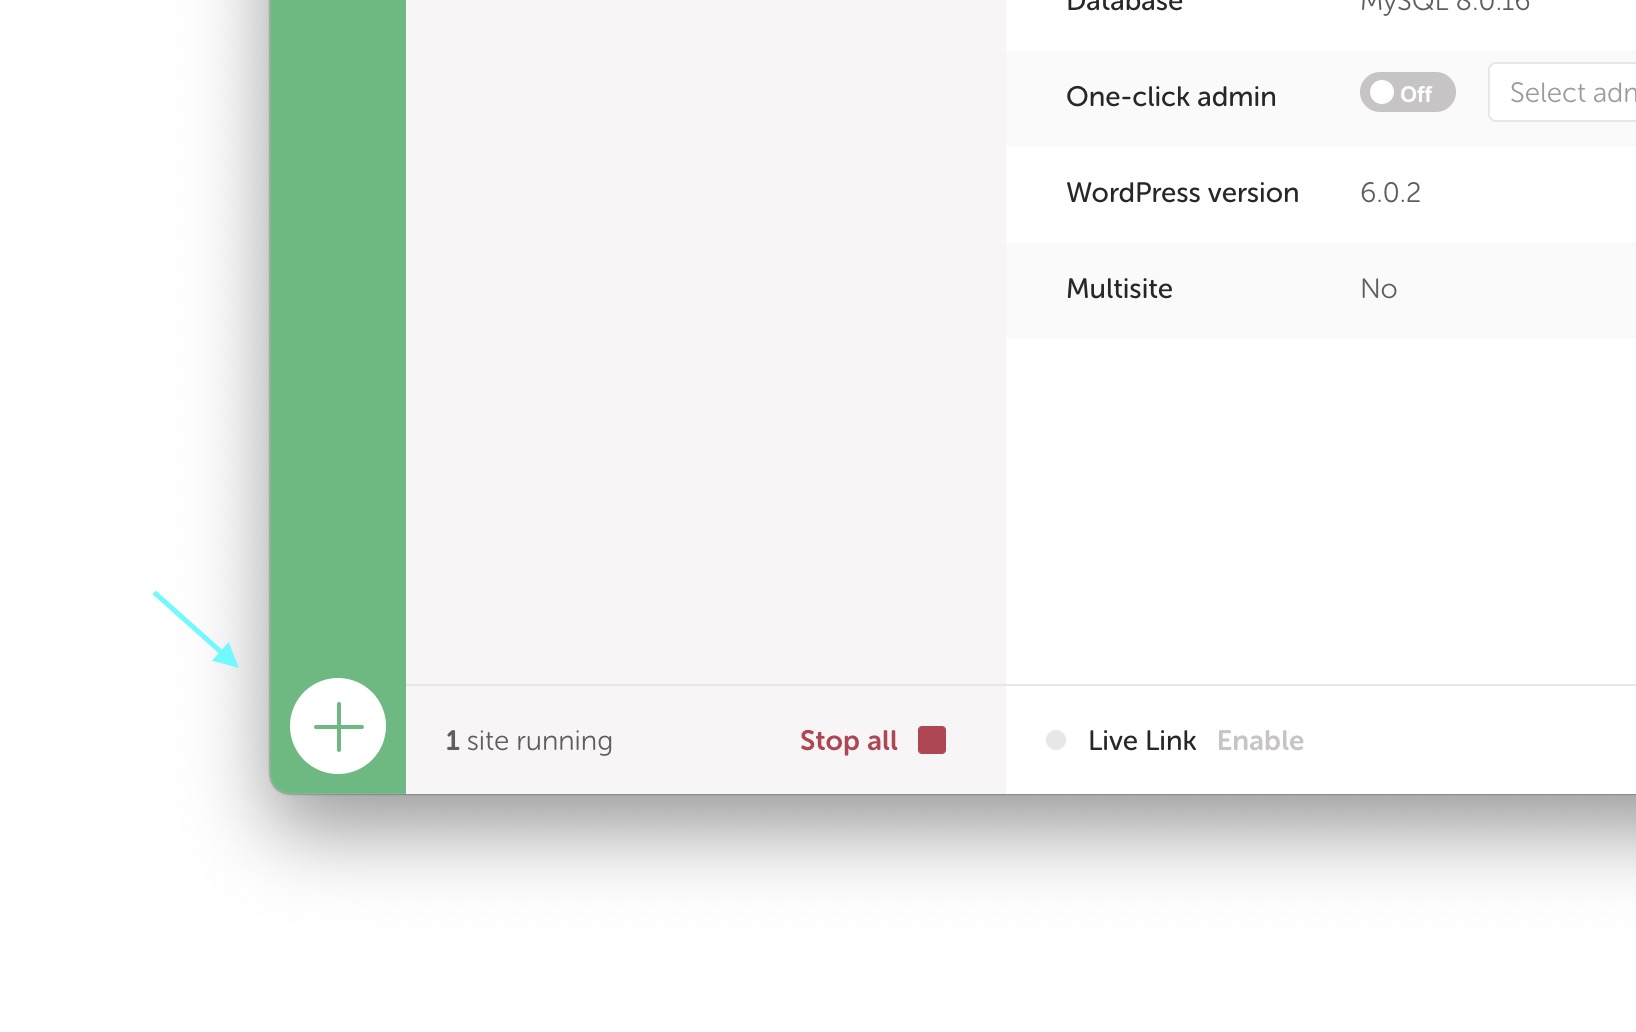
Install Local! Once installed, you can add a new WordPress site using the "+" button.
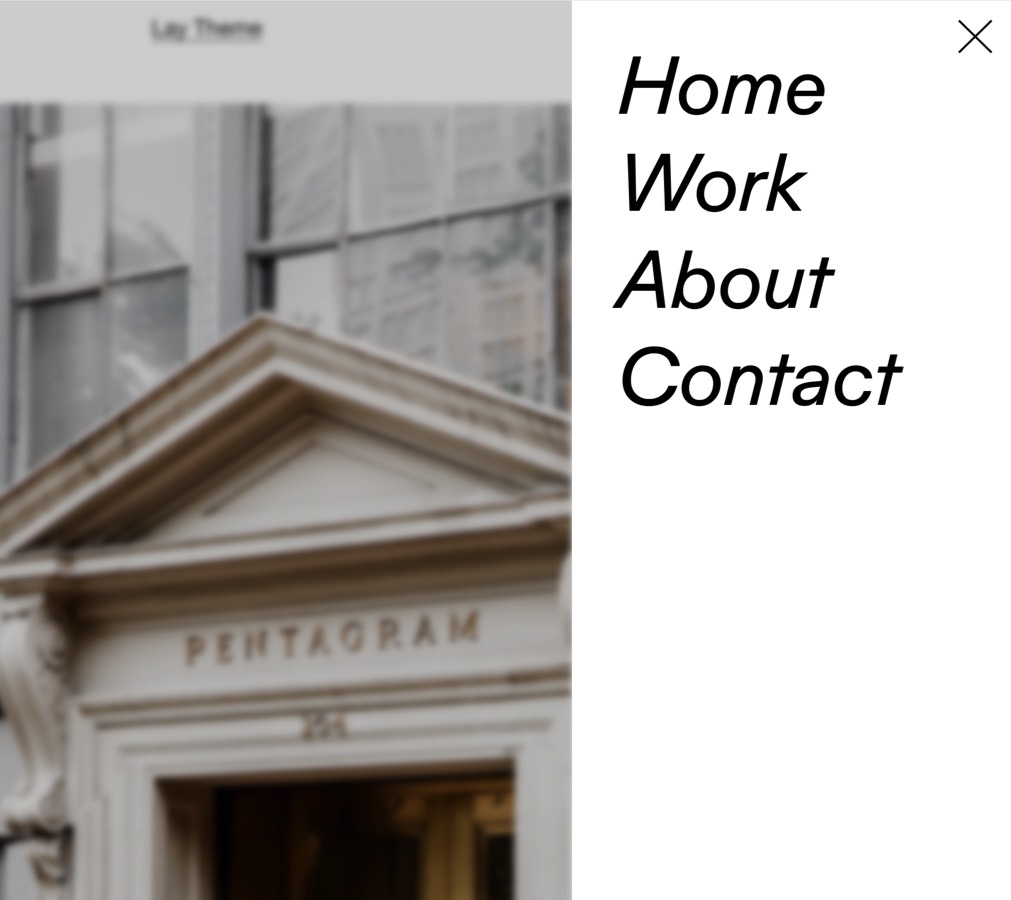
Click the "WP Admin" button on the top right. Login to the WordPress admin panel.
3. Install Lay Theme
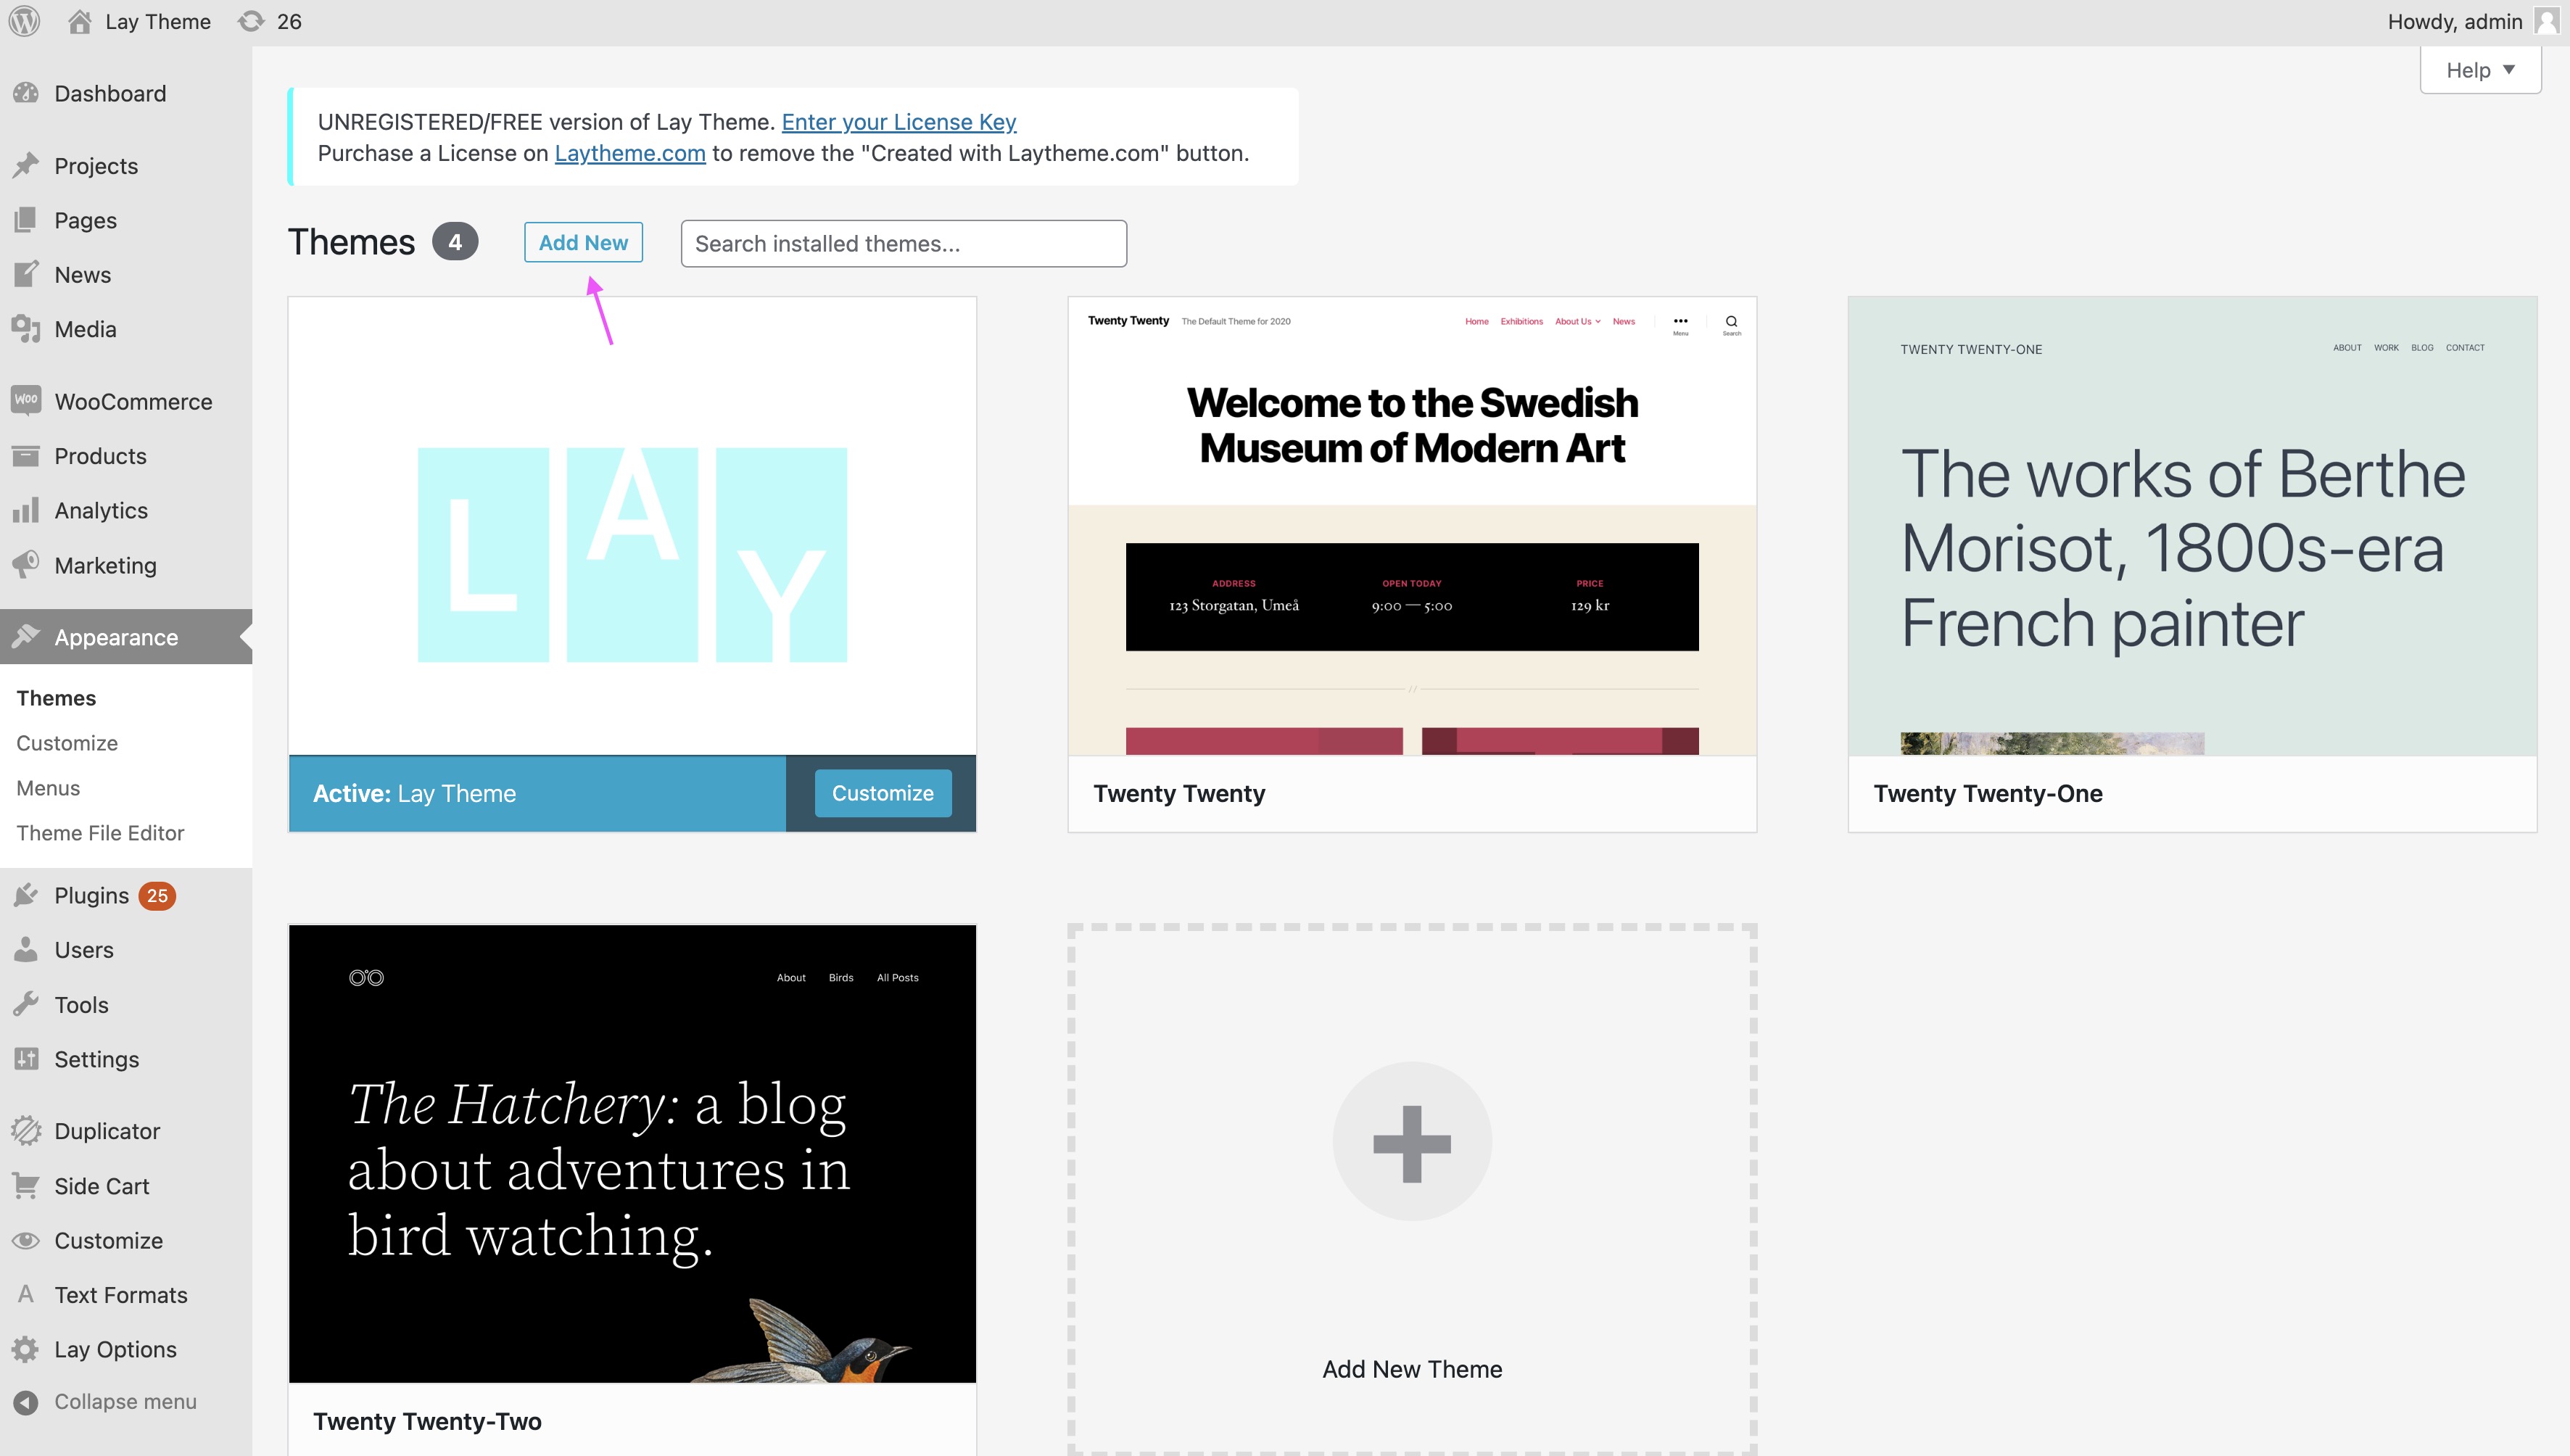
Go to your WordPress admin panel. It can be found at "yourwebsite.com/wp-admin/". Now go to "Appearance" → "Themes".
Click "Add New" at the top.
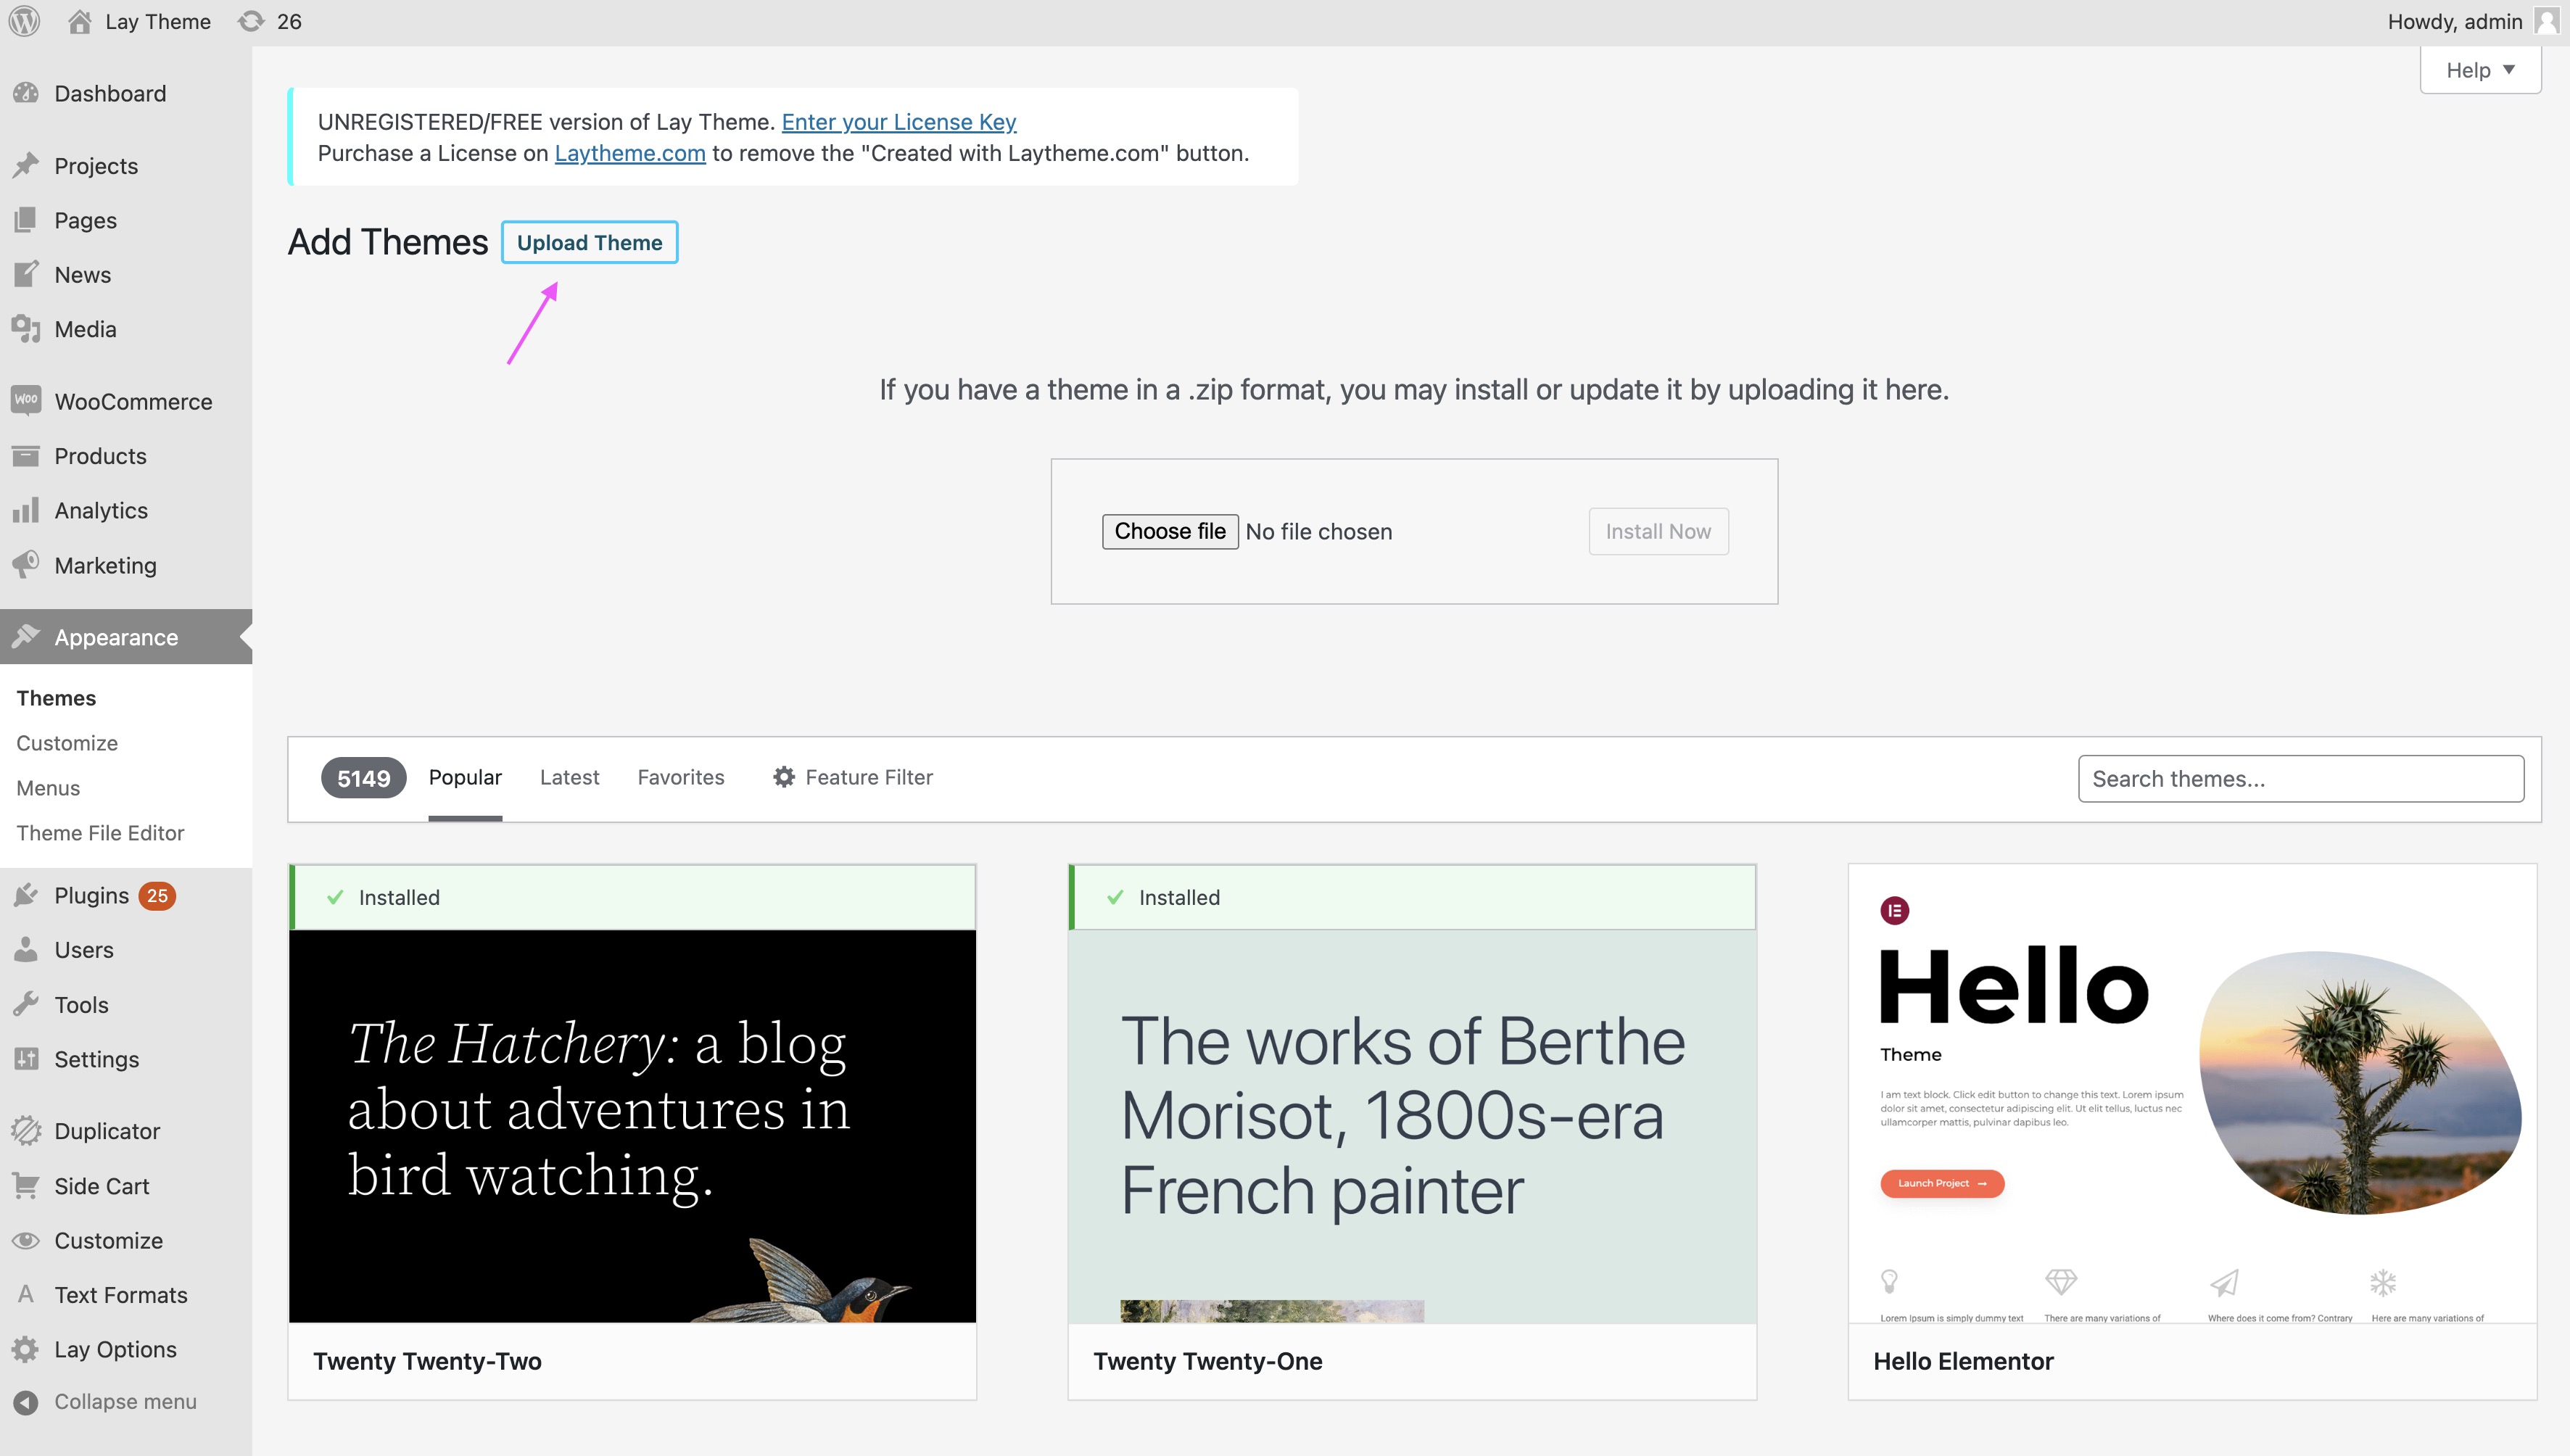
Now click "Upload Theme" and upload lay.zip.
4. Most Important Sections
These are the four most important sections of Lay Theme.
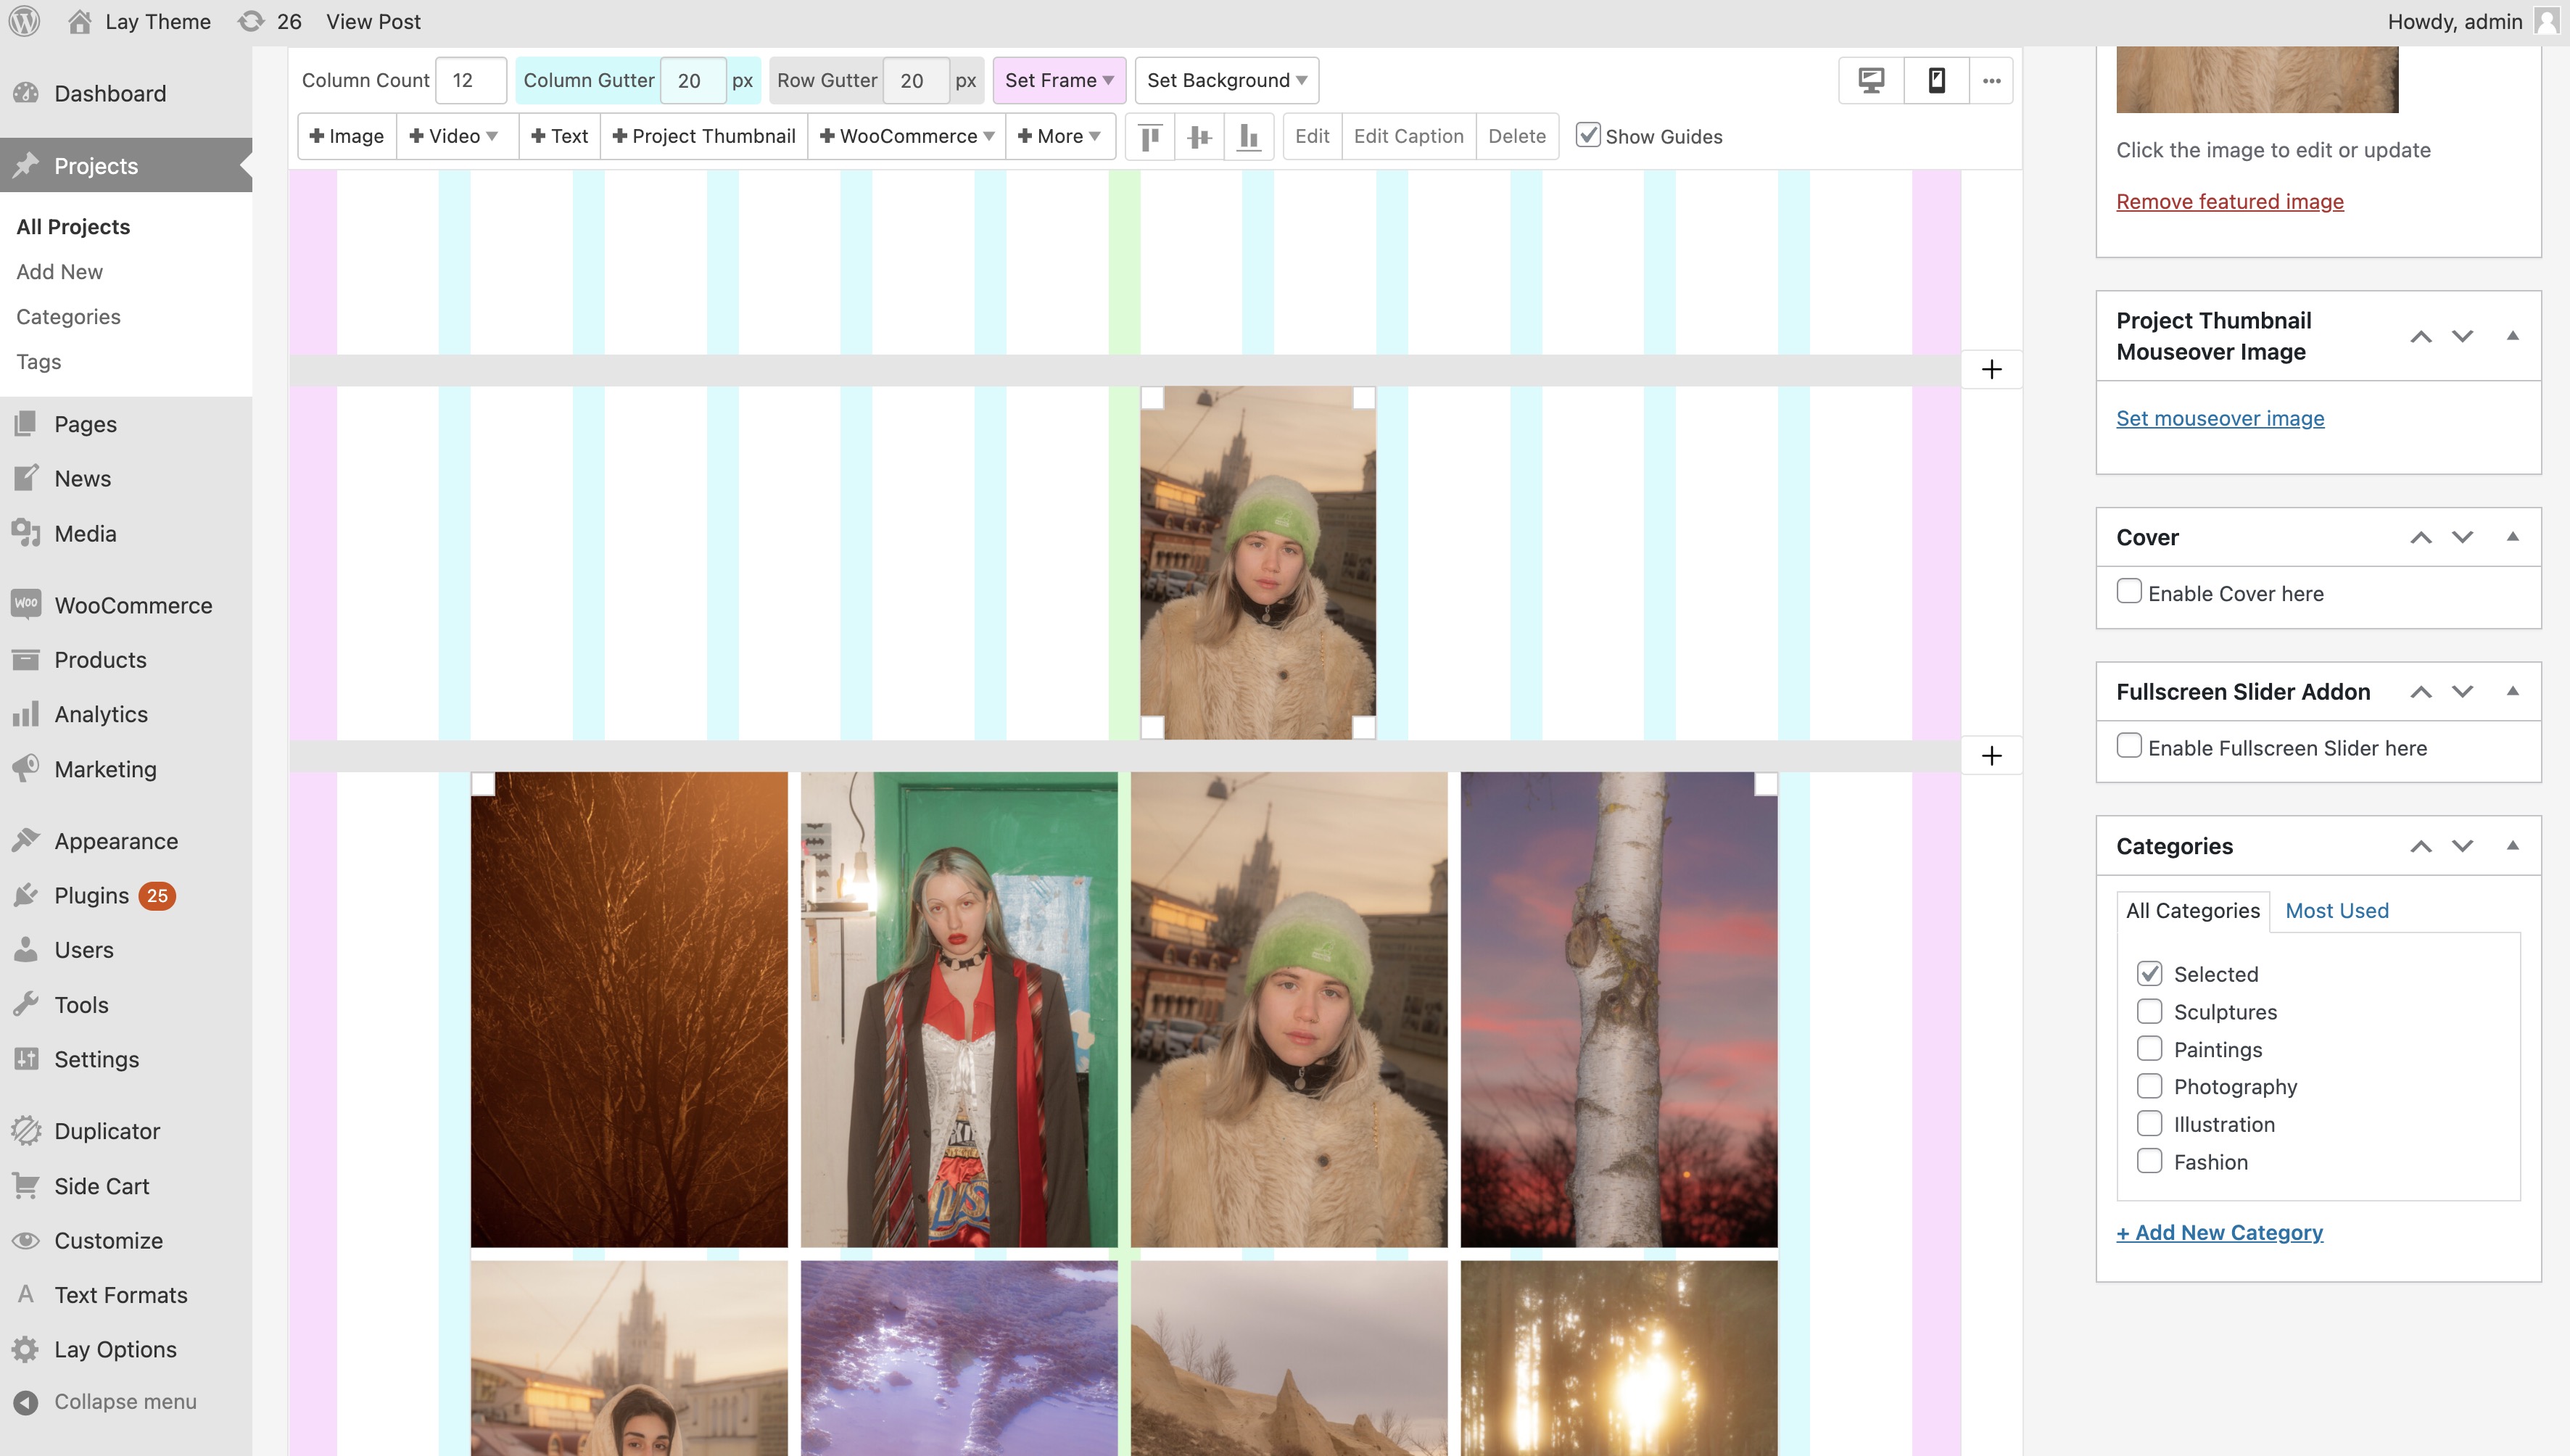
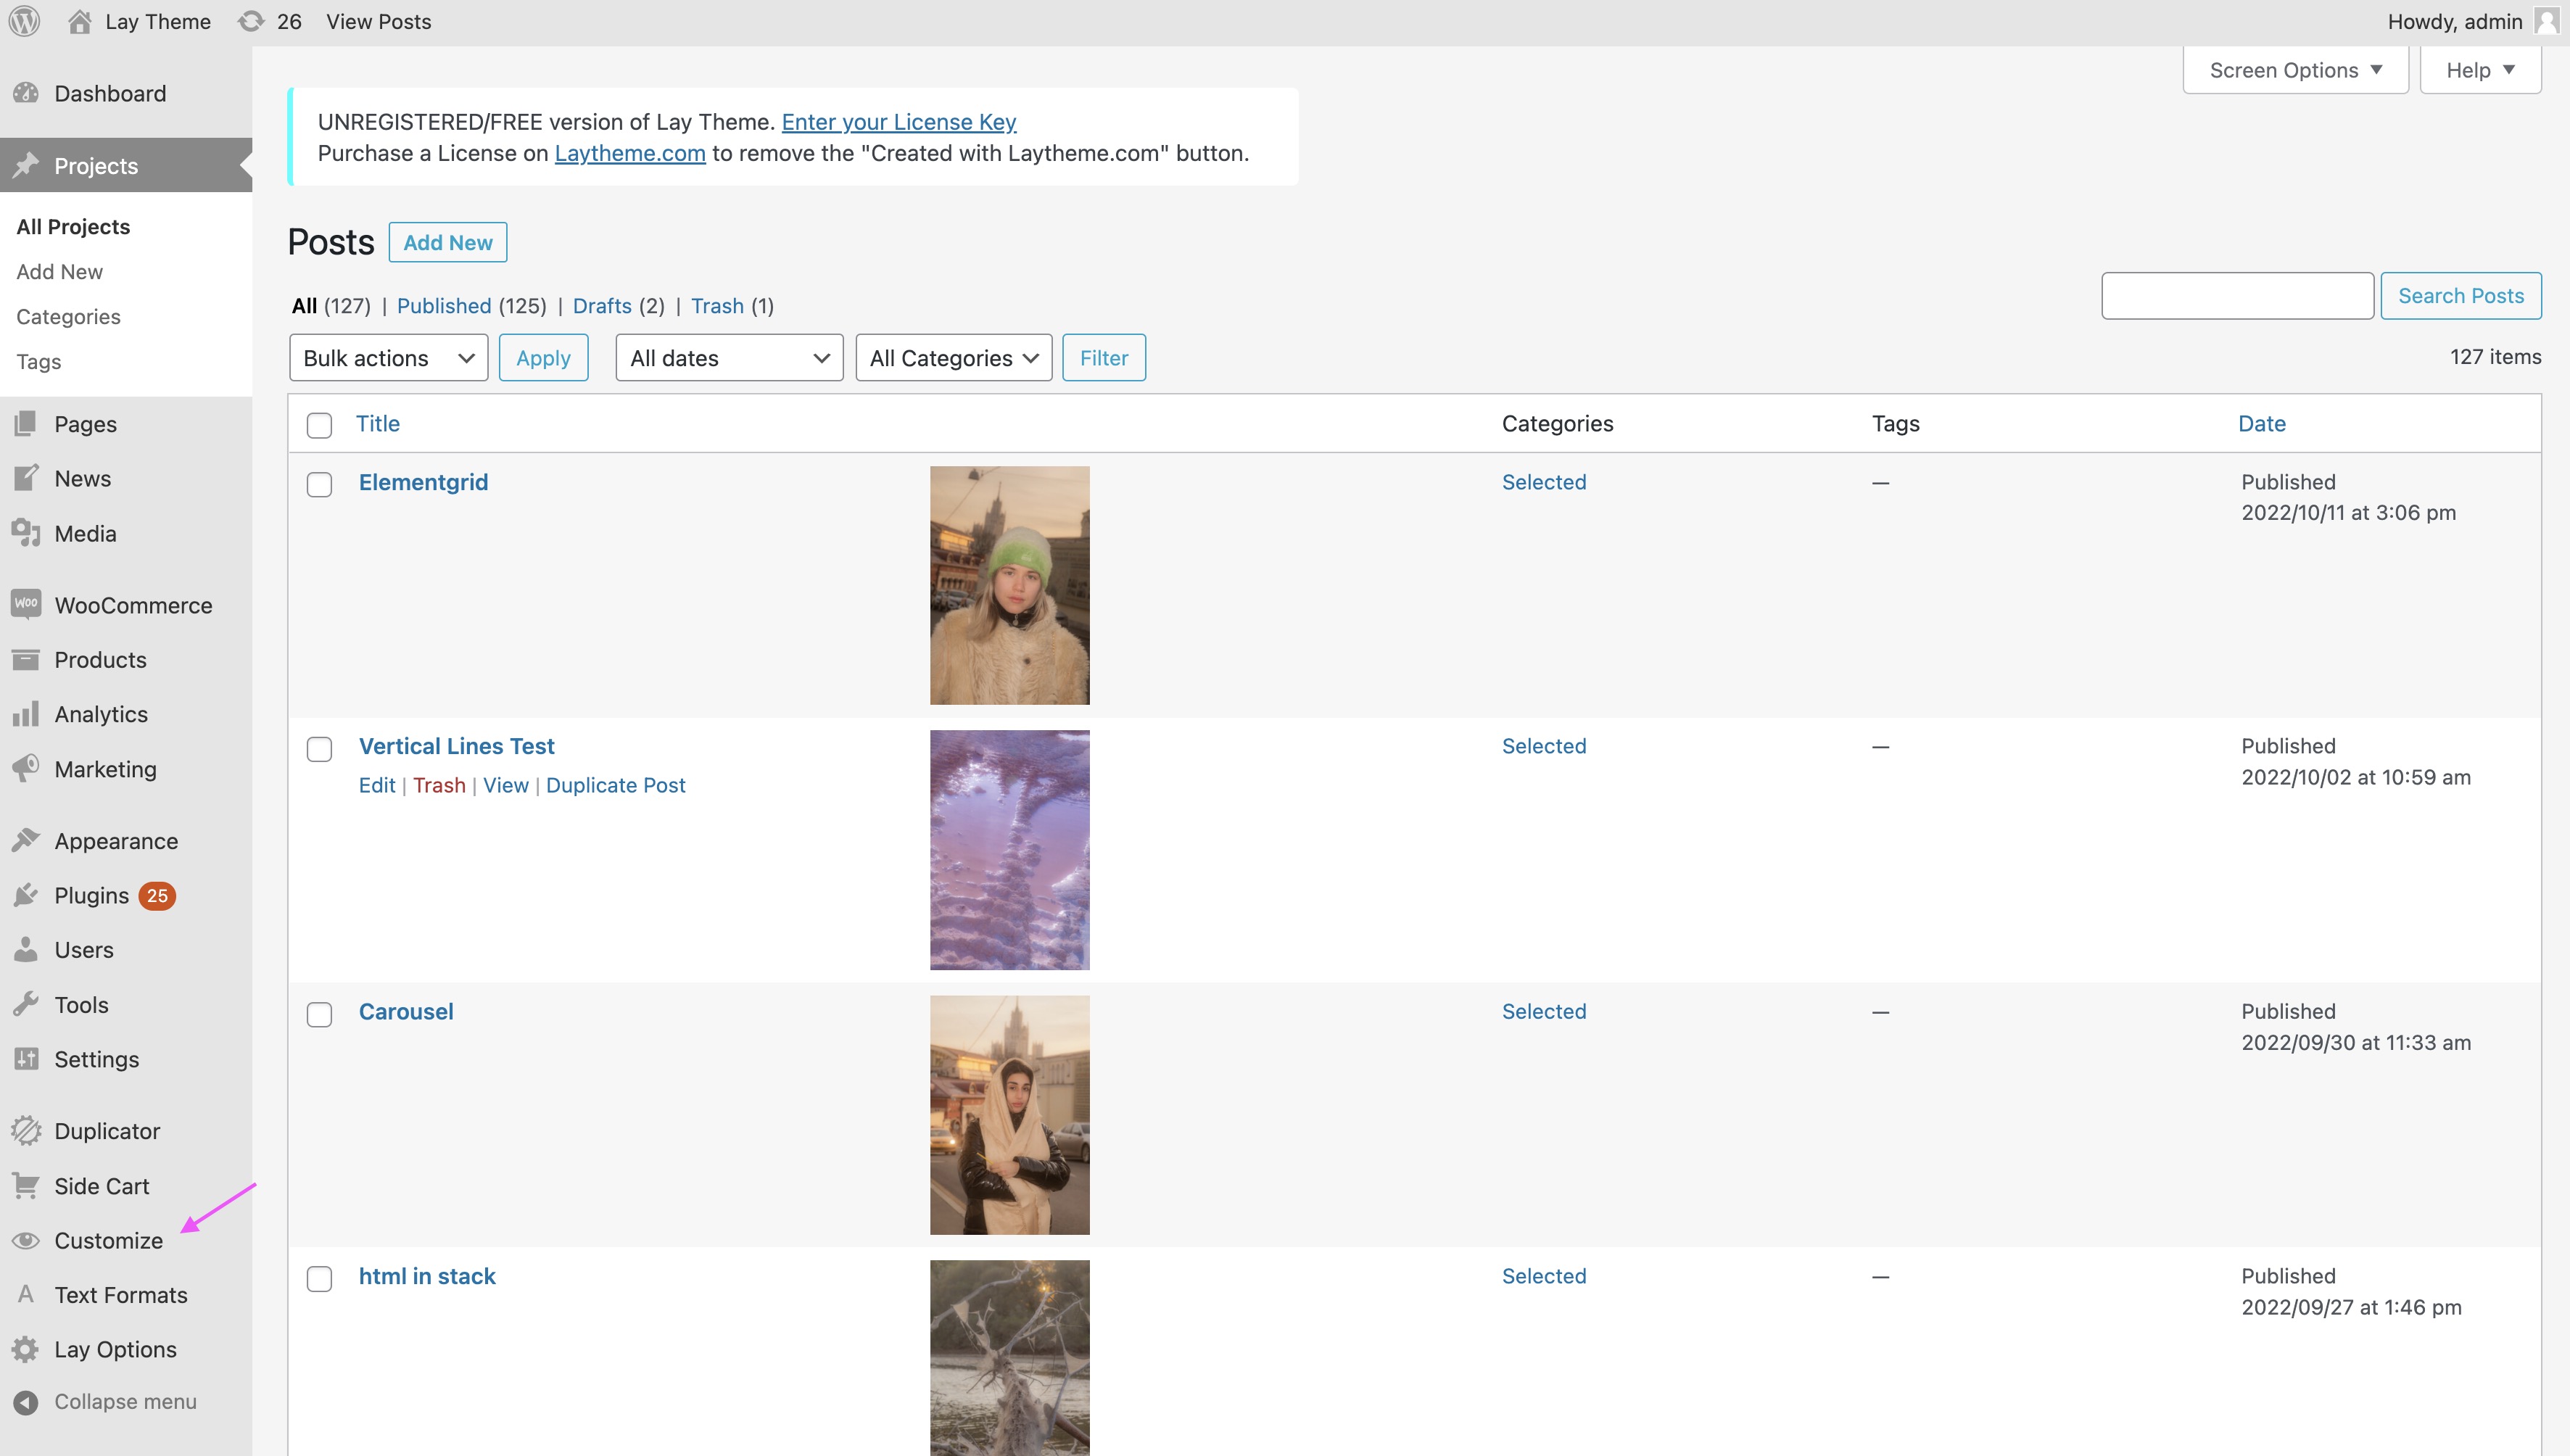
Gridder
This is where you edit your pages.
Go to "Pages" or "Projects" to see it:
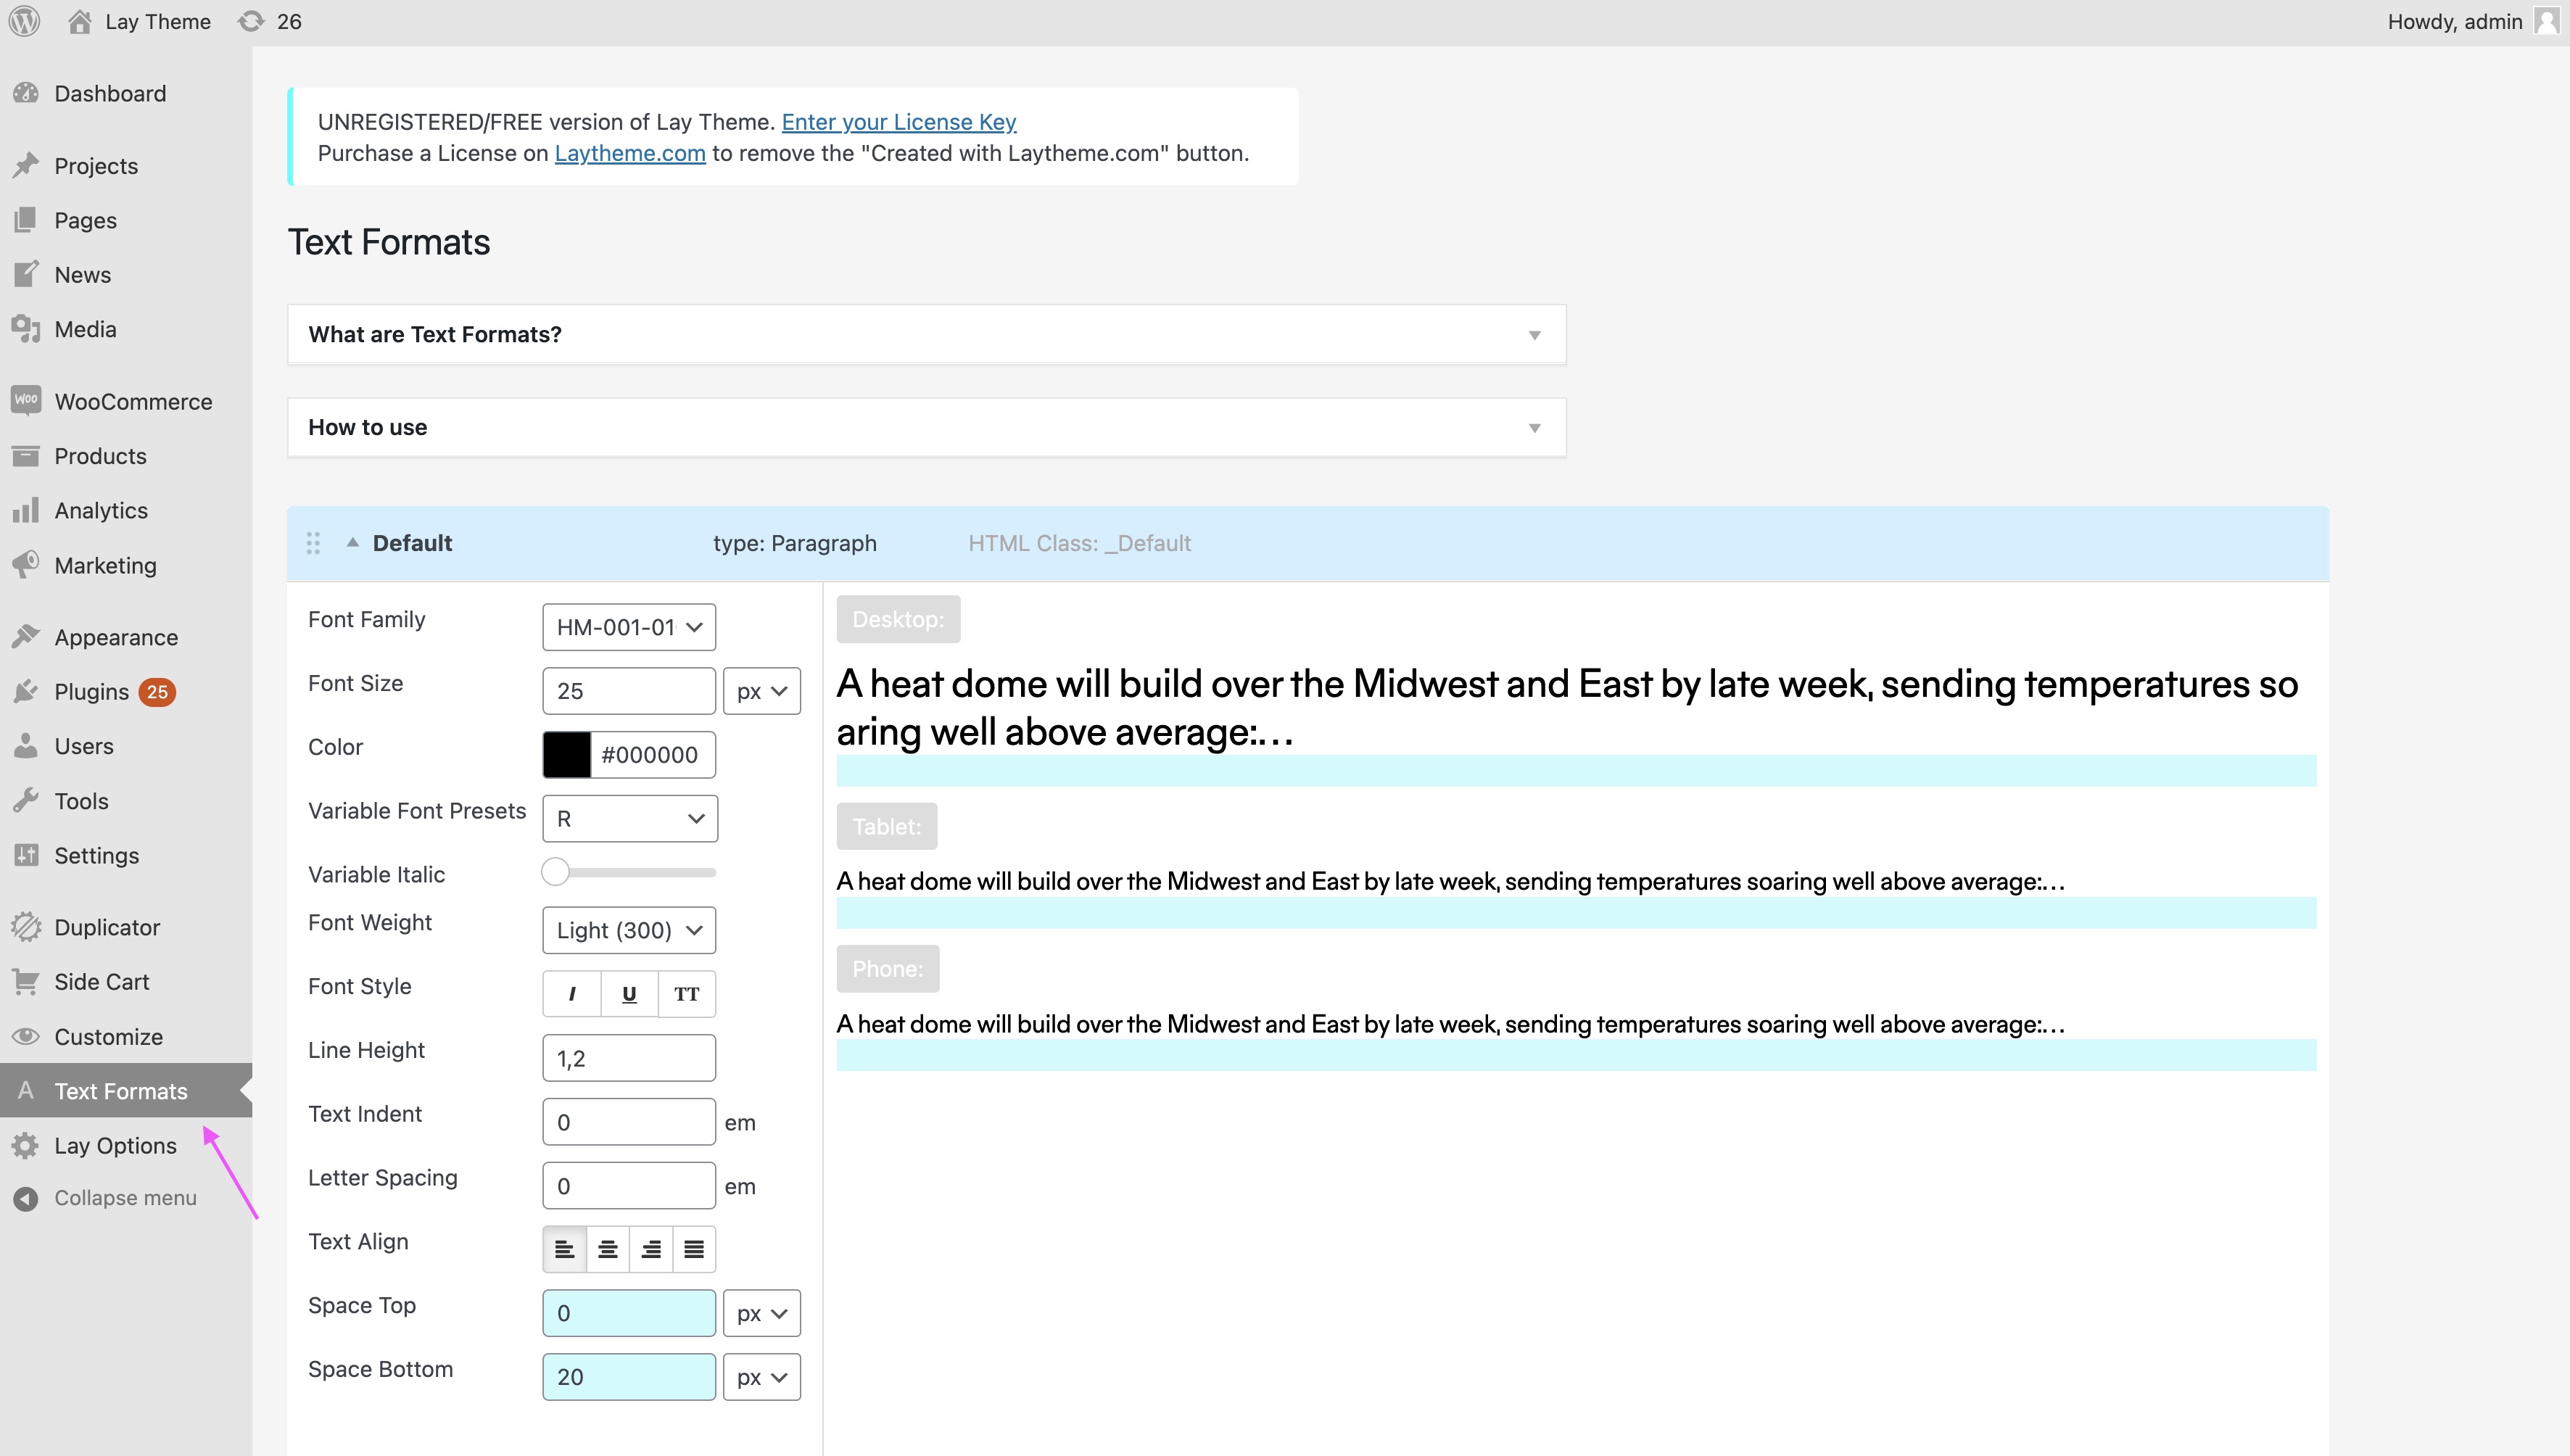
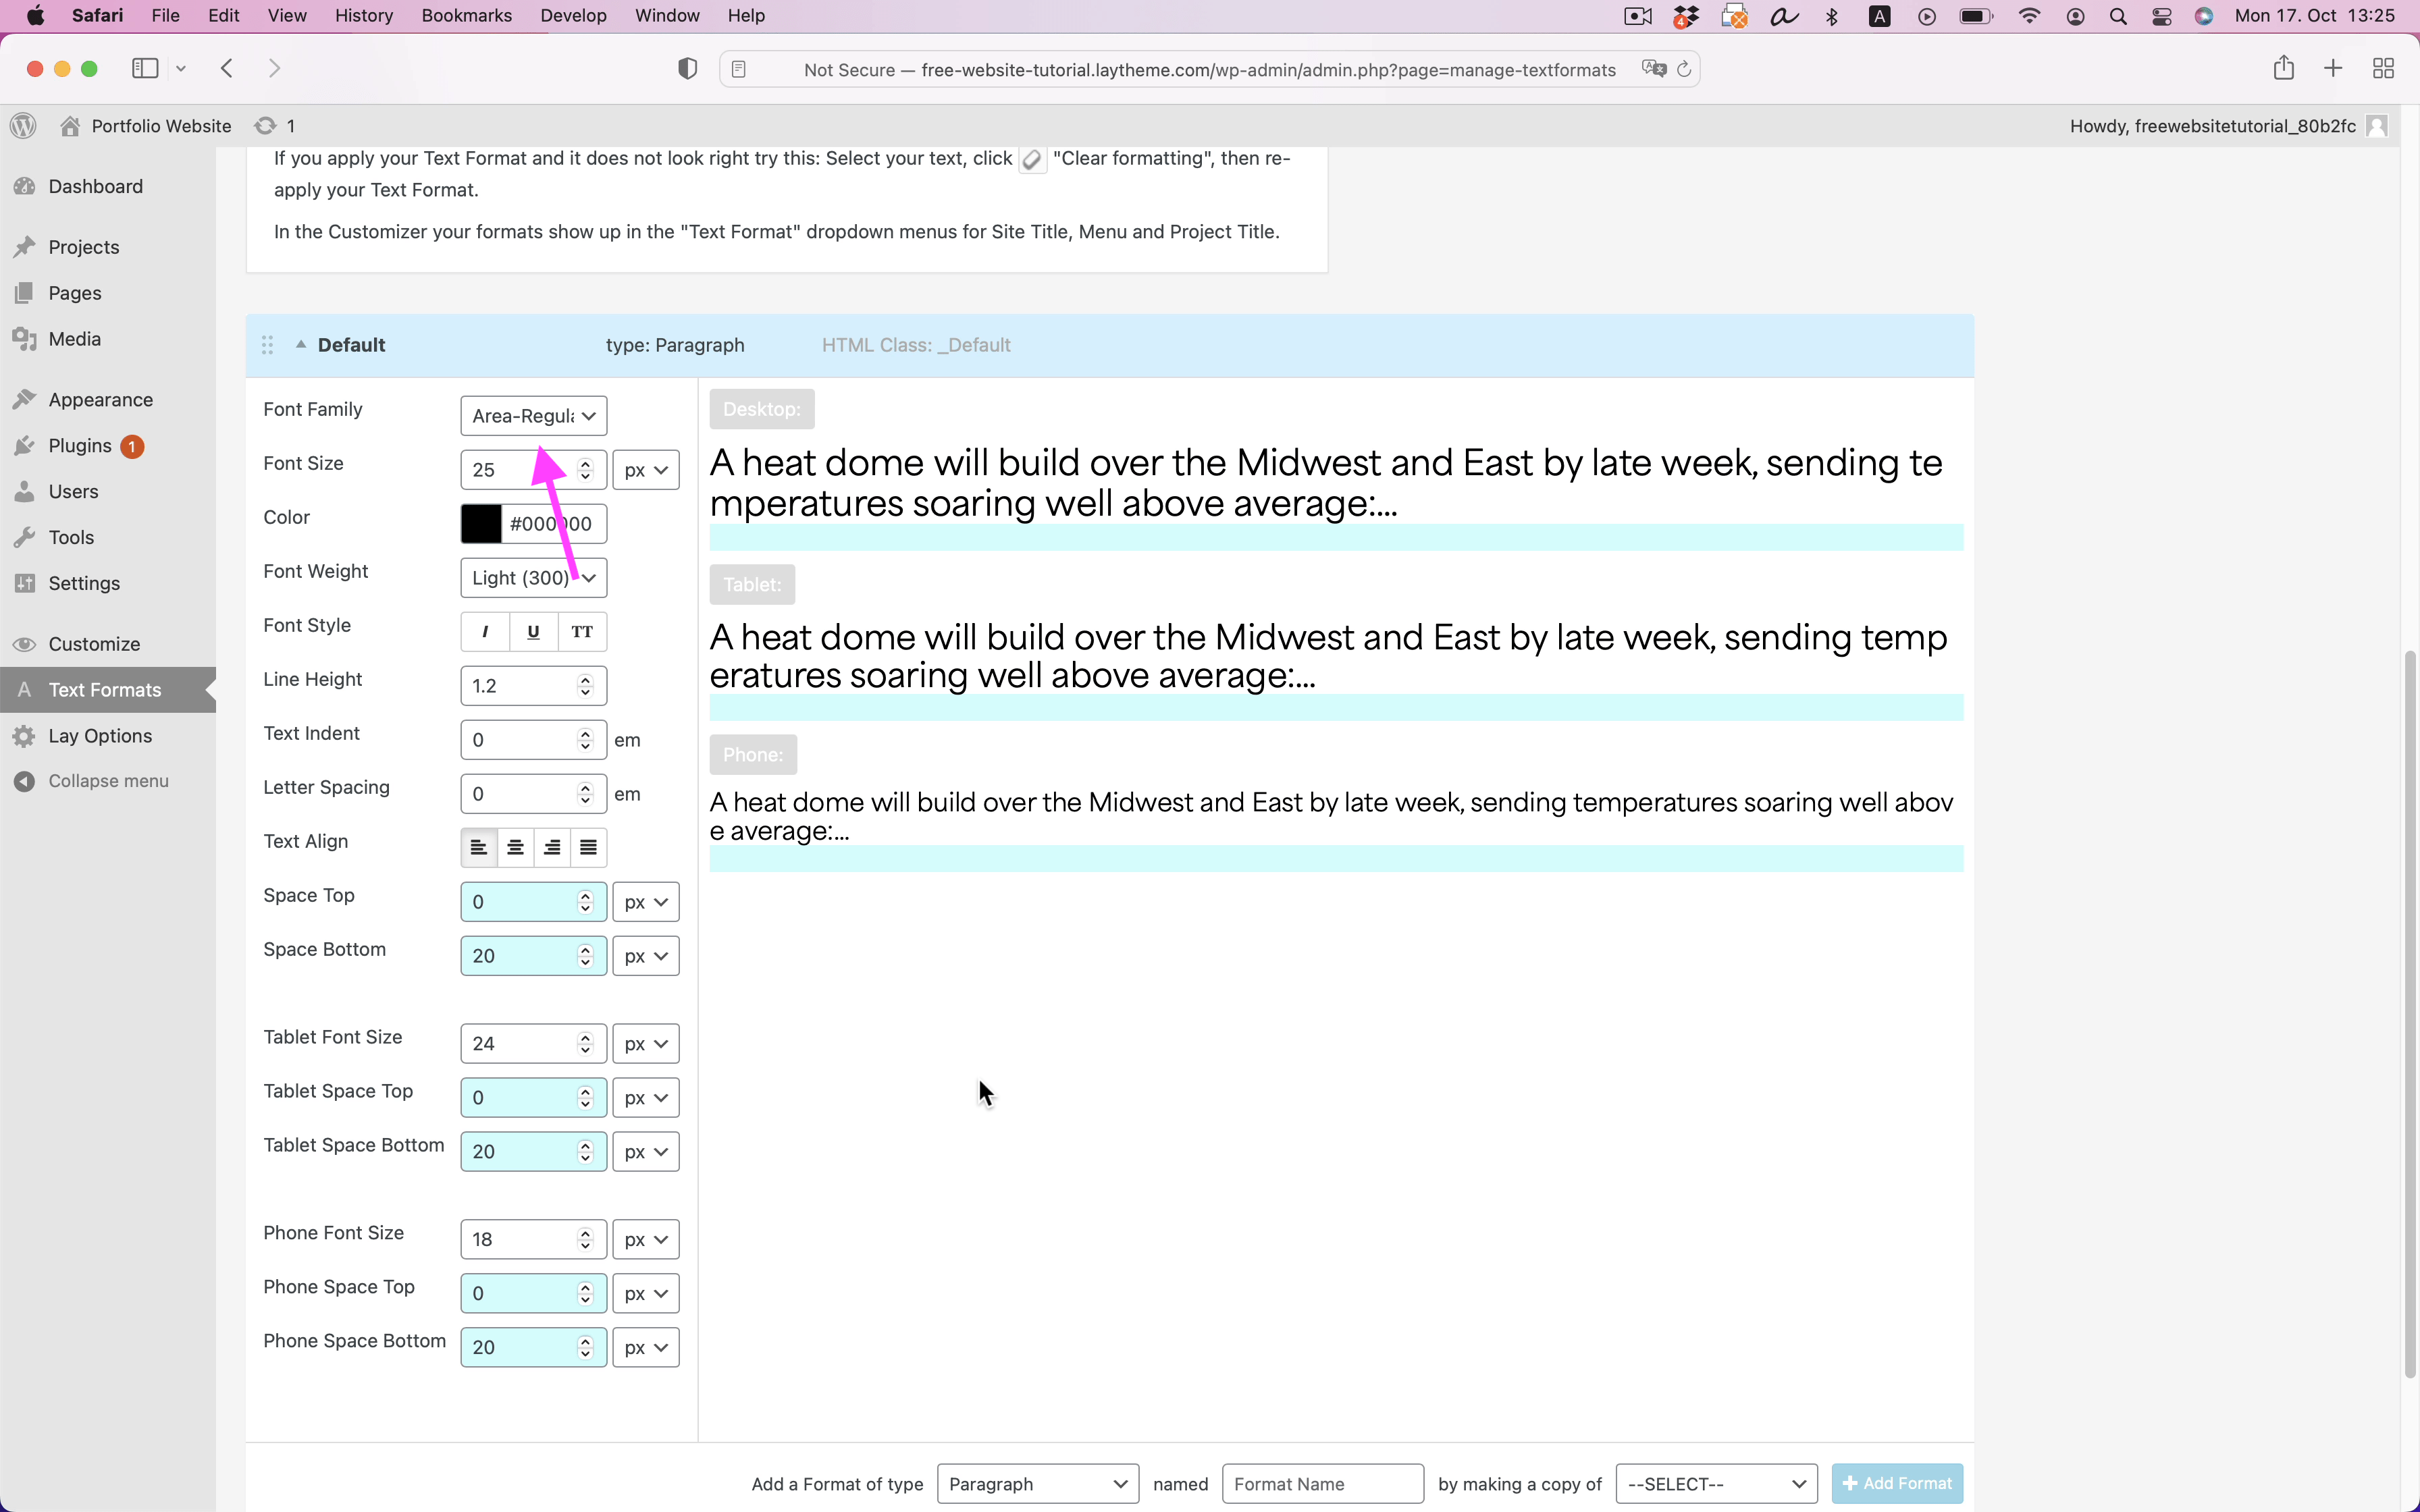
Textformats
You create your Textstyles here and reuse them throughout your website.
We recommend you always use "Textformats"!
Customize
Find a lot of settings for customizing the look of your Website here. Also set your Frontpage here.
Go to "Customize" → "Menu Style" → "Menu Bar" to hide the white bar at the top.
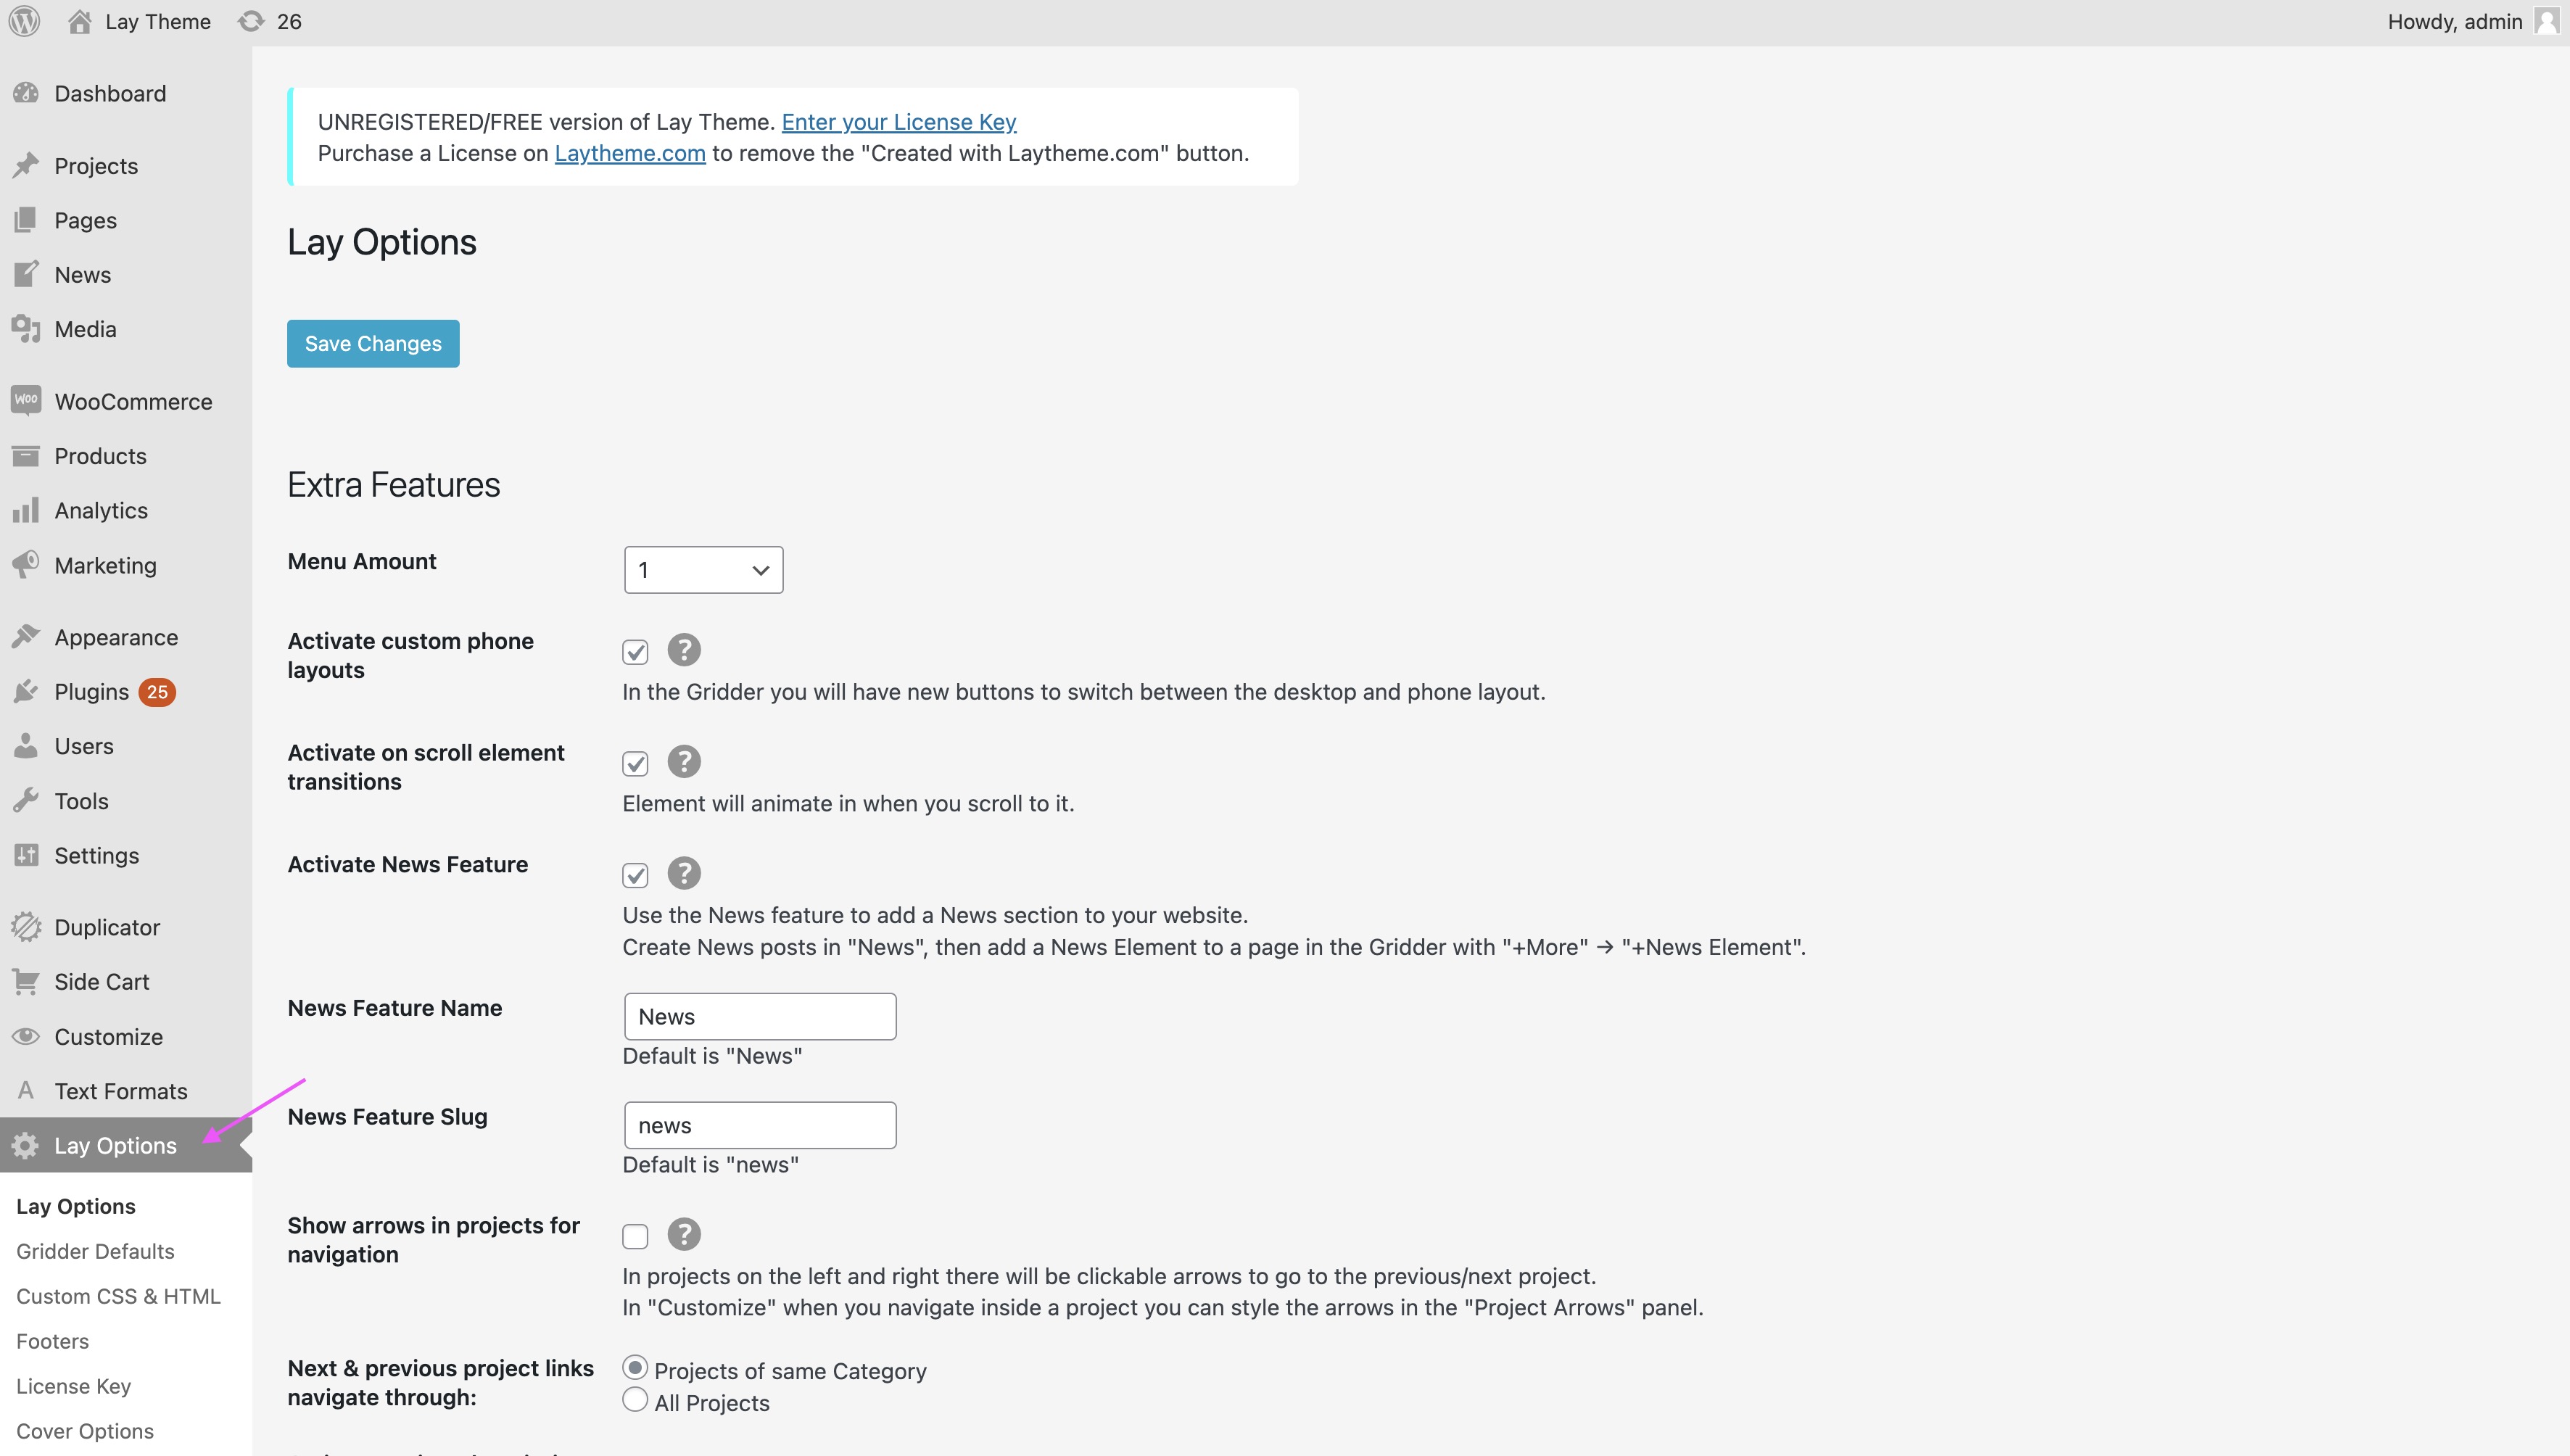
Lay Options
In here you'll find lots of settings.
You can enable extra features like Custom Phone Layouts.
You're good to go!
Read further to see how we would create a simple Portfolio Website. Or play around with Lay Theme to see how it works or watch the Getting Started Video.
Take a look at Documentation for a deep dive into Lay Theme.
5. Build a website Walkthrough
Here we go!
We will create a simple Portfolio Website. This is the end-result: free-website-tutorial.laytheme.com
Video Tutorial
Watch the video above or read on. It's the same thing, here it's just in written form:
Create a Front Page and change your Site Title
Go to your admin area (yourwebsite.com/wp-admin/).
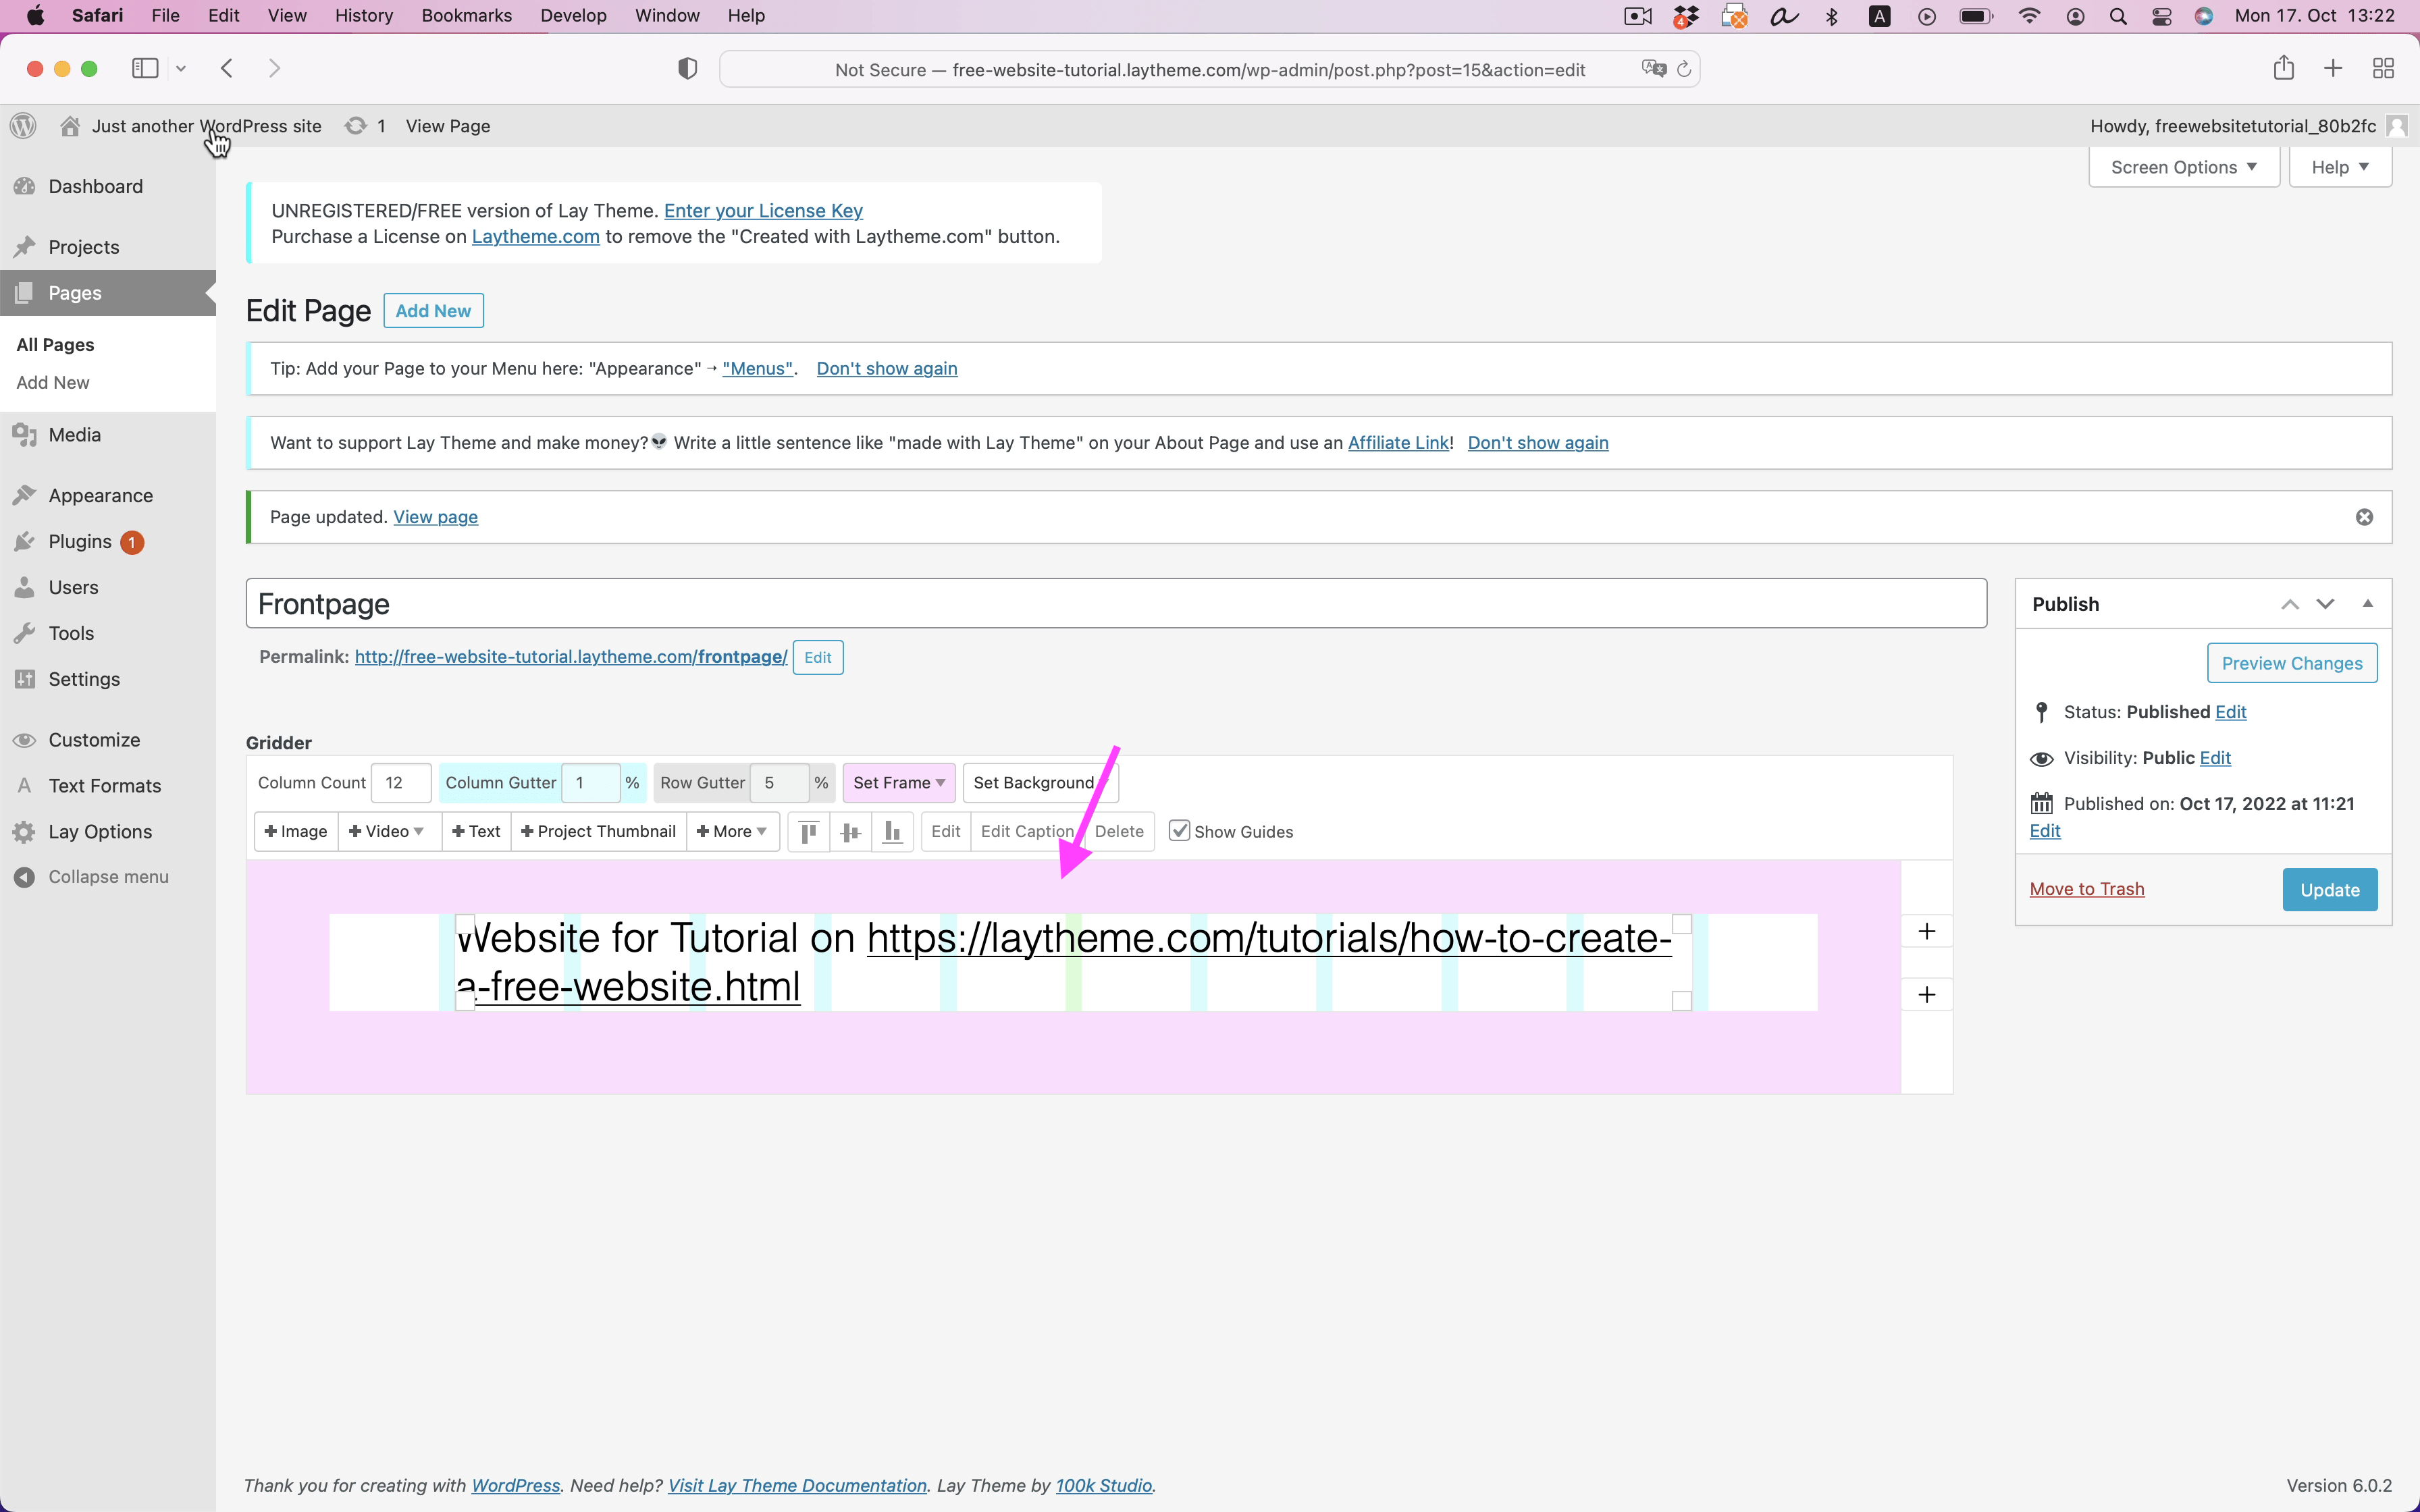
On the left go to "Pages". Create a new Page. This will be your frontpage. In here add some text like I did.
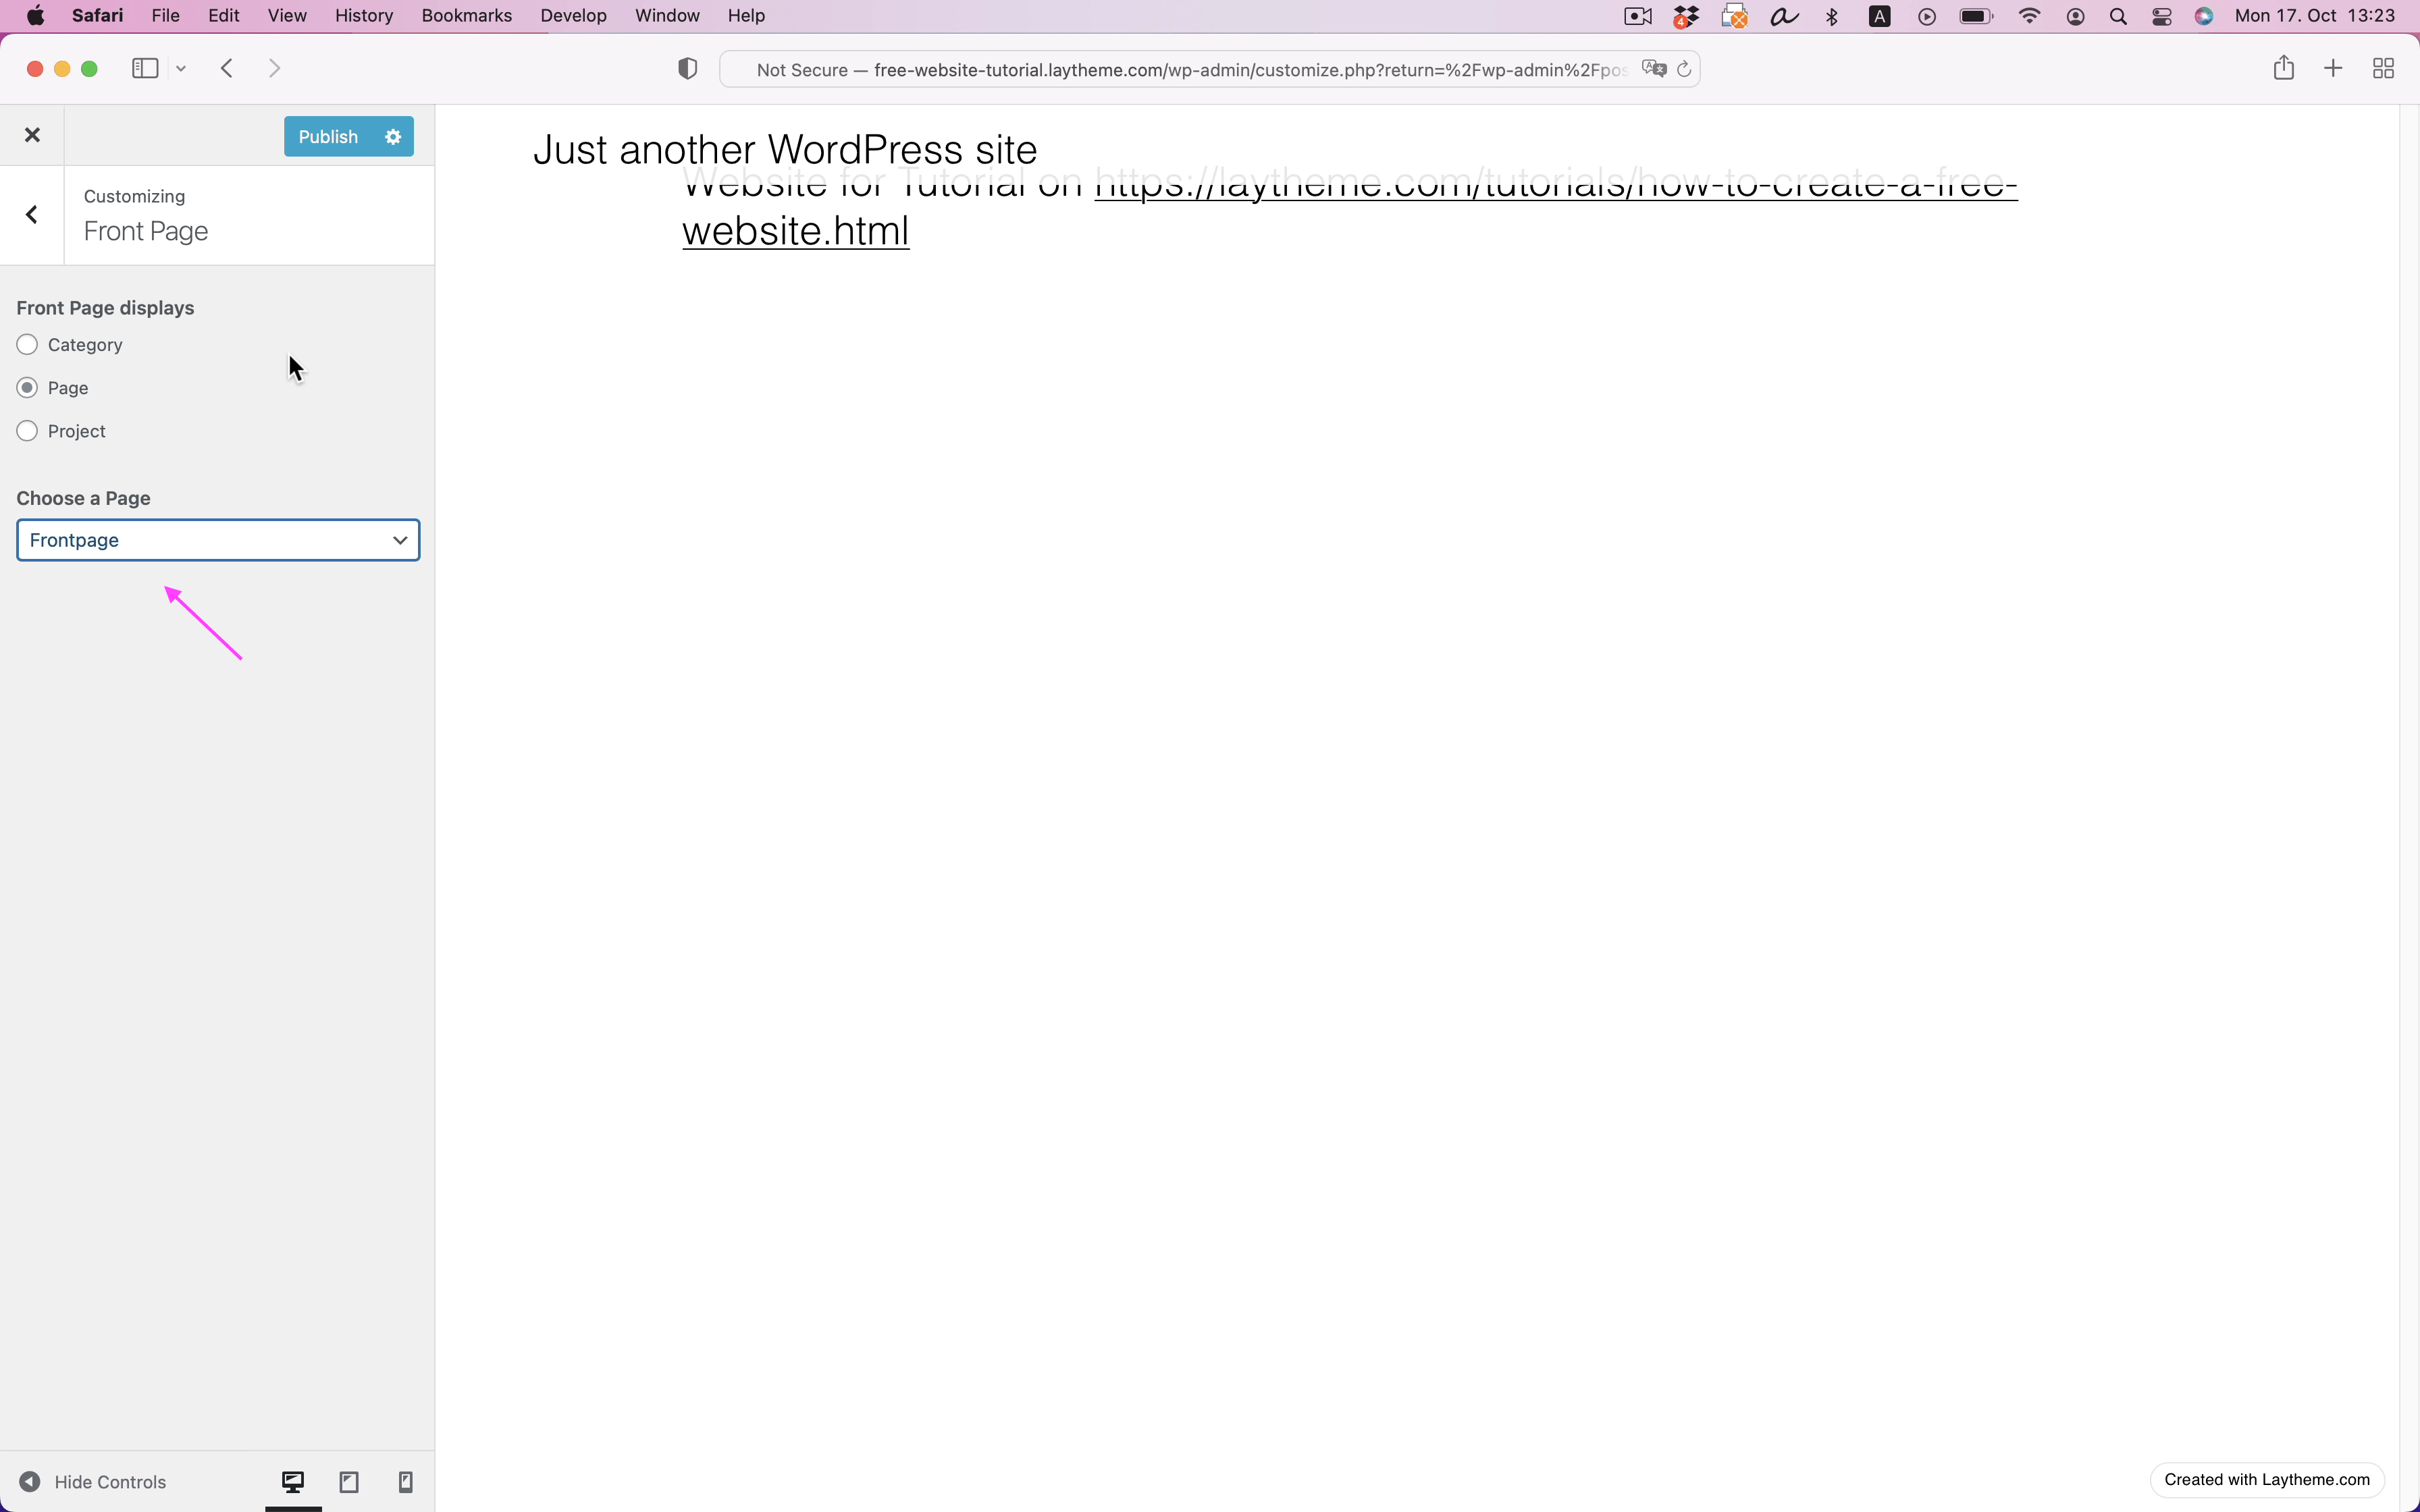
When we visit your website at "yourwebsite.com" we don't see the frontpage as the first page. Let's change that.
Go to "Customize" → "Frontpage". Choose the page you just created as your frontpage.
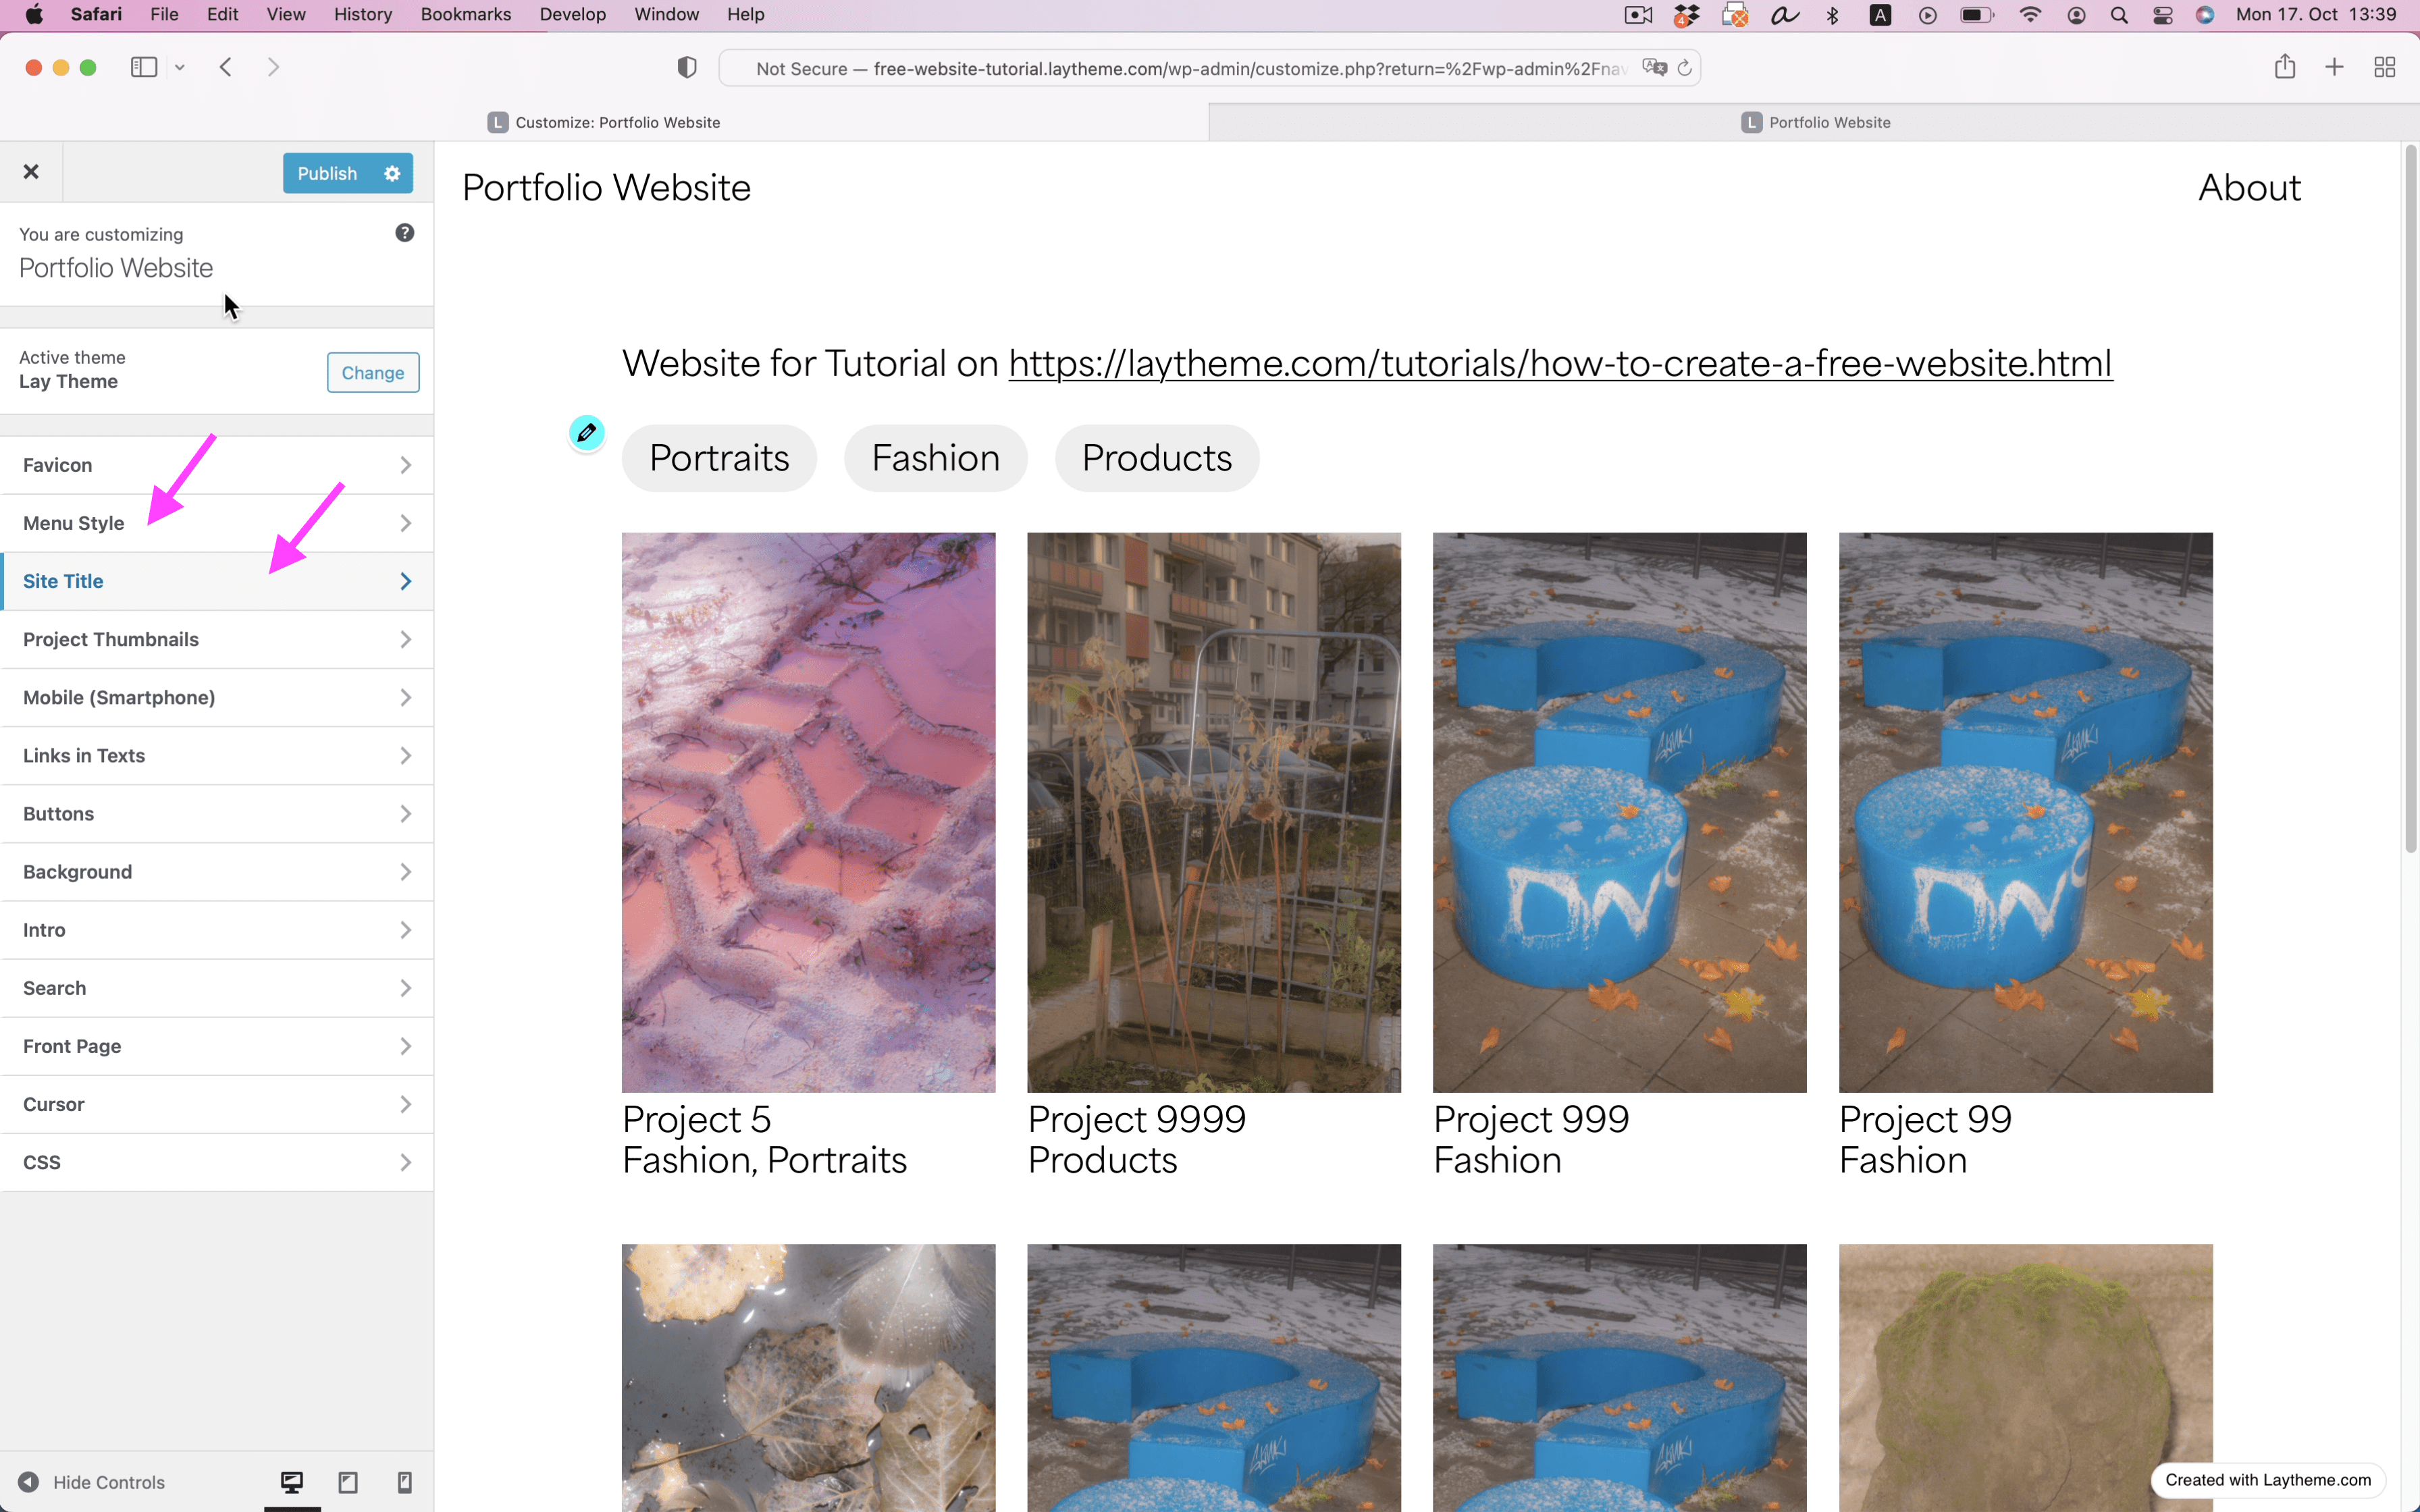
While you're in Customize go to "Site Title" and change it so it doesn't say "Just another WordPress site". Because Lay Theme websites are anything but that :).
Typography
Go to "Lay Options" → "Webfonts". Upload a cool font, I got one by Blaze Type.

Then go to Textformats and set that Font for your "Default" Textstyle. You can create more Textstyles here to use throughout your website.
Change the Default Grid Settings
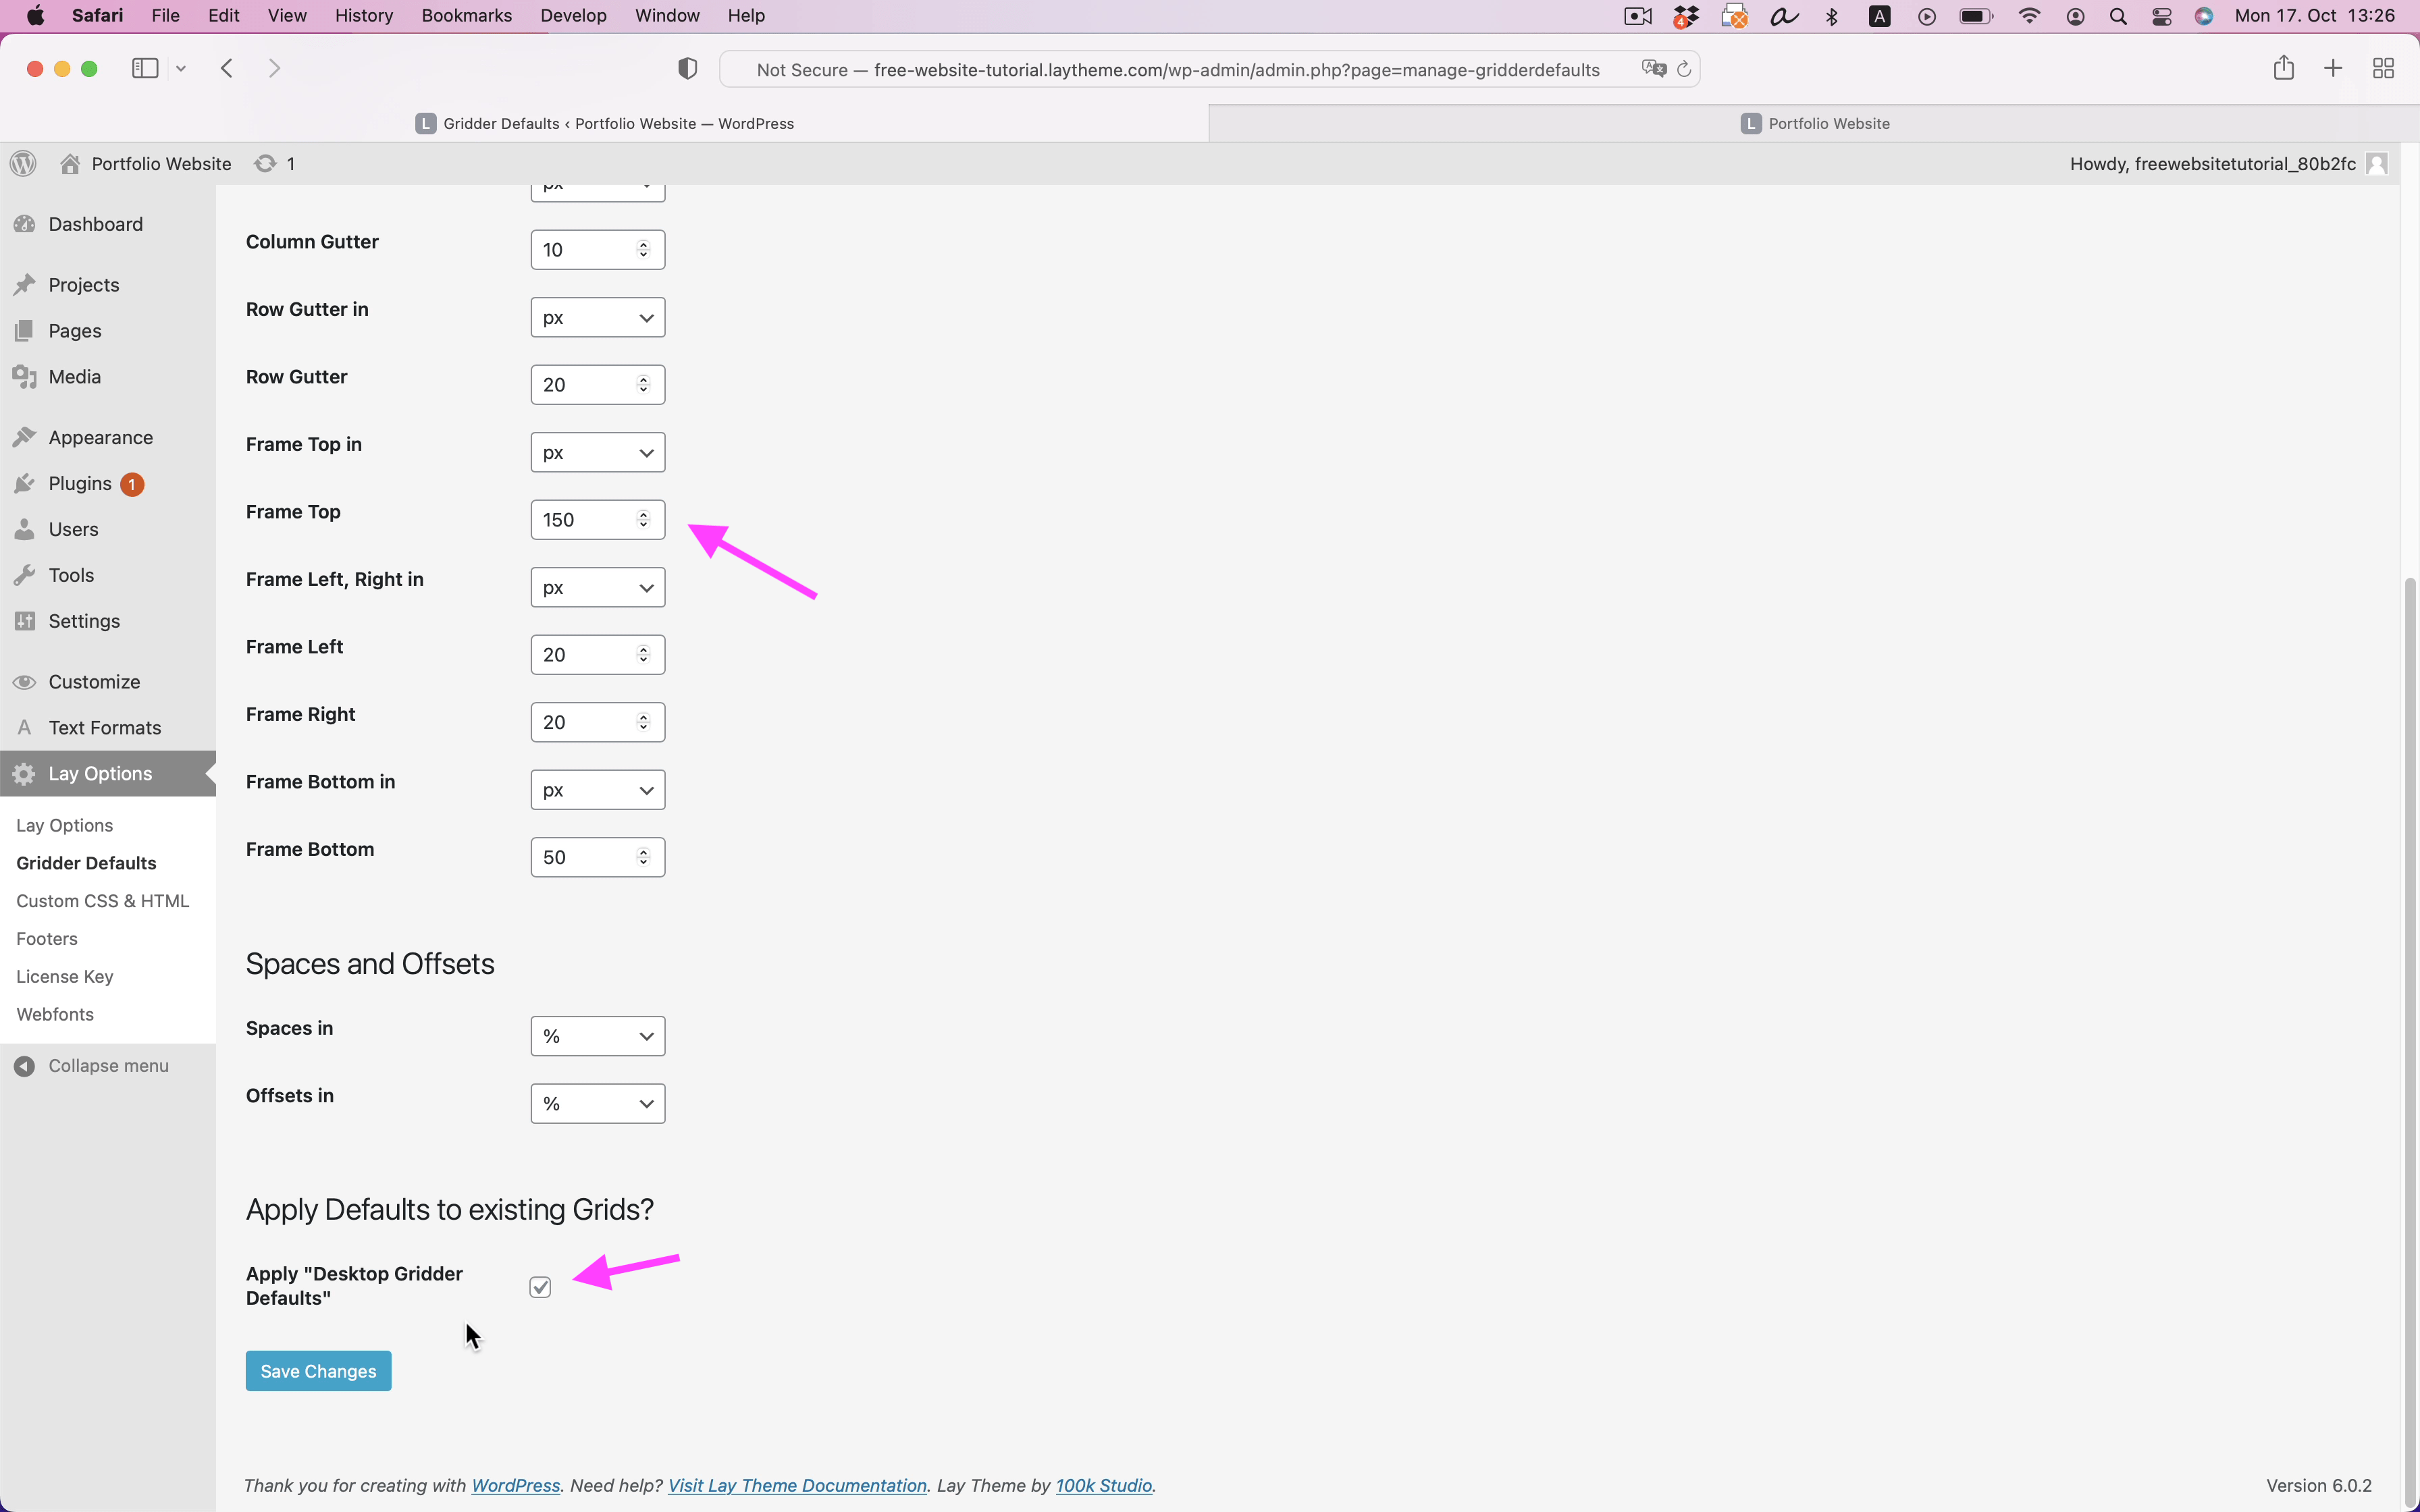
In "Lay Options" → "Gridder Defaults" change the settings so we have more space at the top.
We could do this for every page and project individually but it's easier like this. We like to use pixel values for everything. You can change "Frame in" to px and "Row- and Column Gutter in" to px.
For "Frame Top" use a value like 150 pixels. This way our menu has more space at the top of your website.
Make sure to check "Apply Desktop Gridder Defaults" so the changes are applied to our existing pages.
Create Projects with Tags
In "Projects" create a Project Page. Go to Projects, click "Add New", change the title and insert a Featured Image.
The Featured Image is the preview image of your project. It's also called "Project Thumbnail".
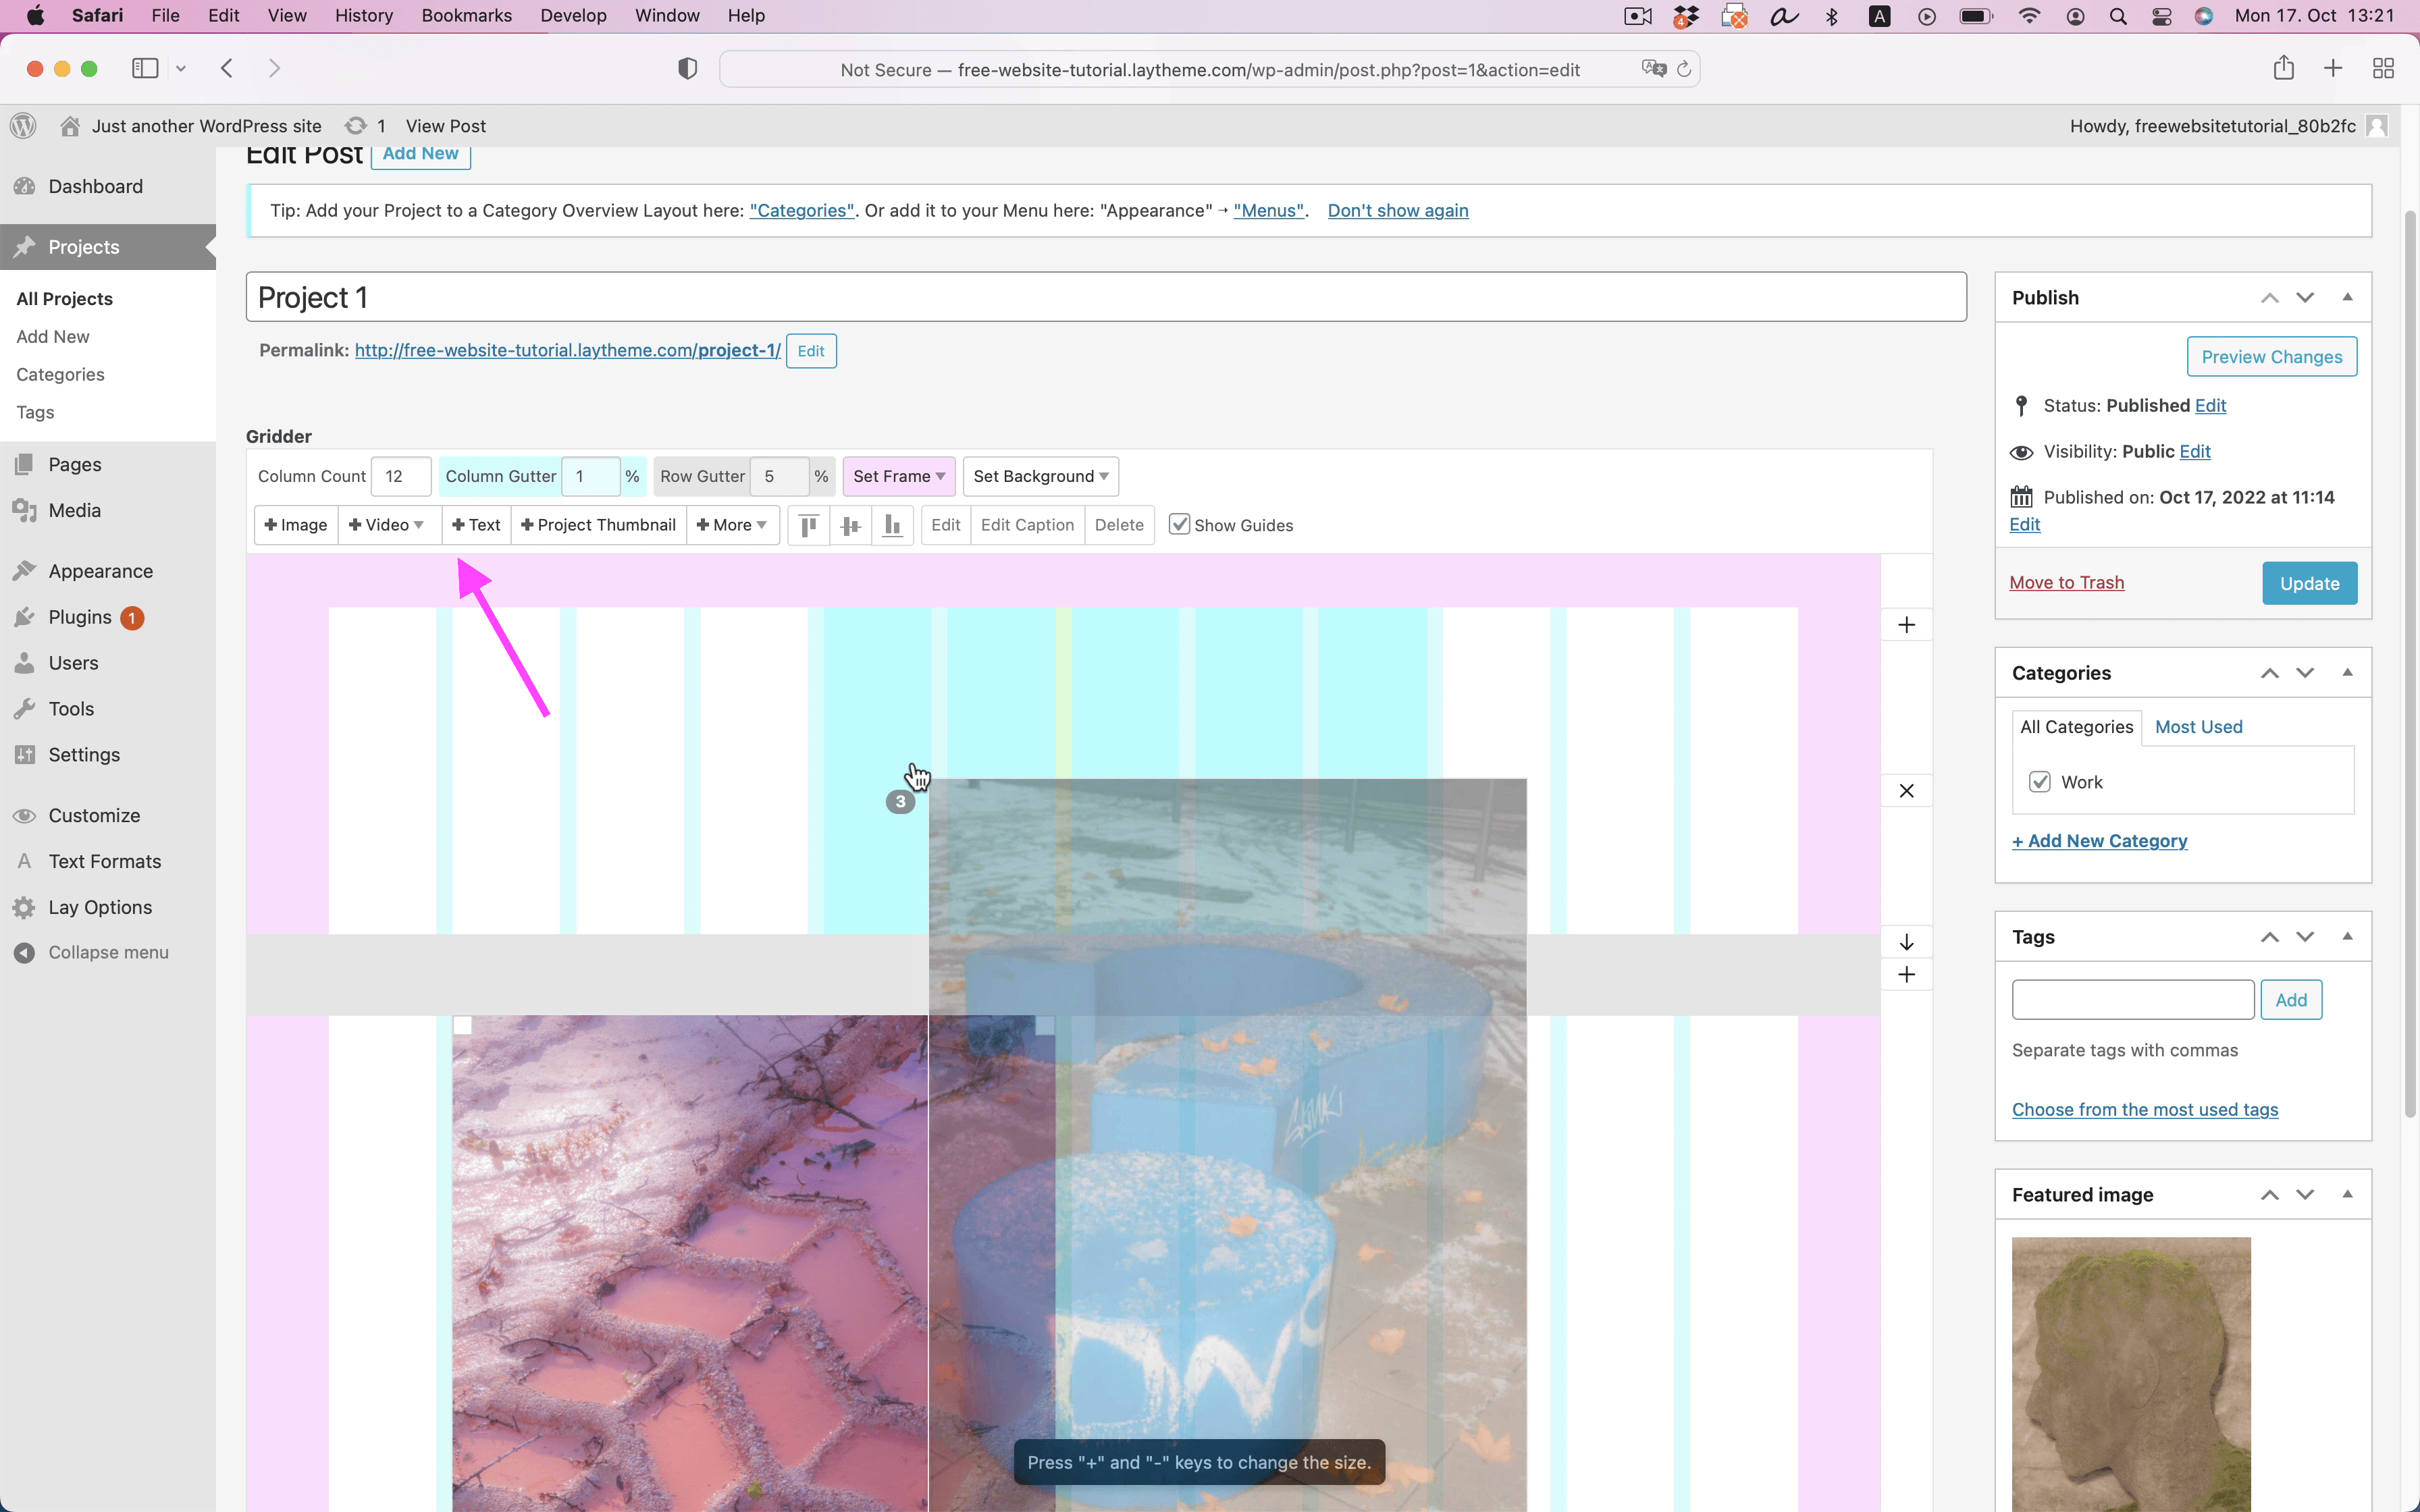
Now you can start layouting your first project. Insert images, texts videos and more here:
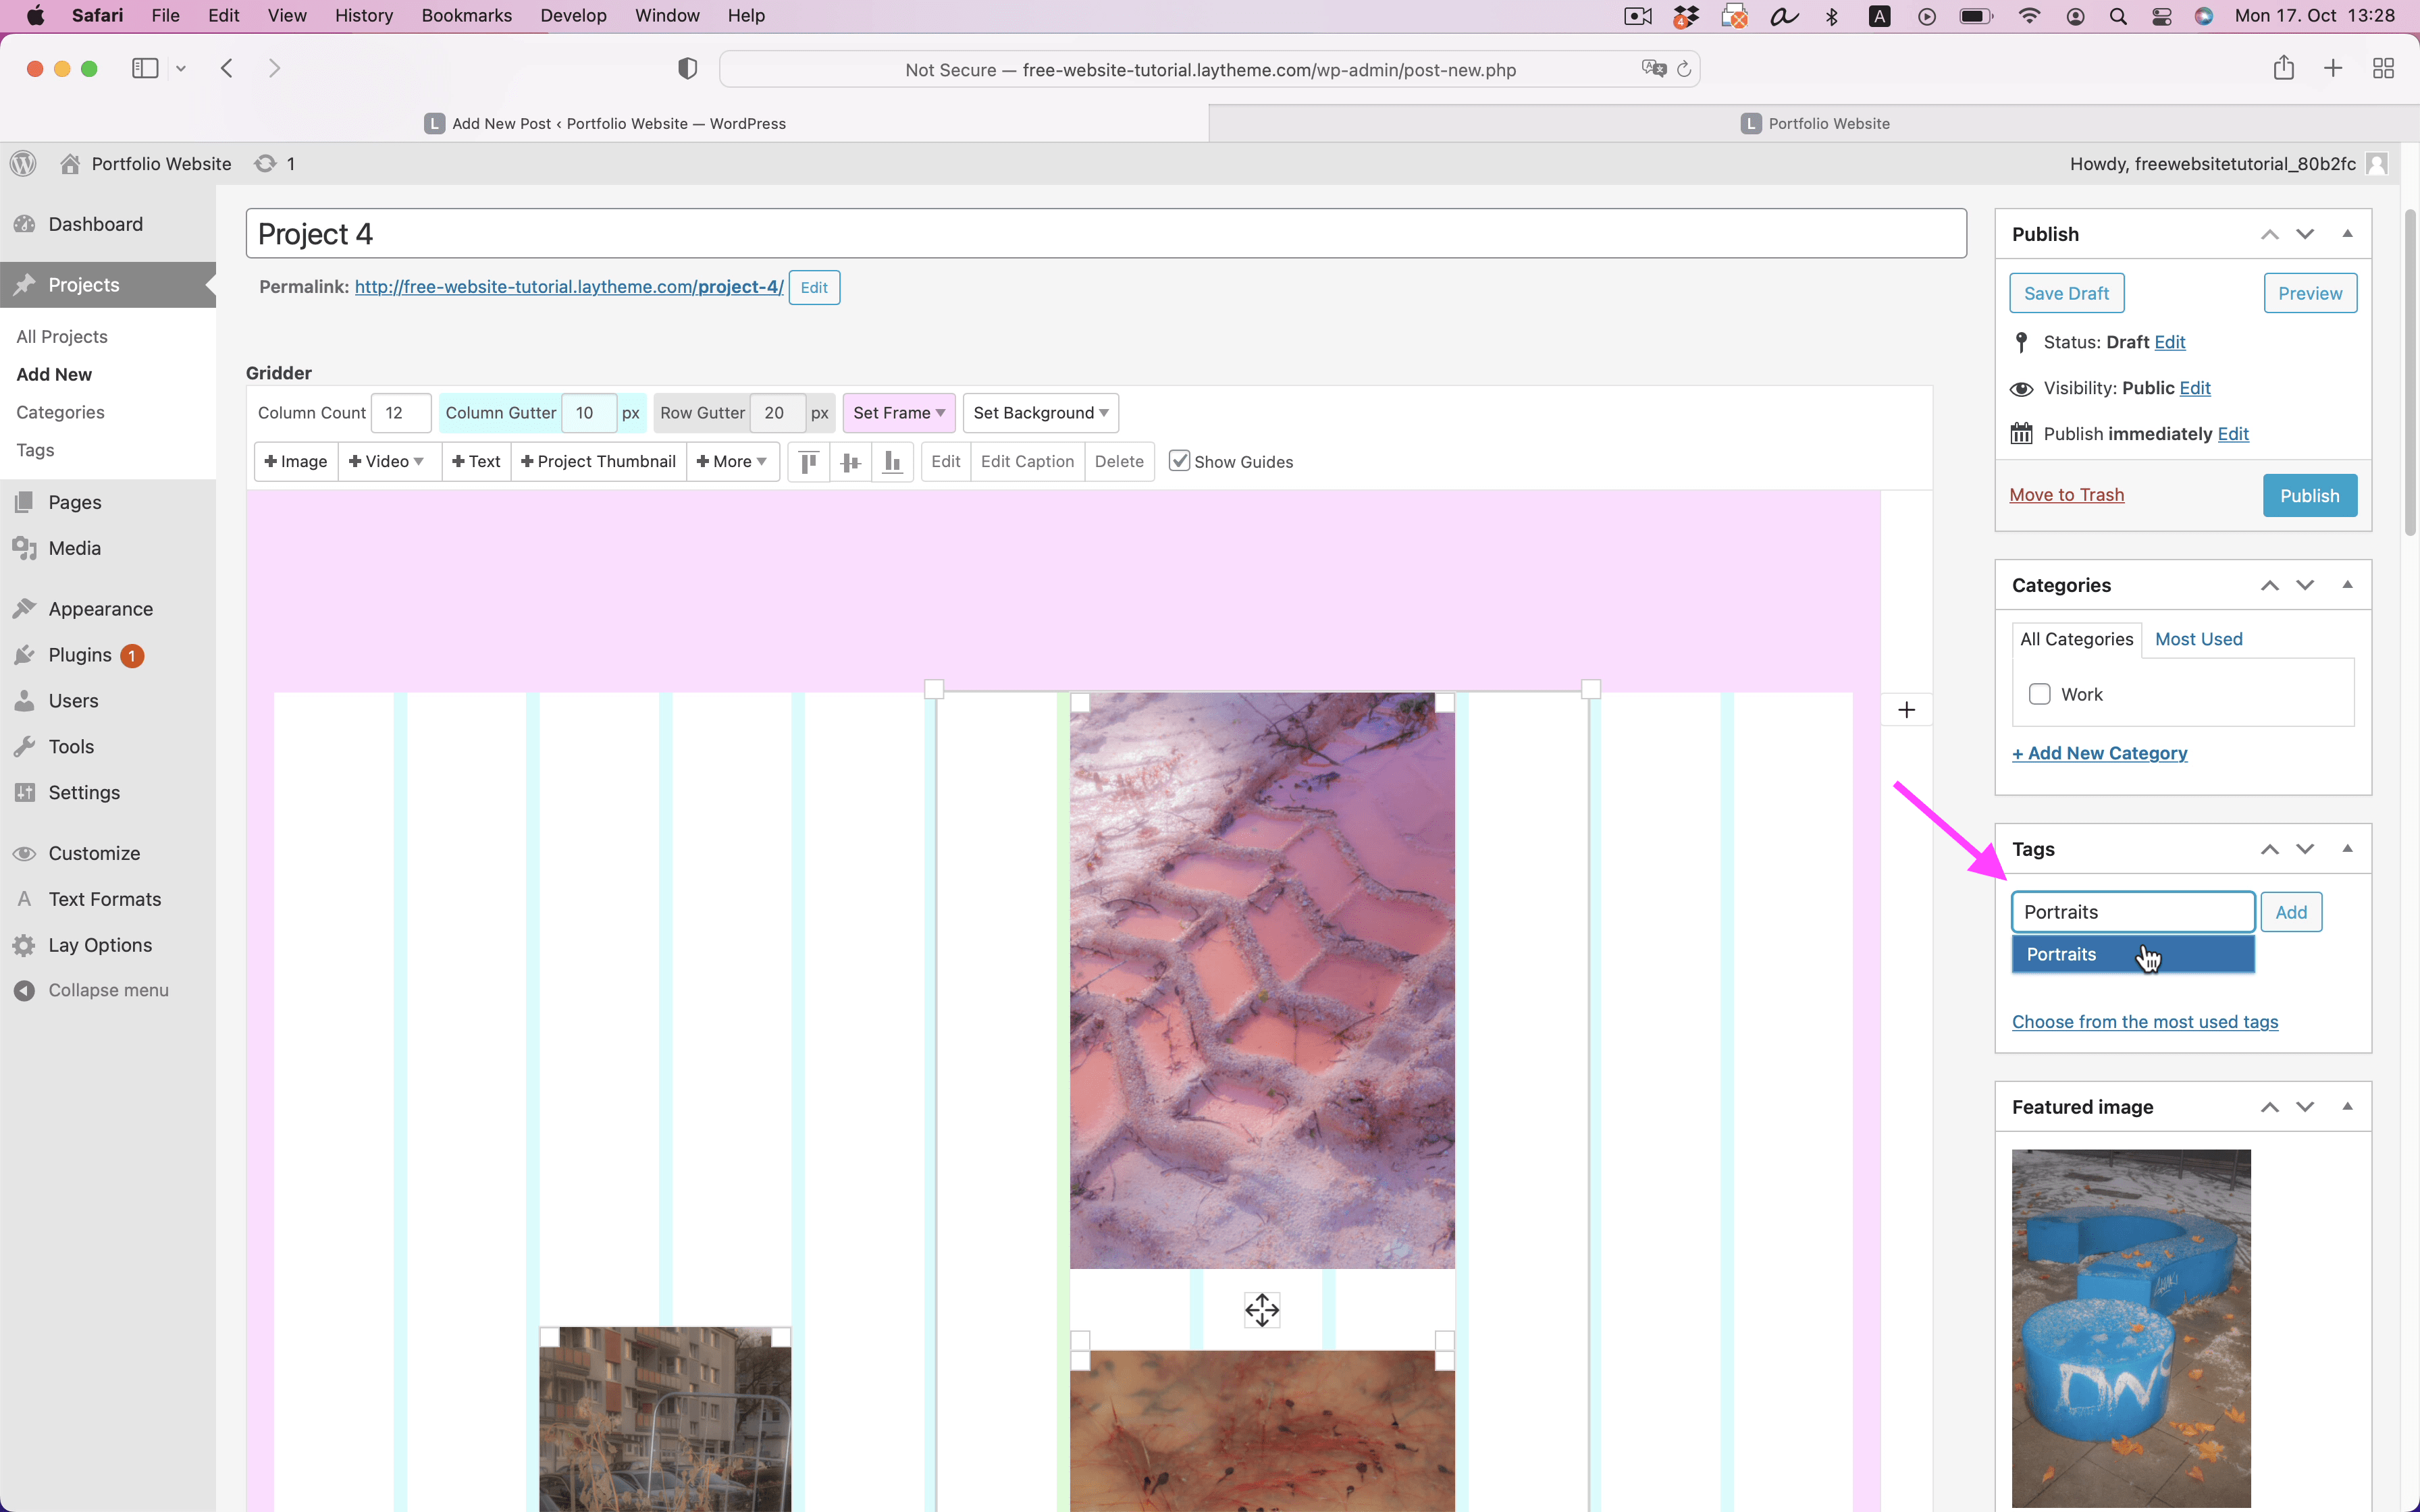
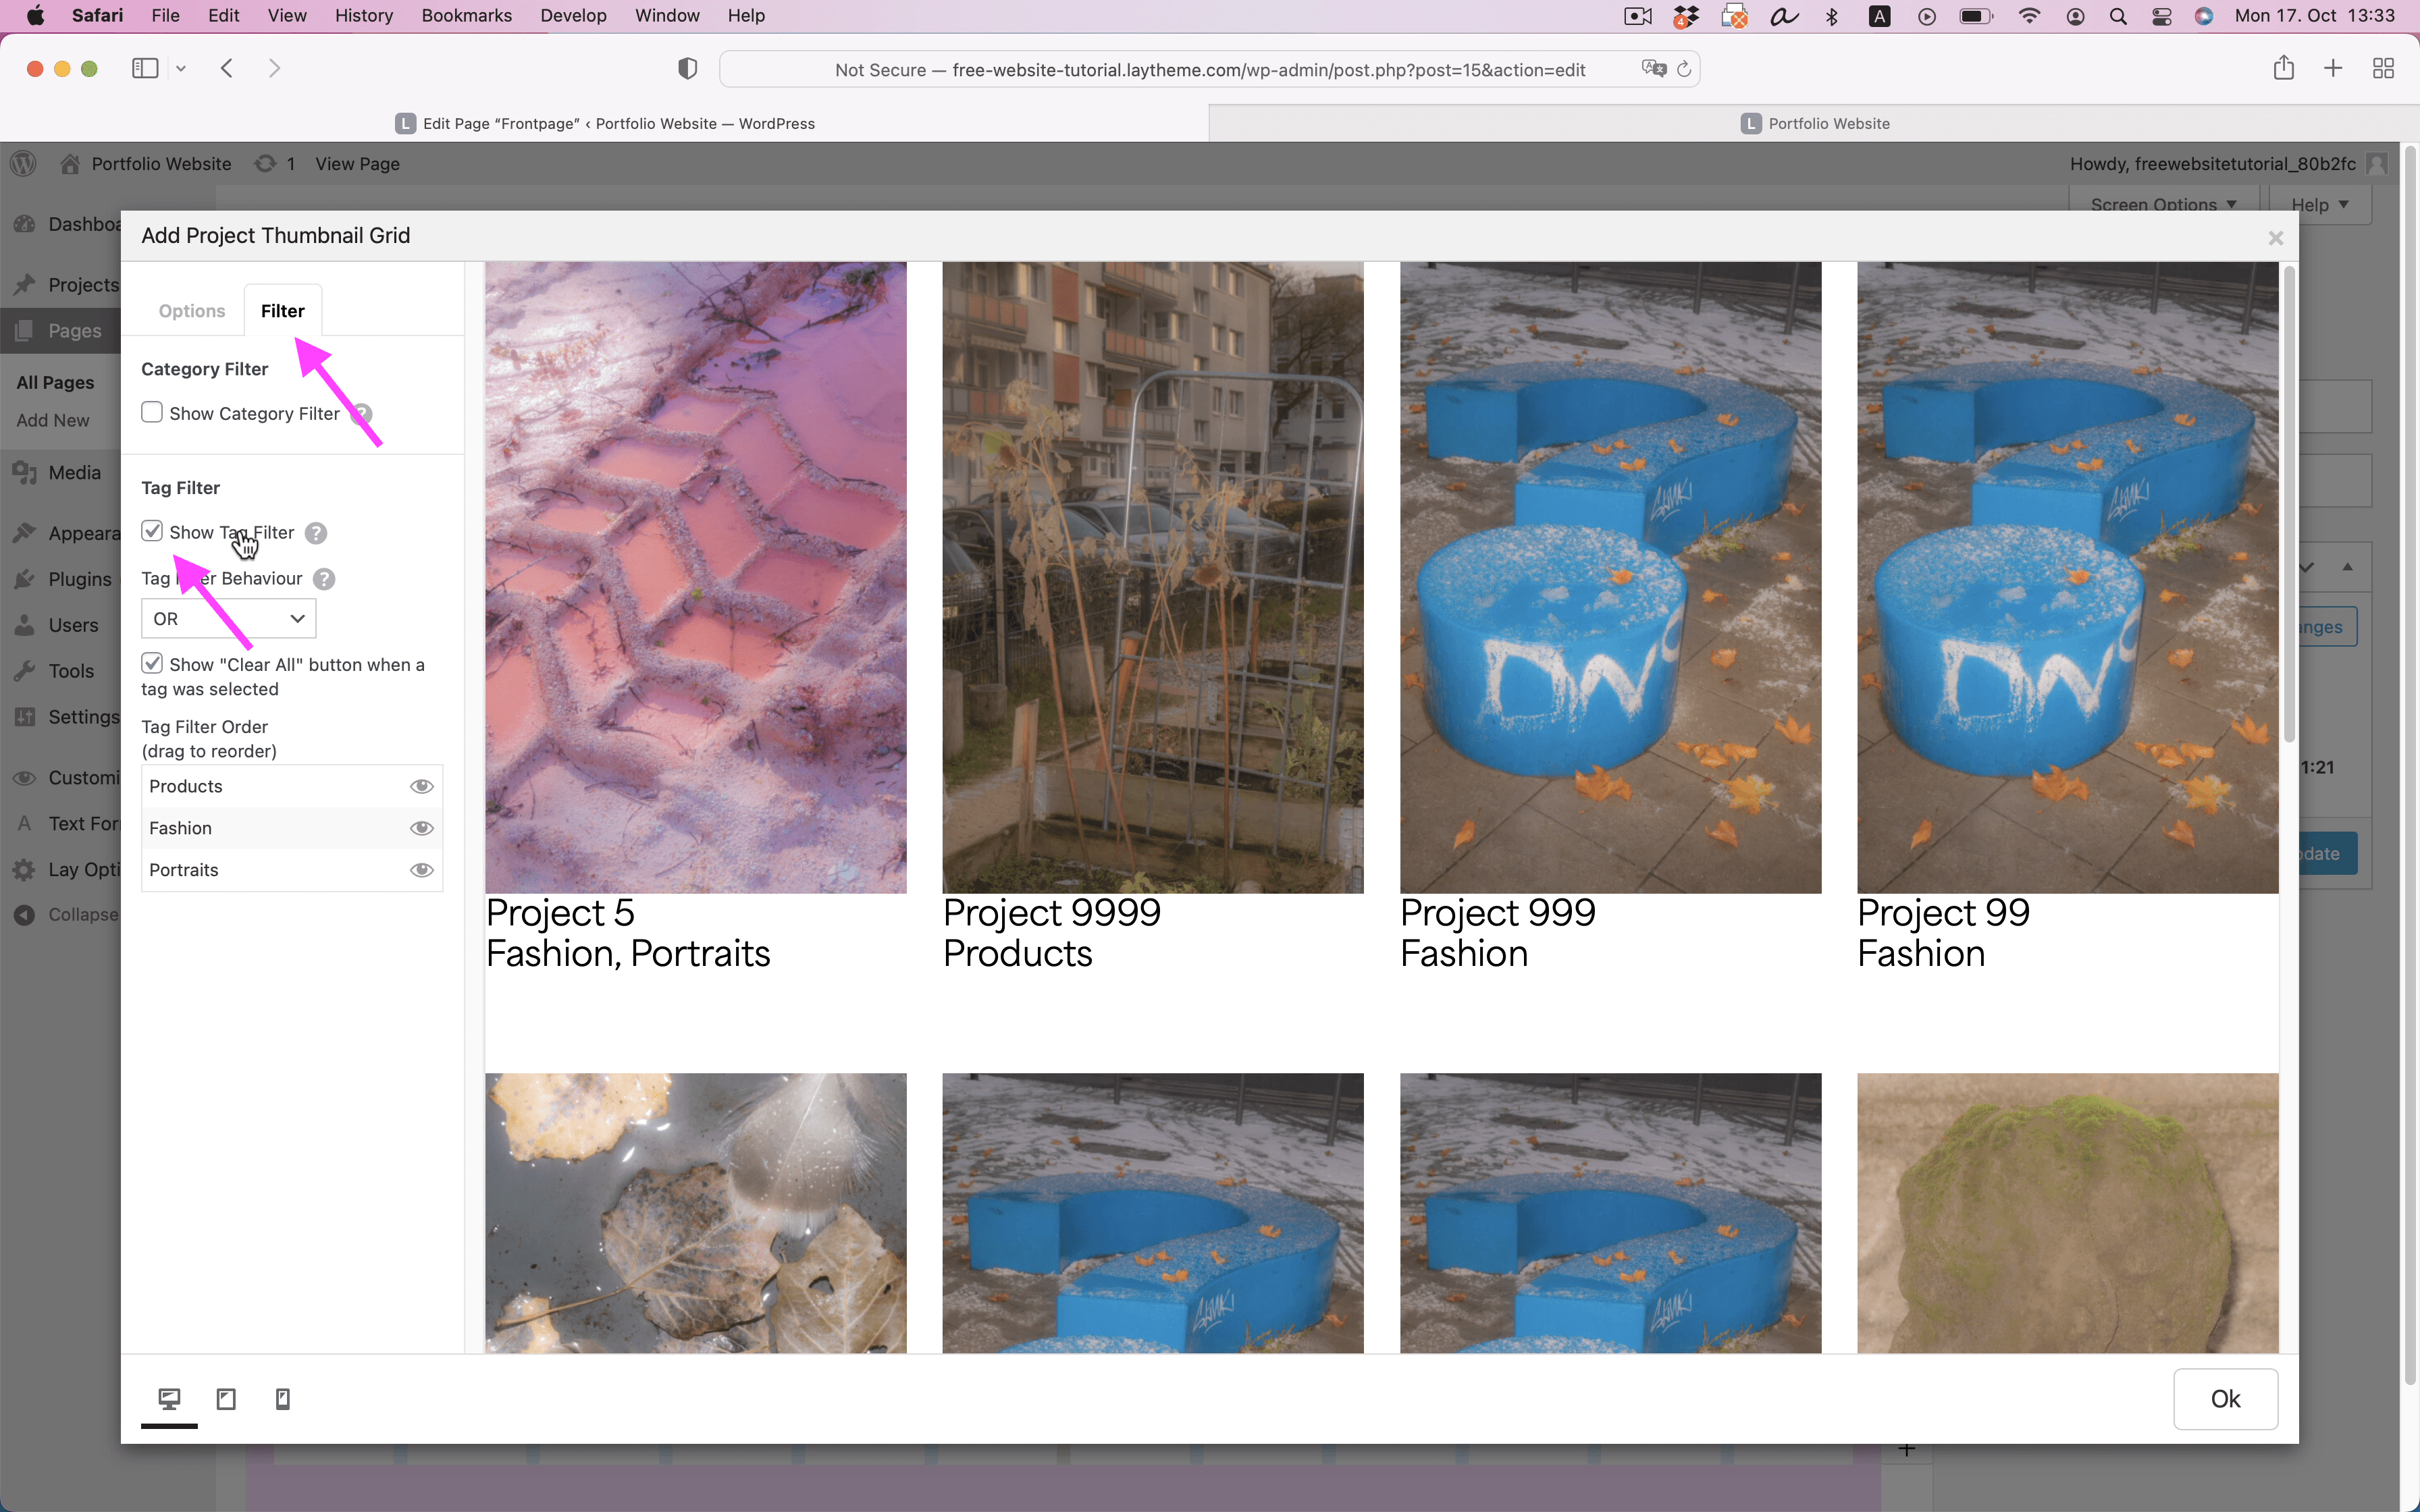
Create a bunch of projects and make sure you use categories, tags or both.
We only use Tags on our website:
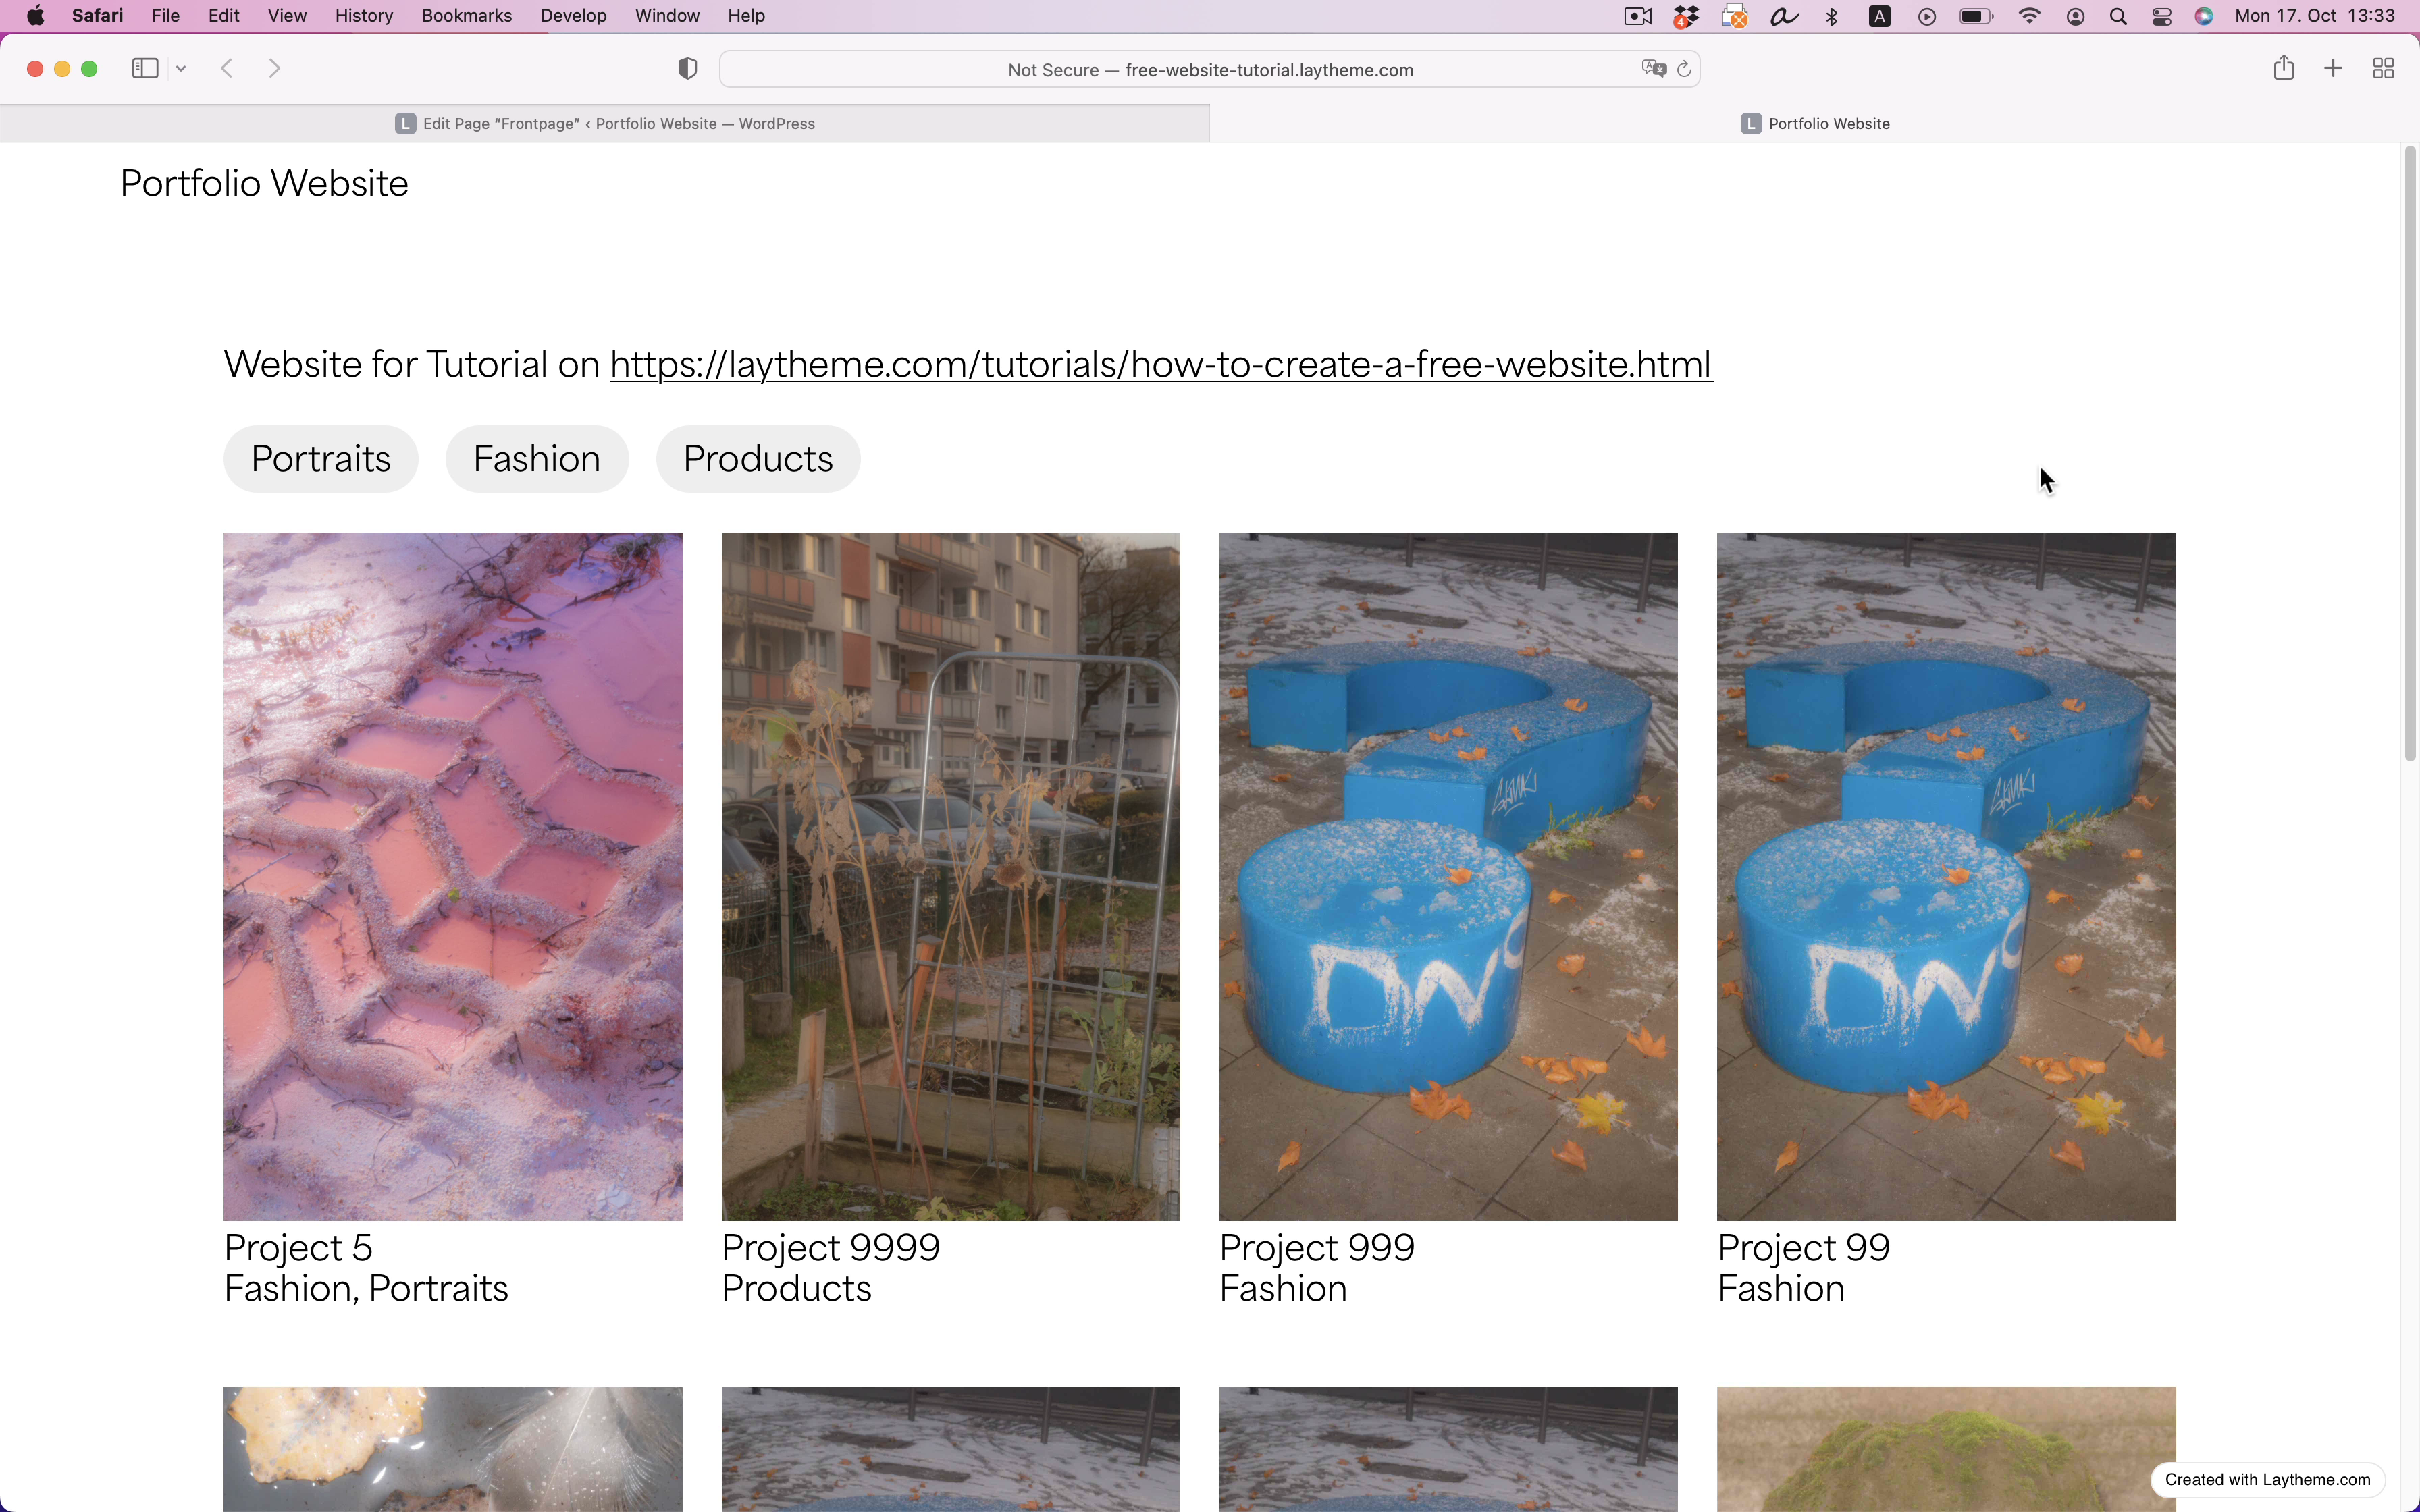
Add a Thumbnailgrid to your Front Page
Go to "Pages" and edit your Frontpage. In here, add the "Thumbnailgrid" Element. This is a Grid of the Projects you just created.
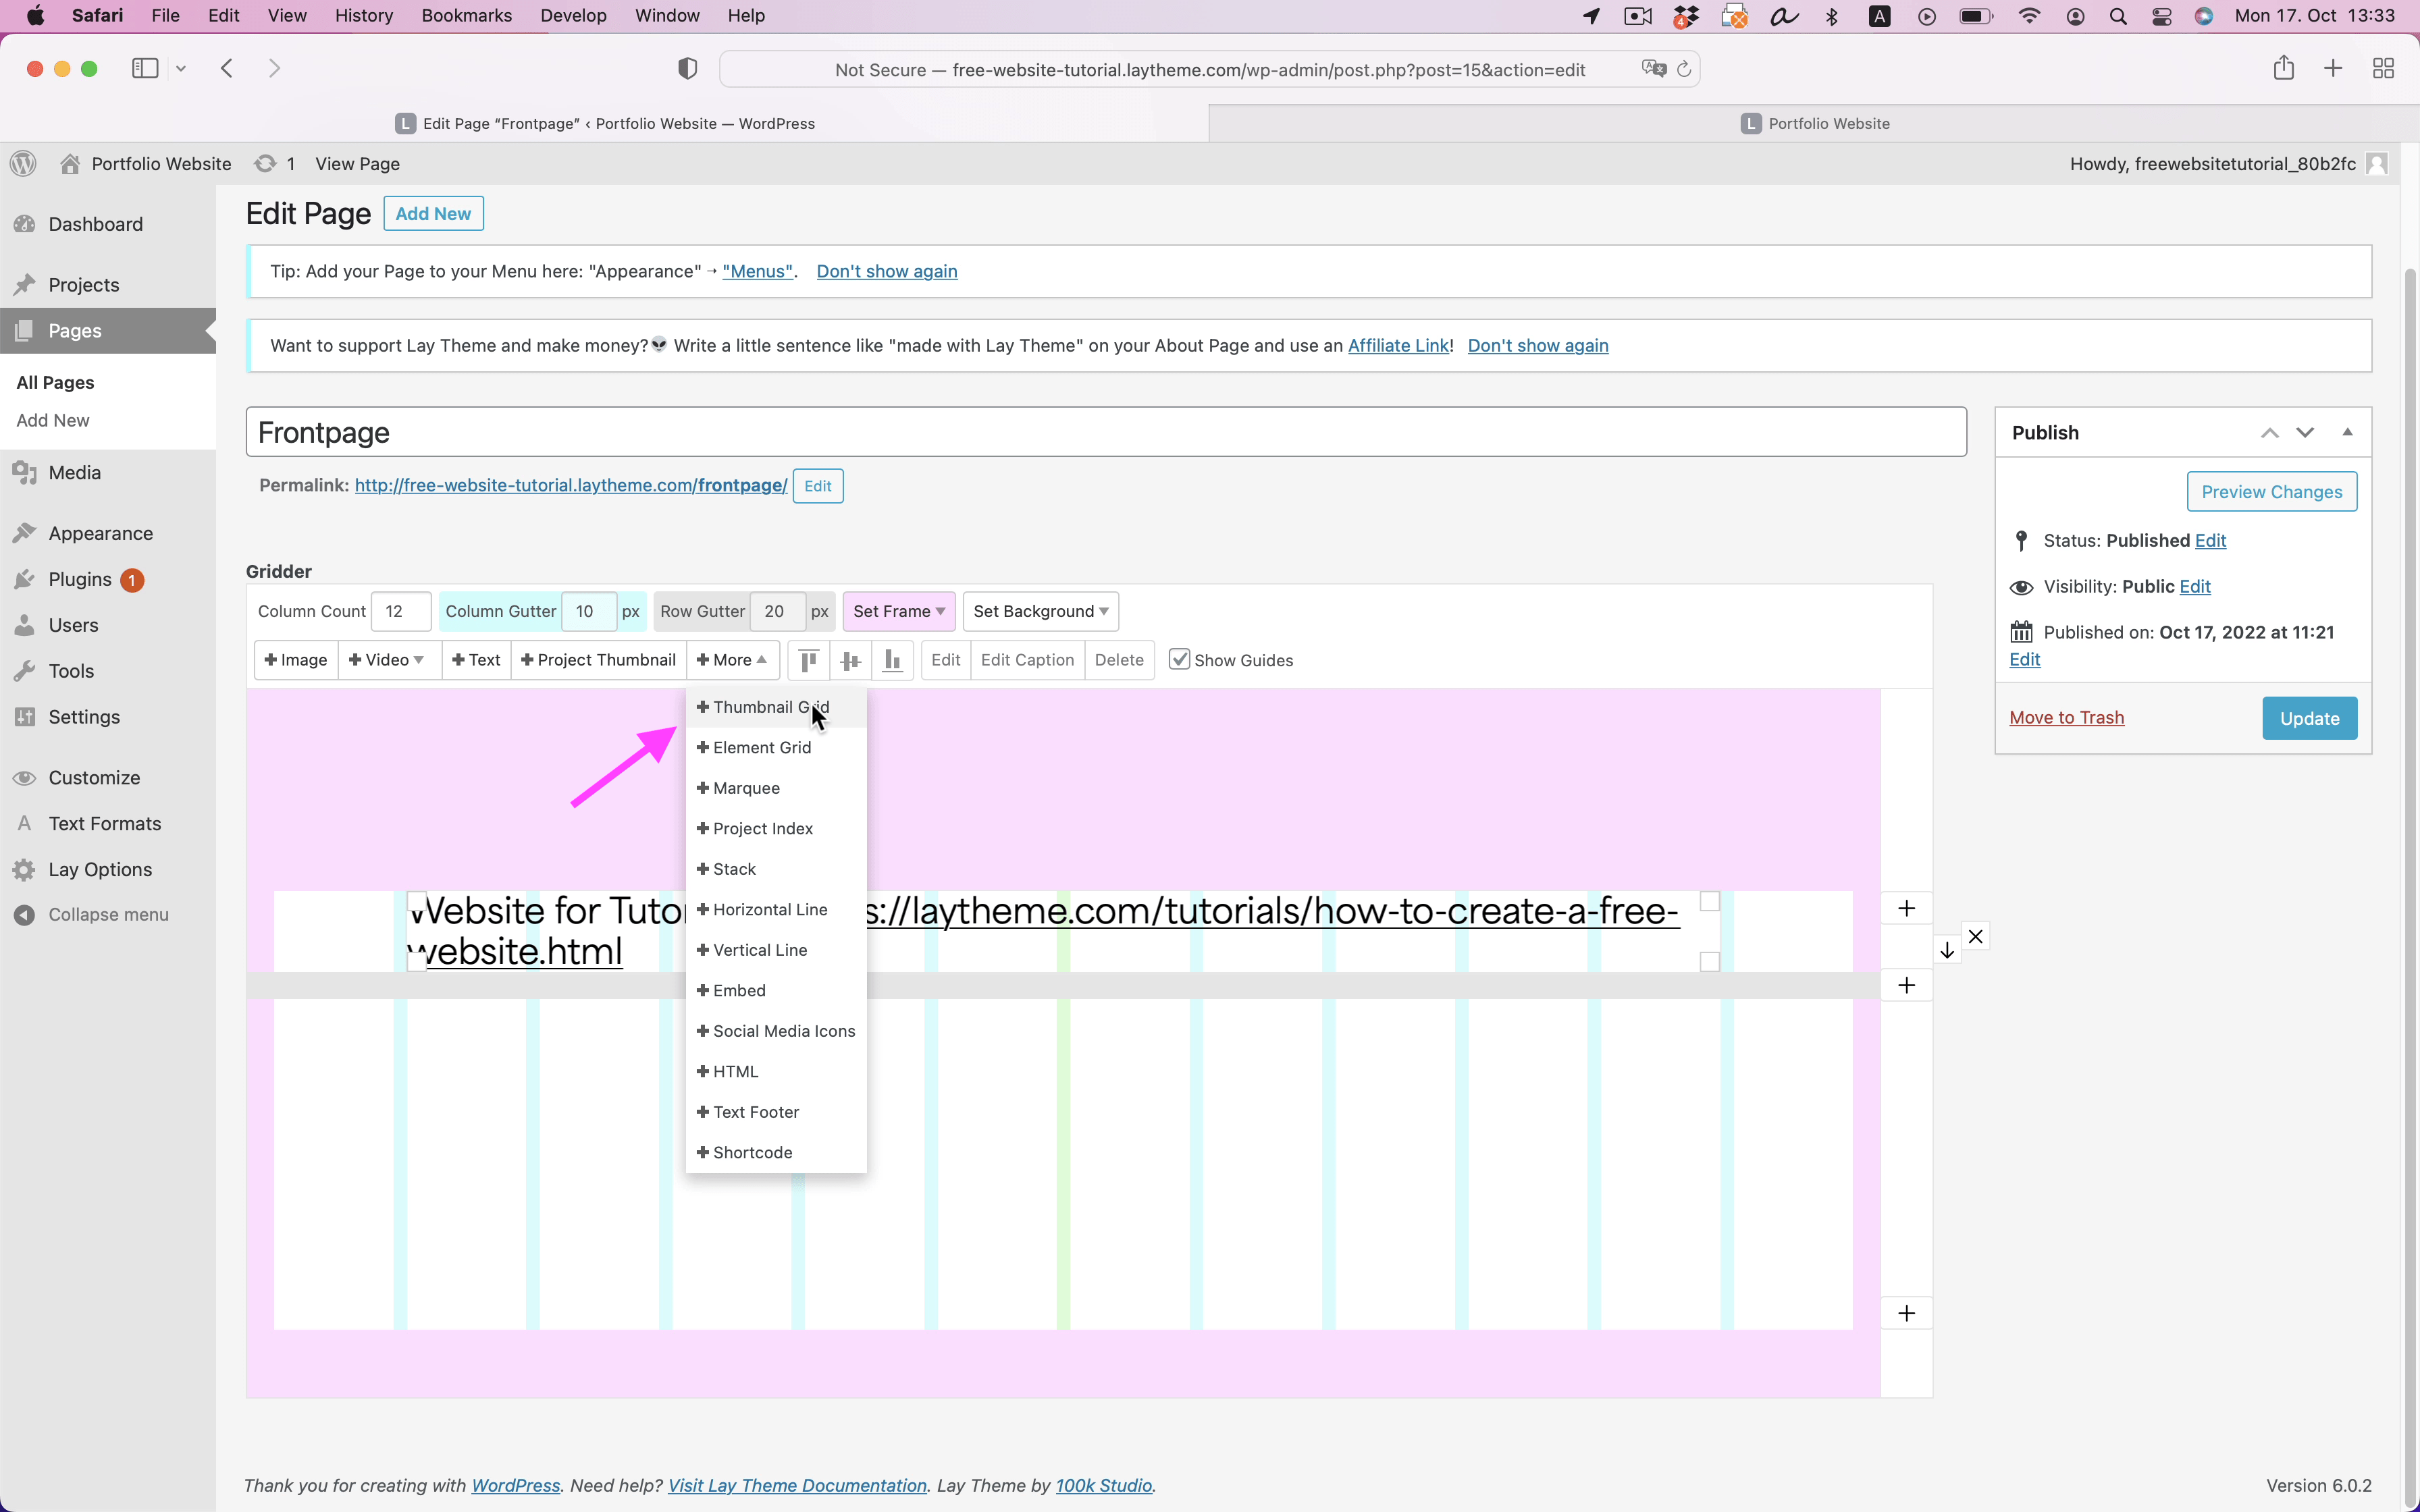
Also activate "Show Tag Filter".
Take a look at your website. We now have an overview of all of your projects on the frontpage.
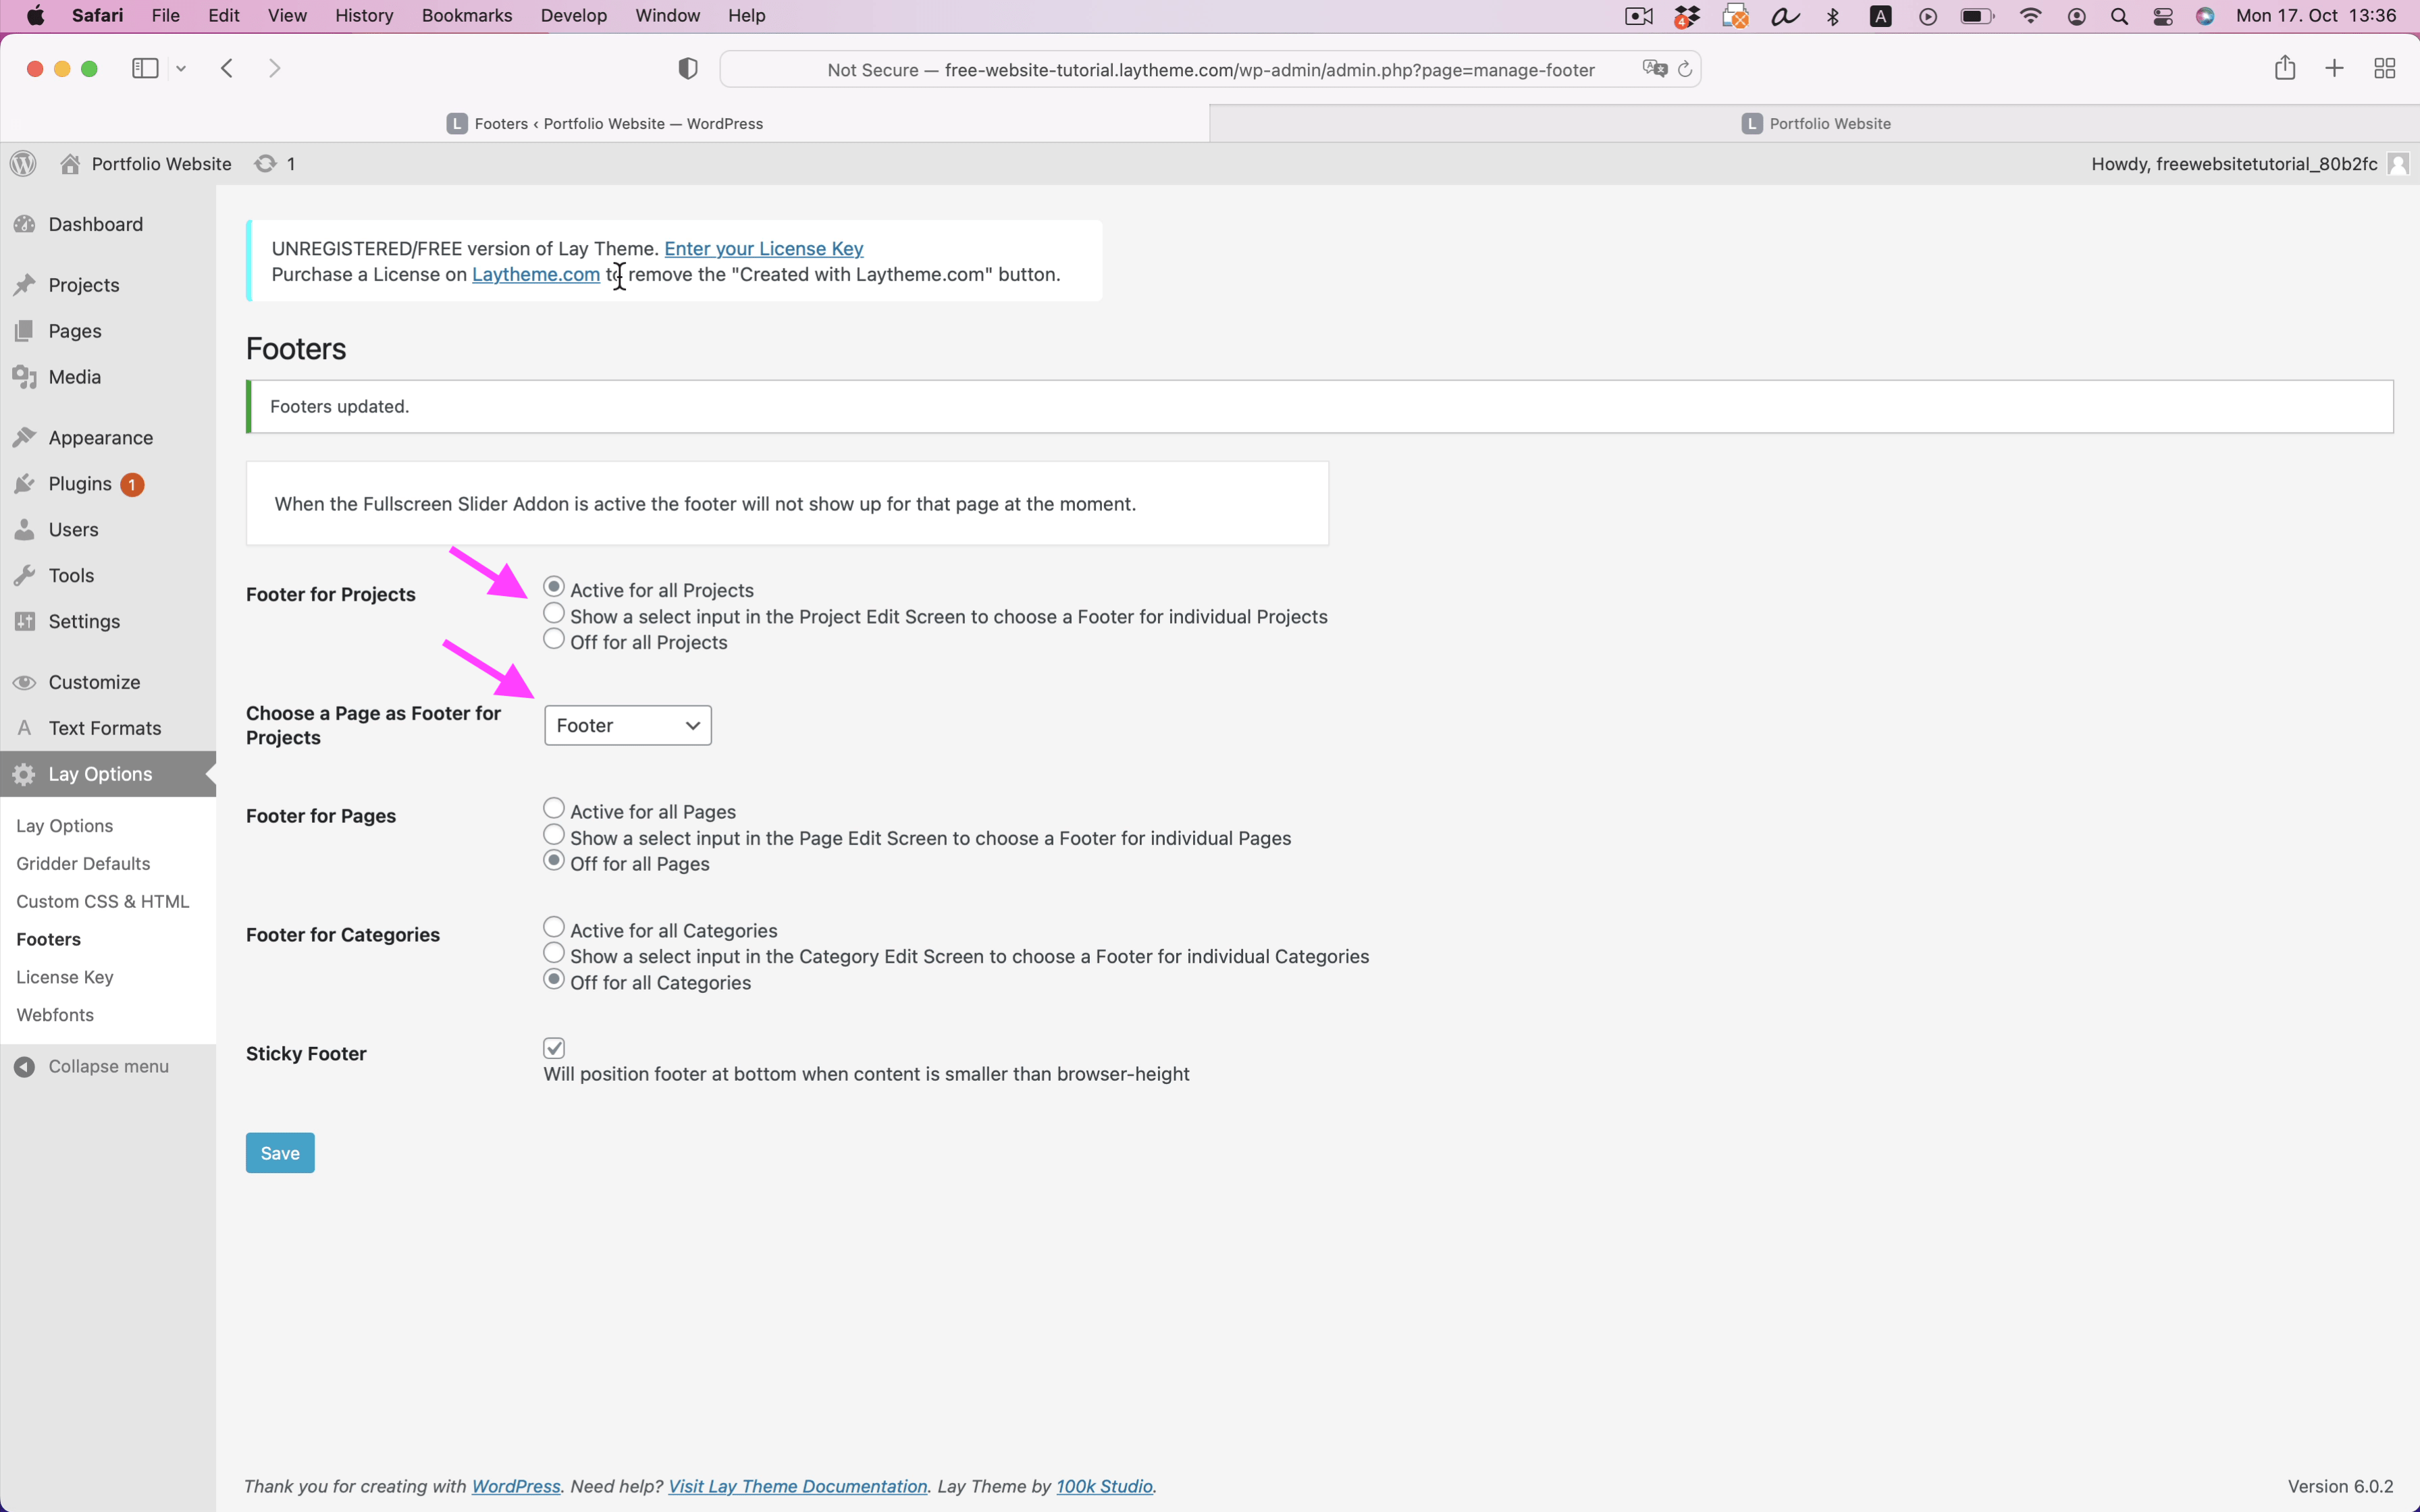
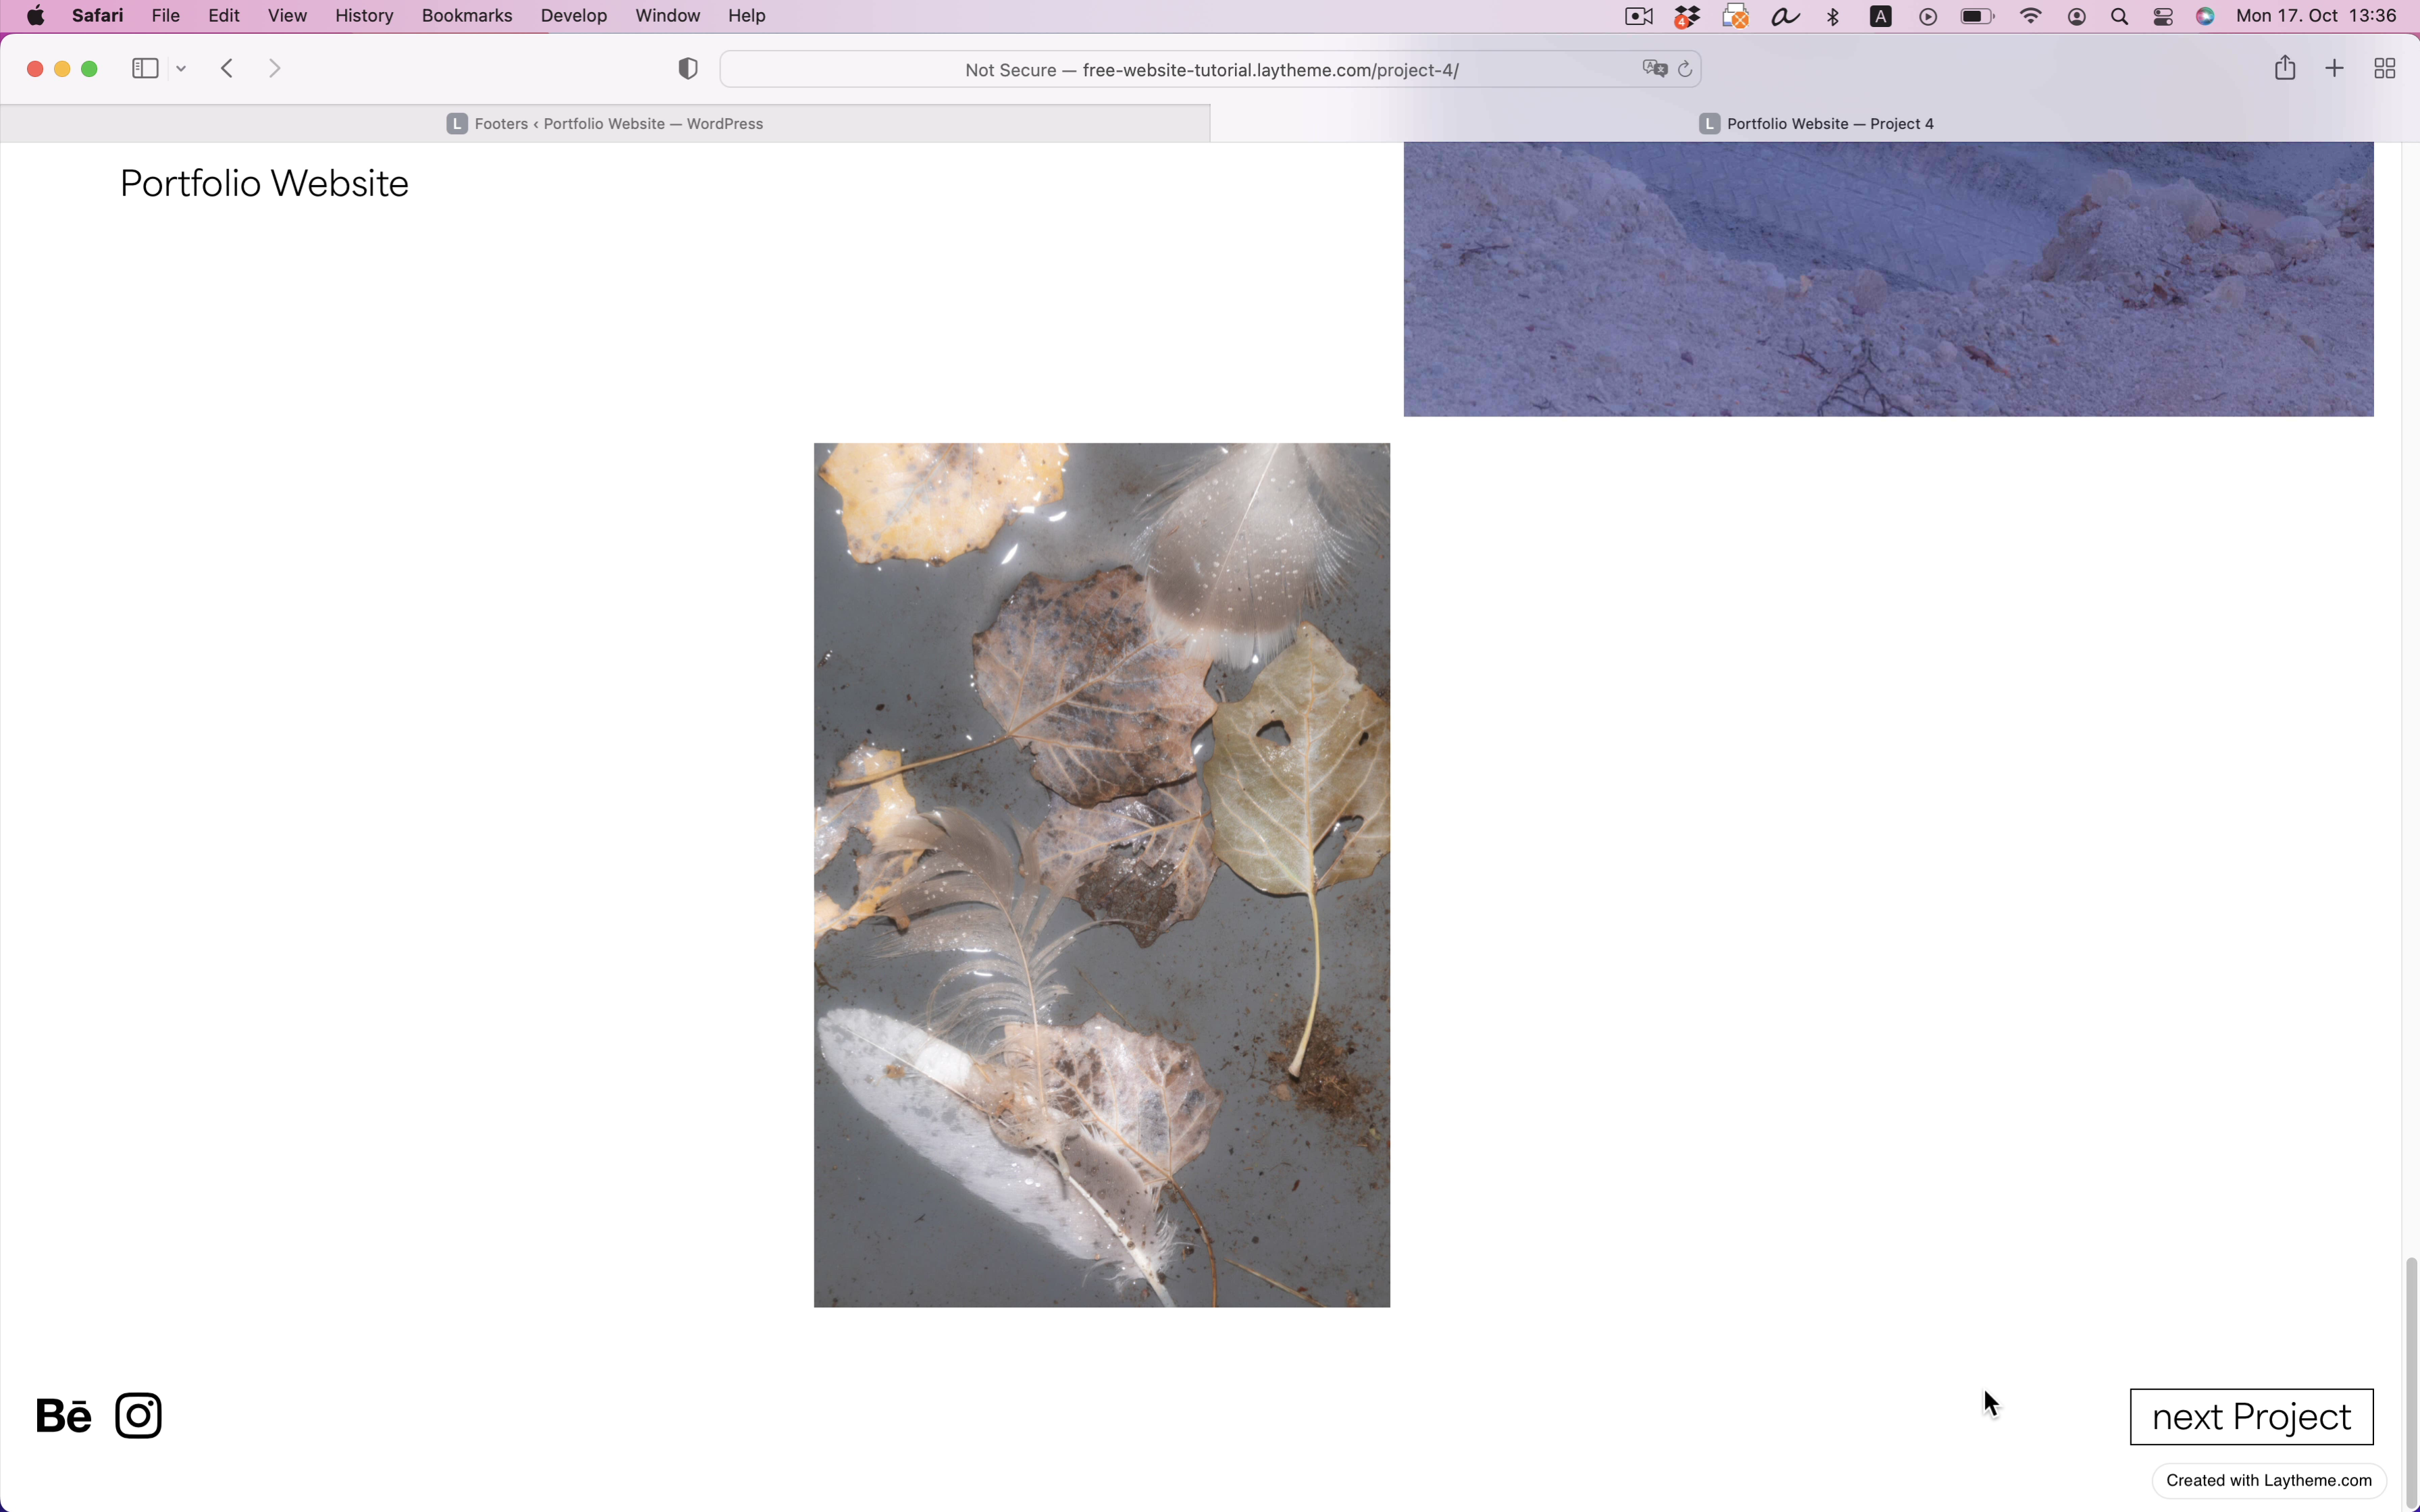
Add a Footer to your Projects
Let's create a Footer for your Projects. It will contain a button to navigate to the next project. Also it will include links to your social media.
Go to "Pages", create a new page called "Footer". Add a Text, enter "Next Project" and use the "→" button to make it a "Next Project" button.
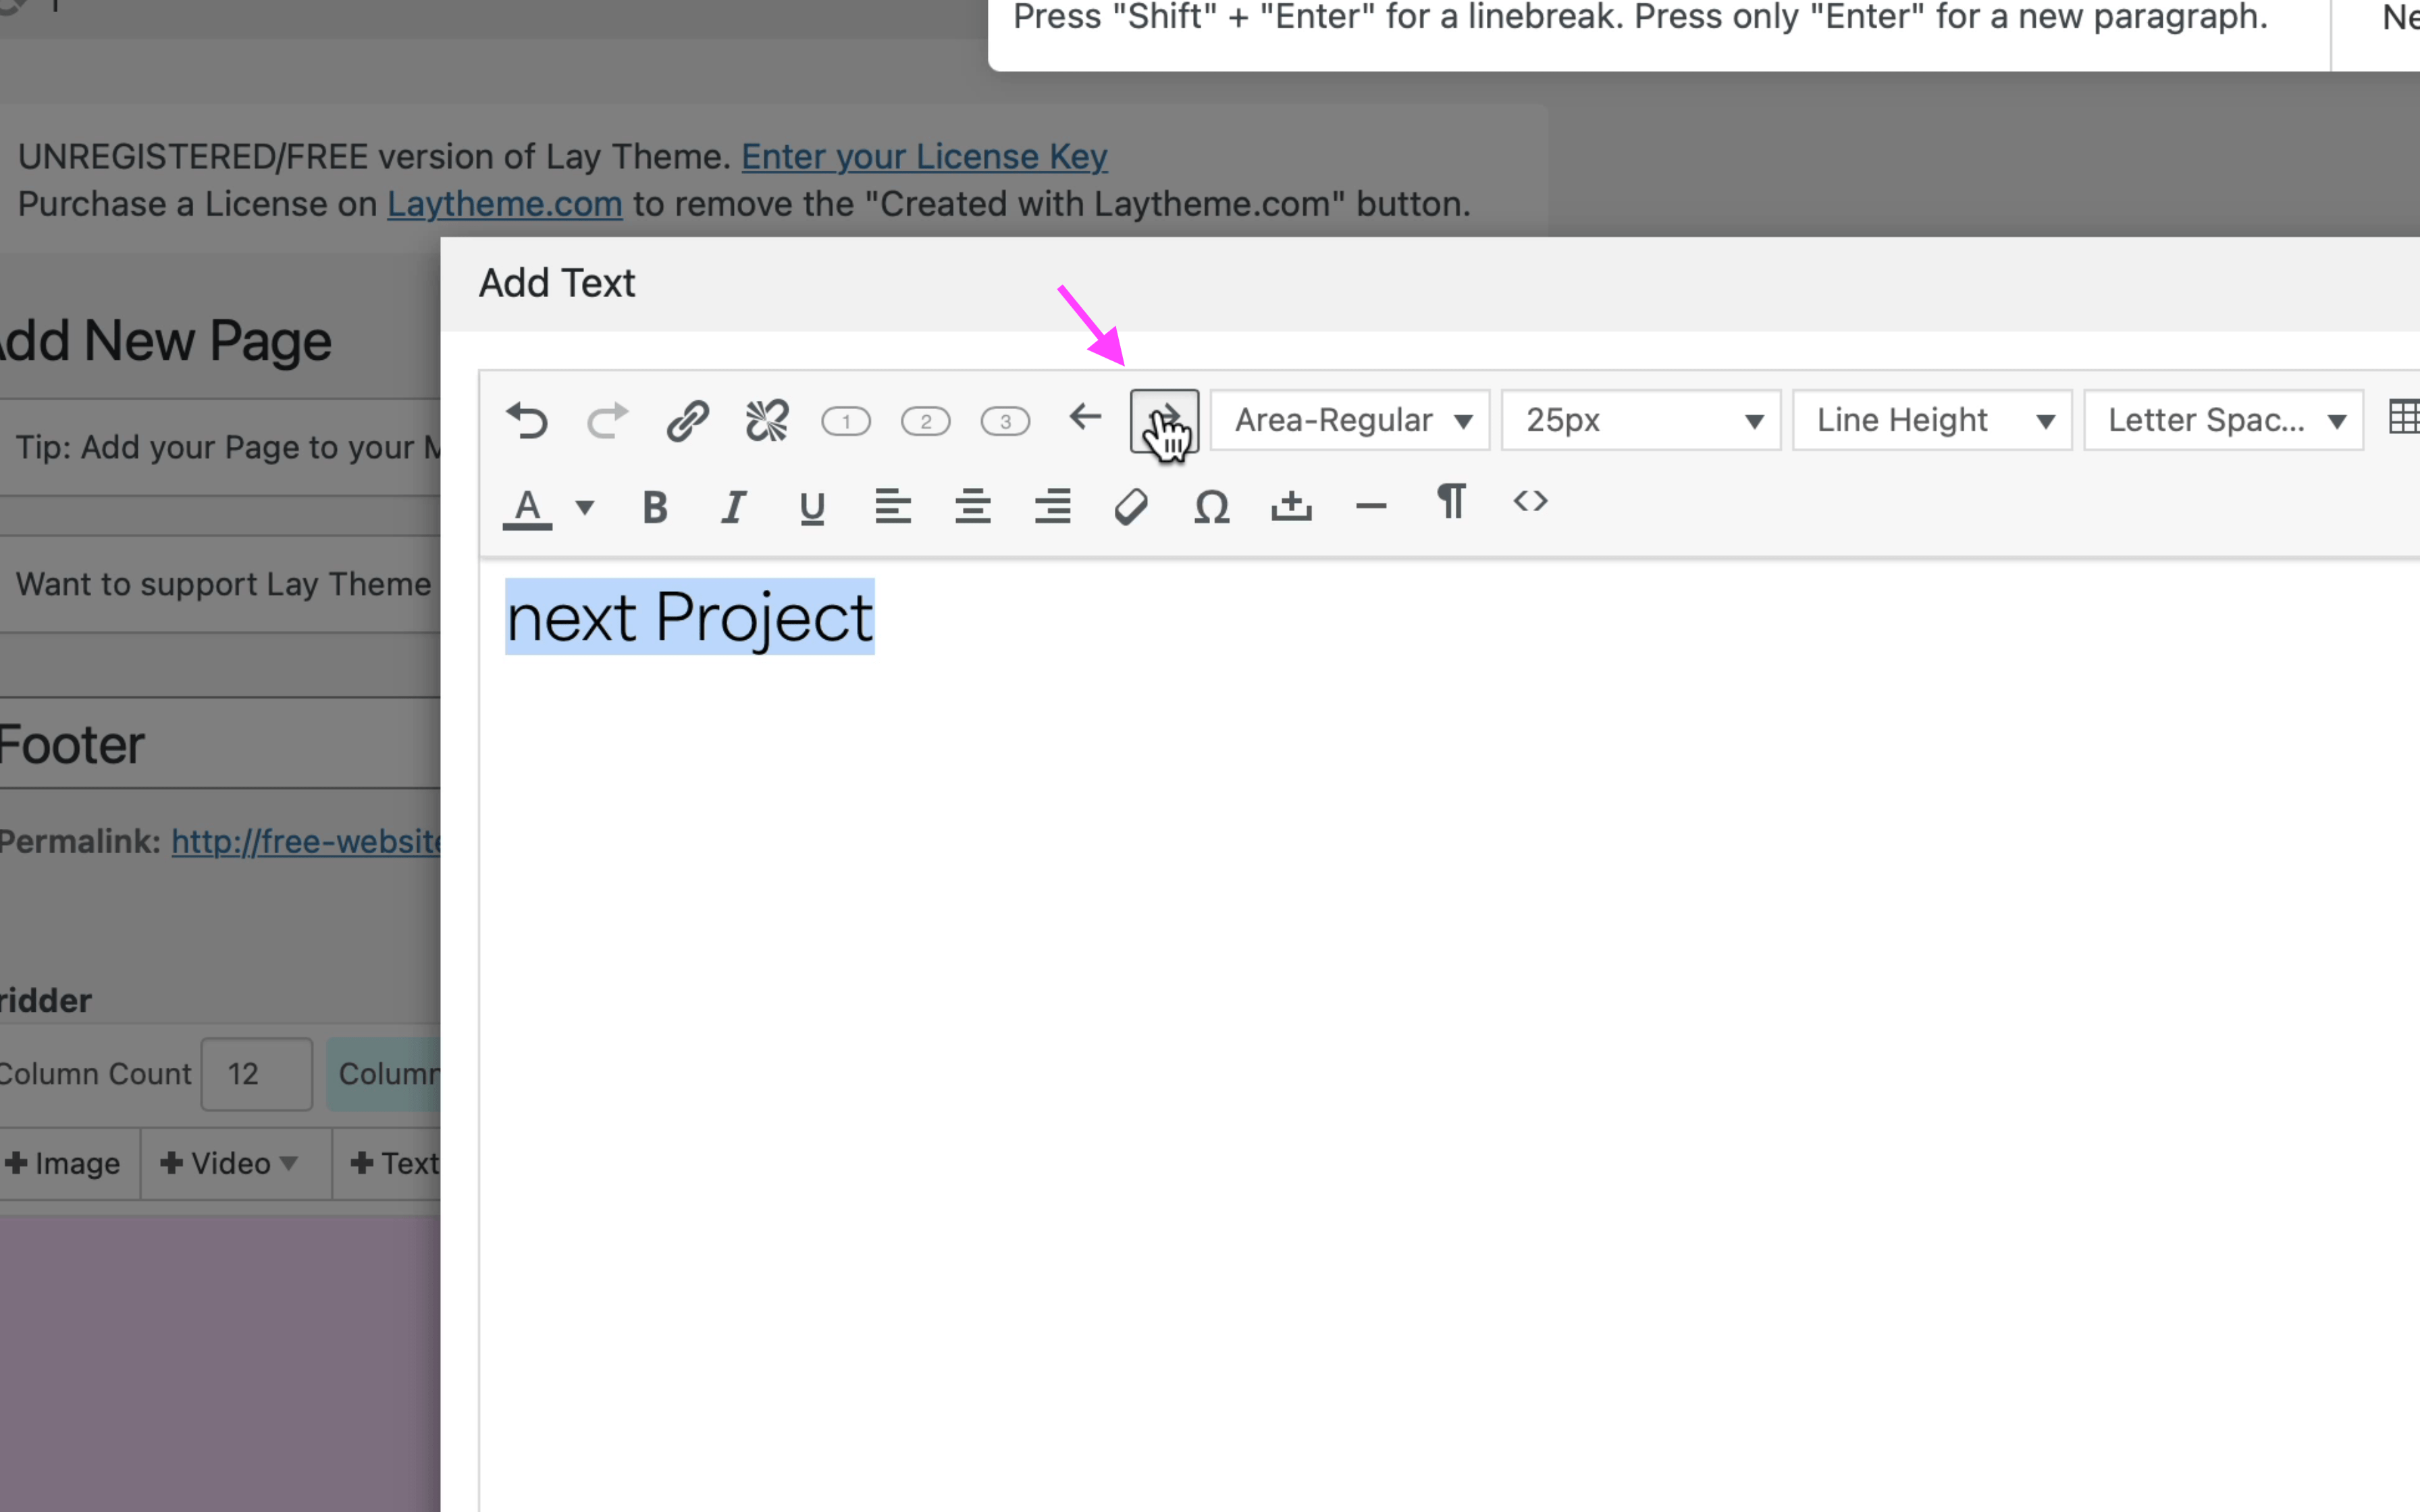
Afterwards you can click the "( 1 )", "( 2 )" or "( 3 )" button to give your text a button style.
Now add your social media links. Click "+More" → "+Social Media Icons", add your socials and put this in your footer.
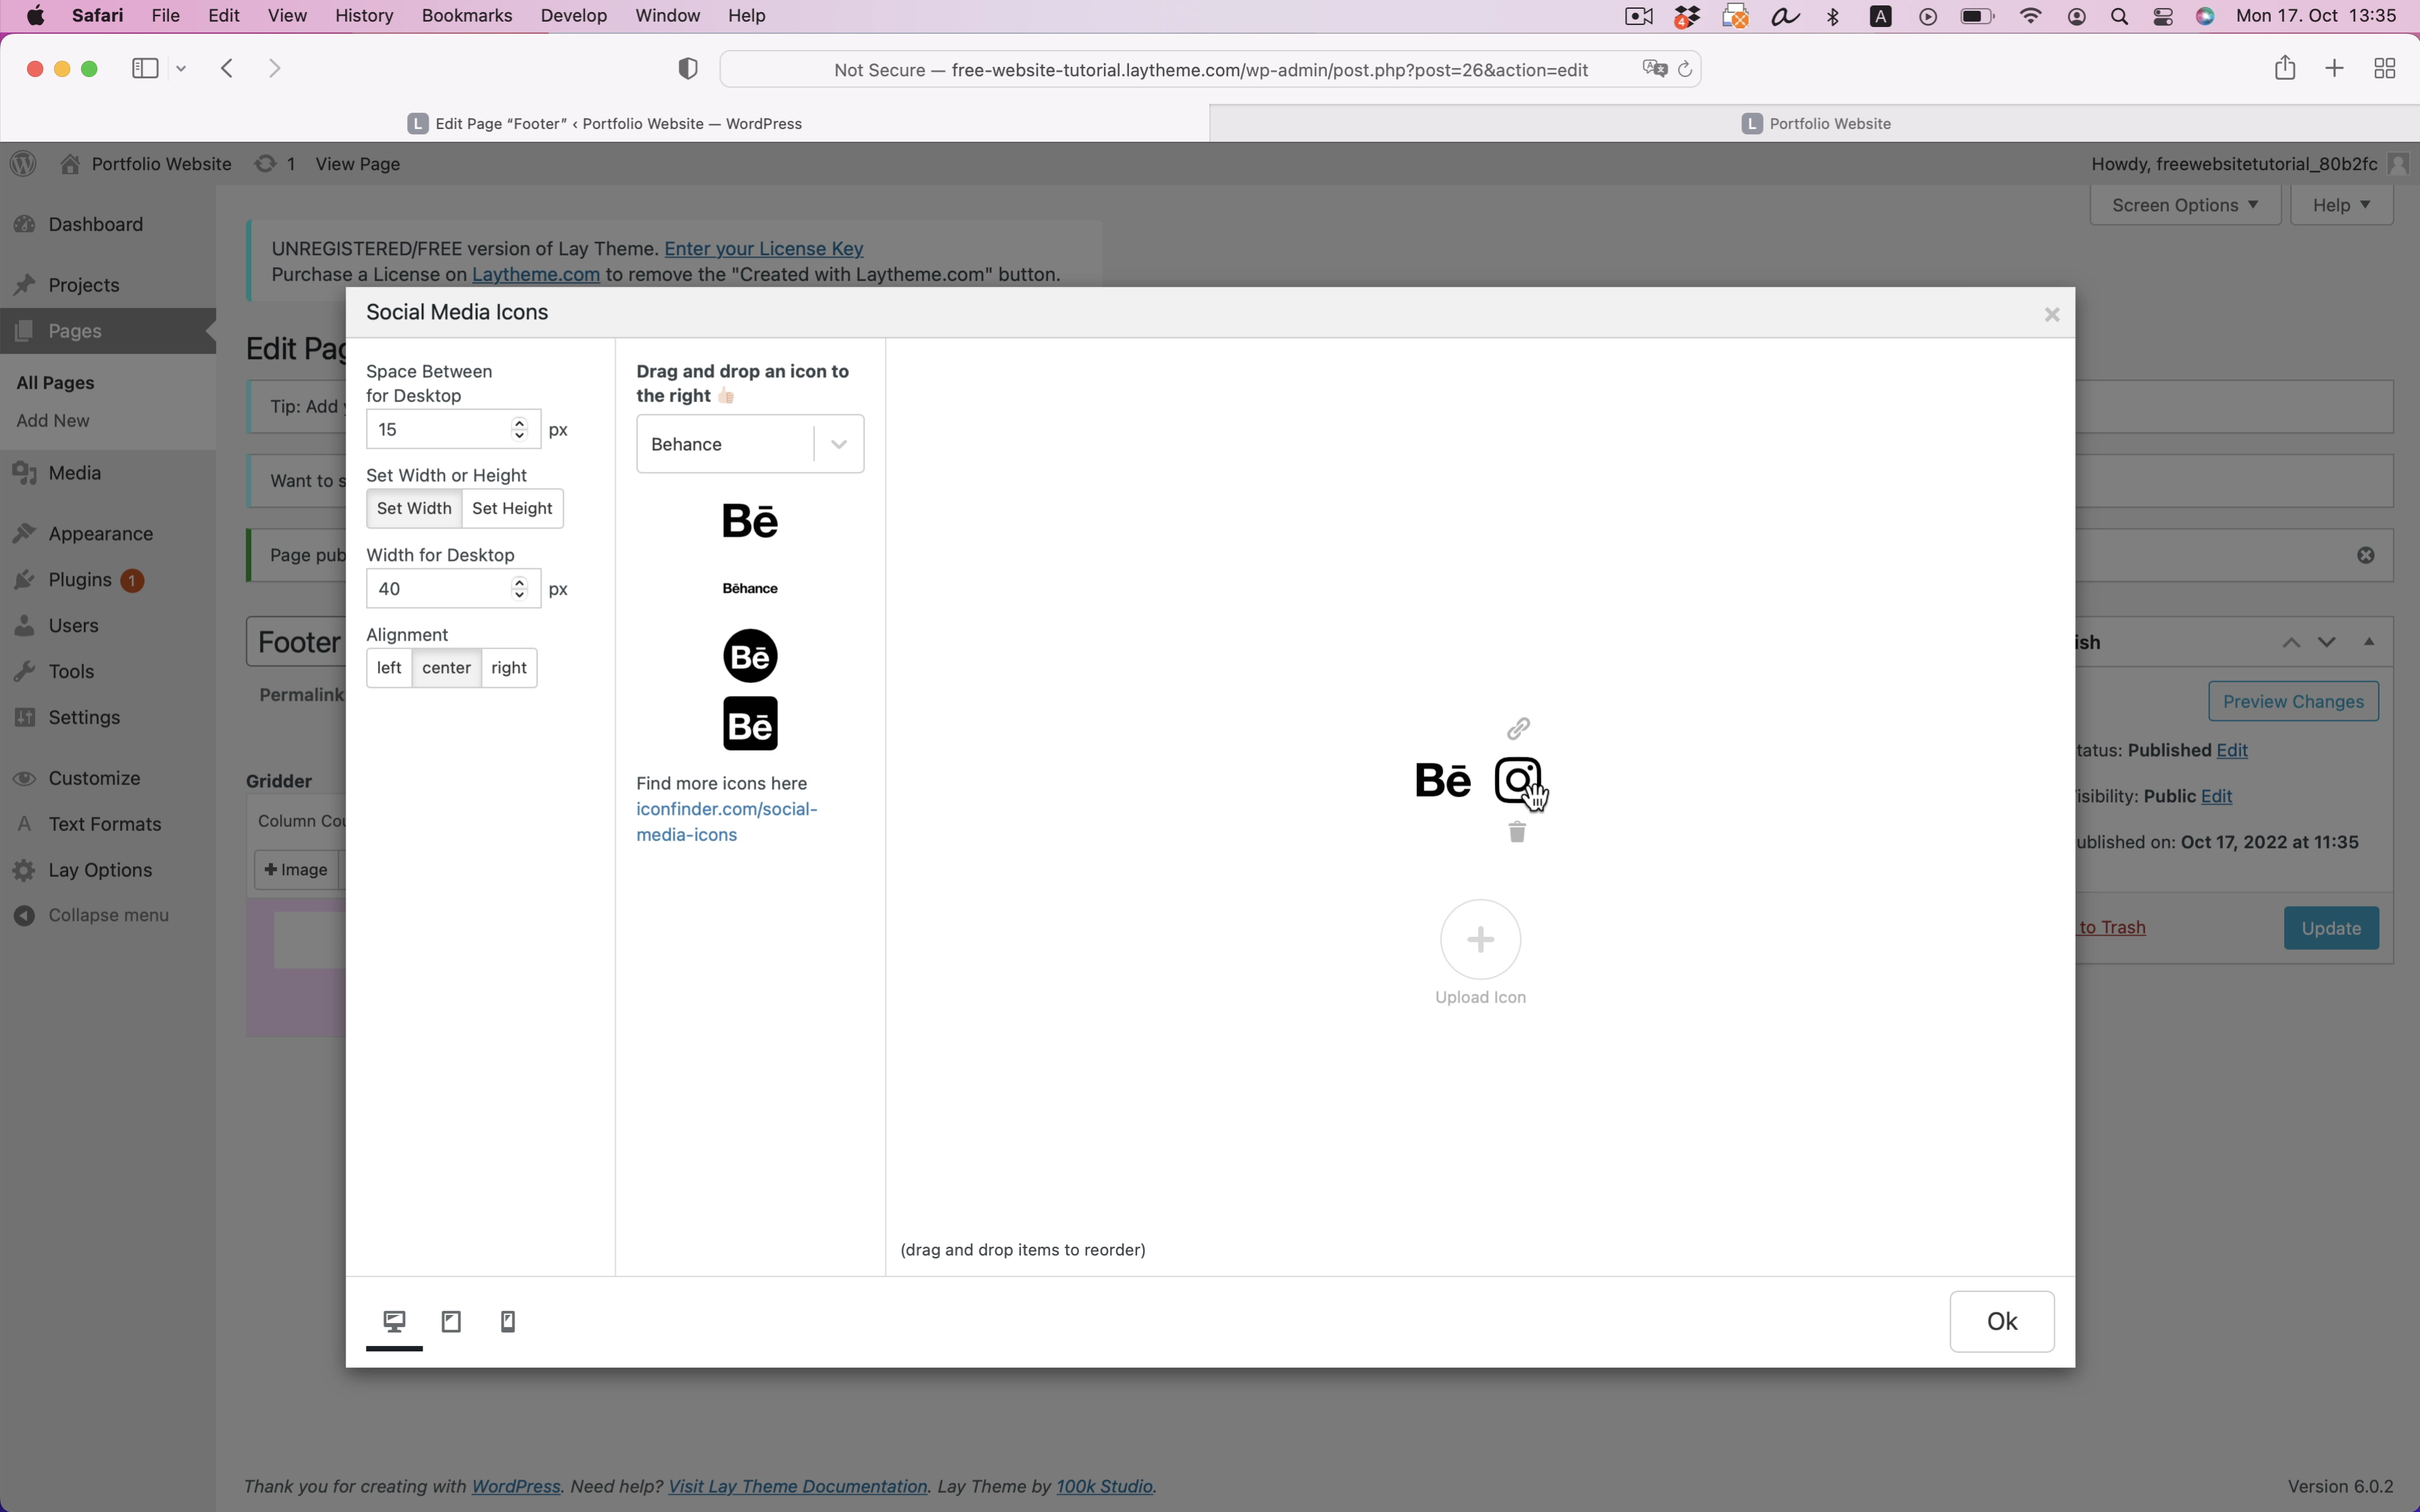
Go to "Lay Options" → "Footer". Click "Active for all Projects". From the dropdown choose the page "Footer" you just created.
Amazing! Look at a project and find the footer below.
Create an About Page
In "Pages" create a new page. Call it "About" and add a Text about your website.
If the text is longer you can make it have a fixed pixel width. This way it won't get too wide. Really wide text is not readable easily so we like to do this.
Right-click your text and choose "Set Text in Pixel Width". Use a value of 700 pixels for Desktop and Tablet.
Add the About Page to your Menu
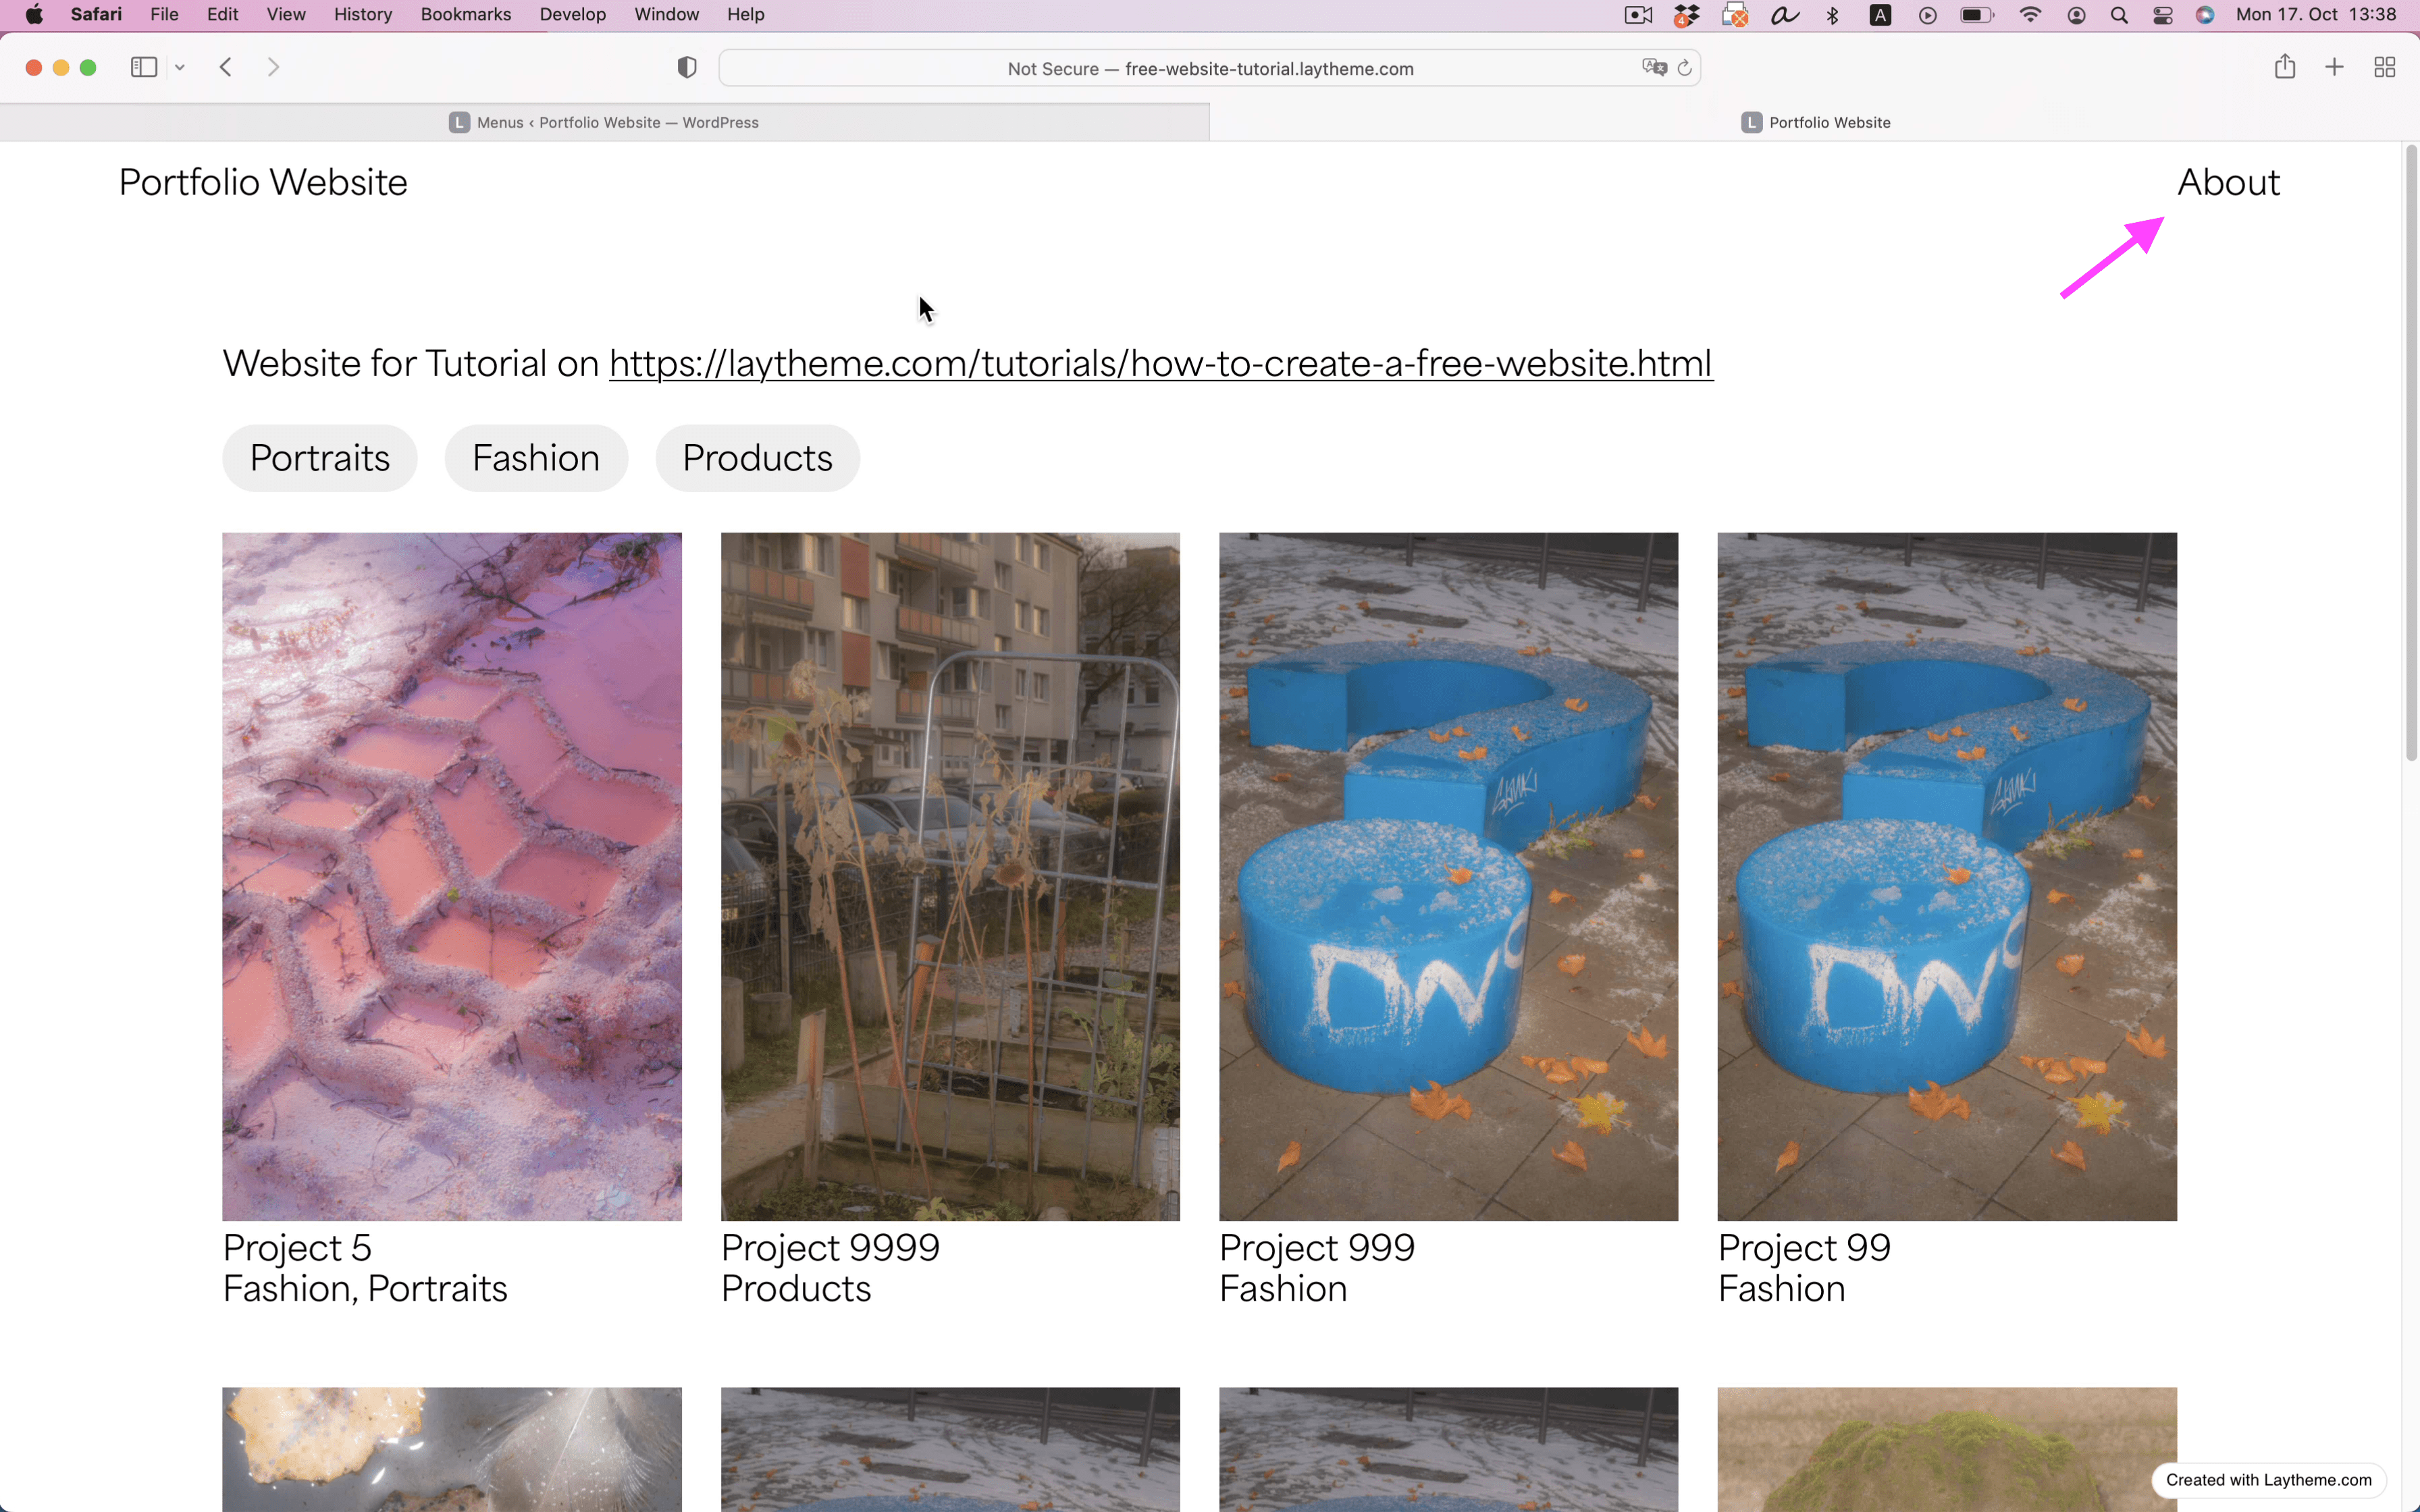
In "Appearance" → "Menus" create a menu. Assign it to the "Primary Menu" location. Add your "About" page to the menu.
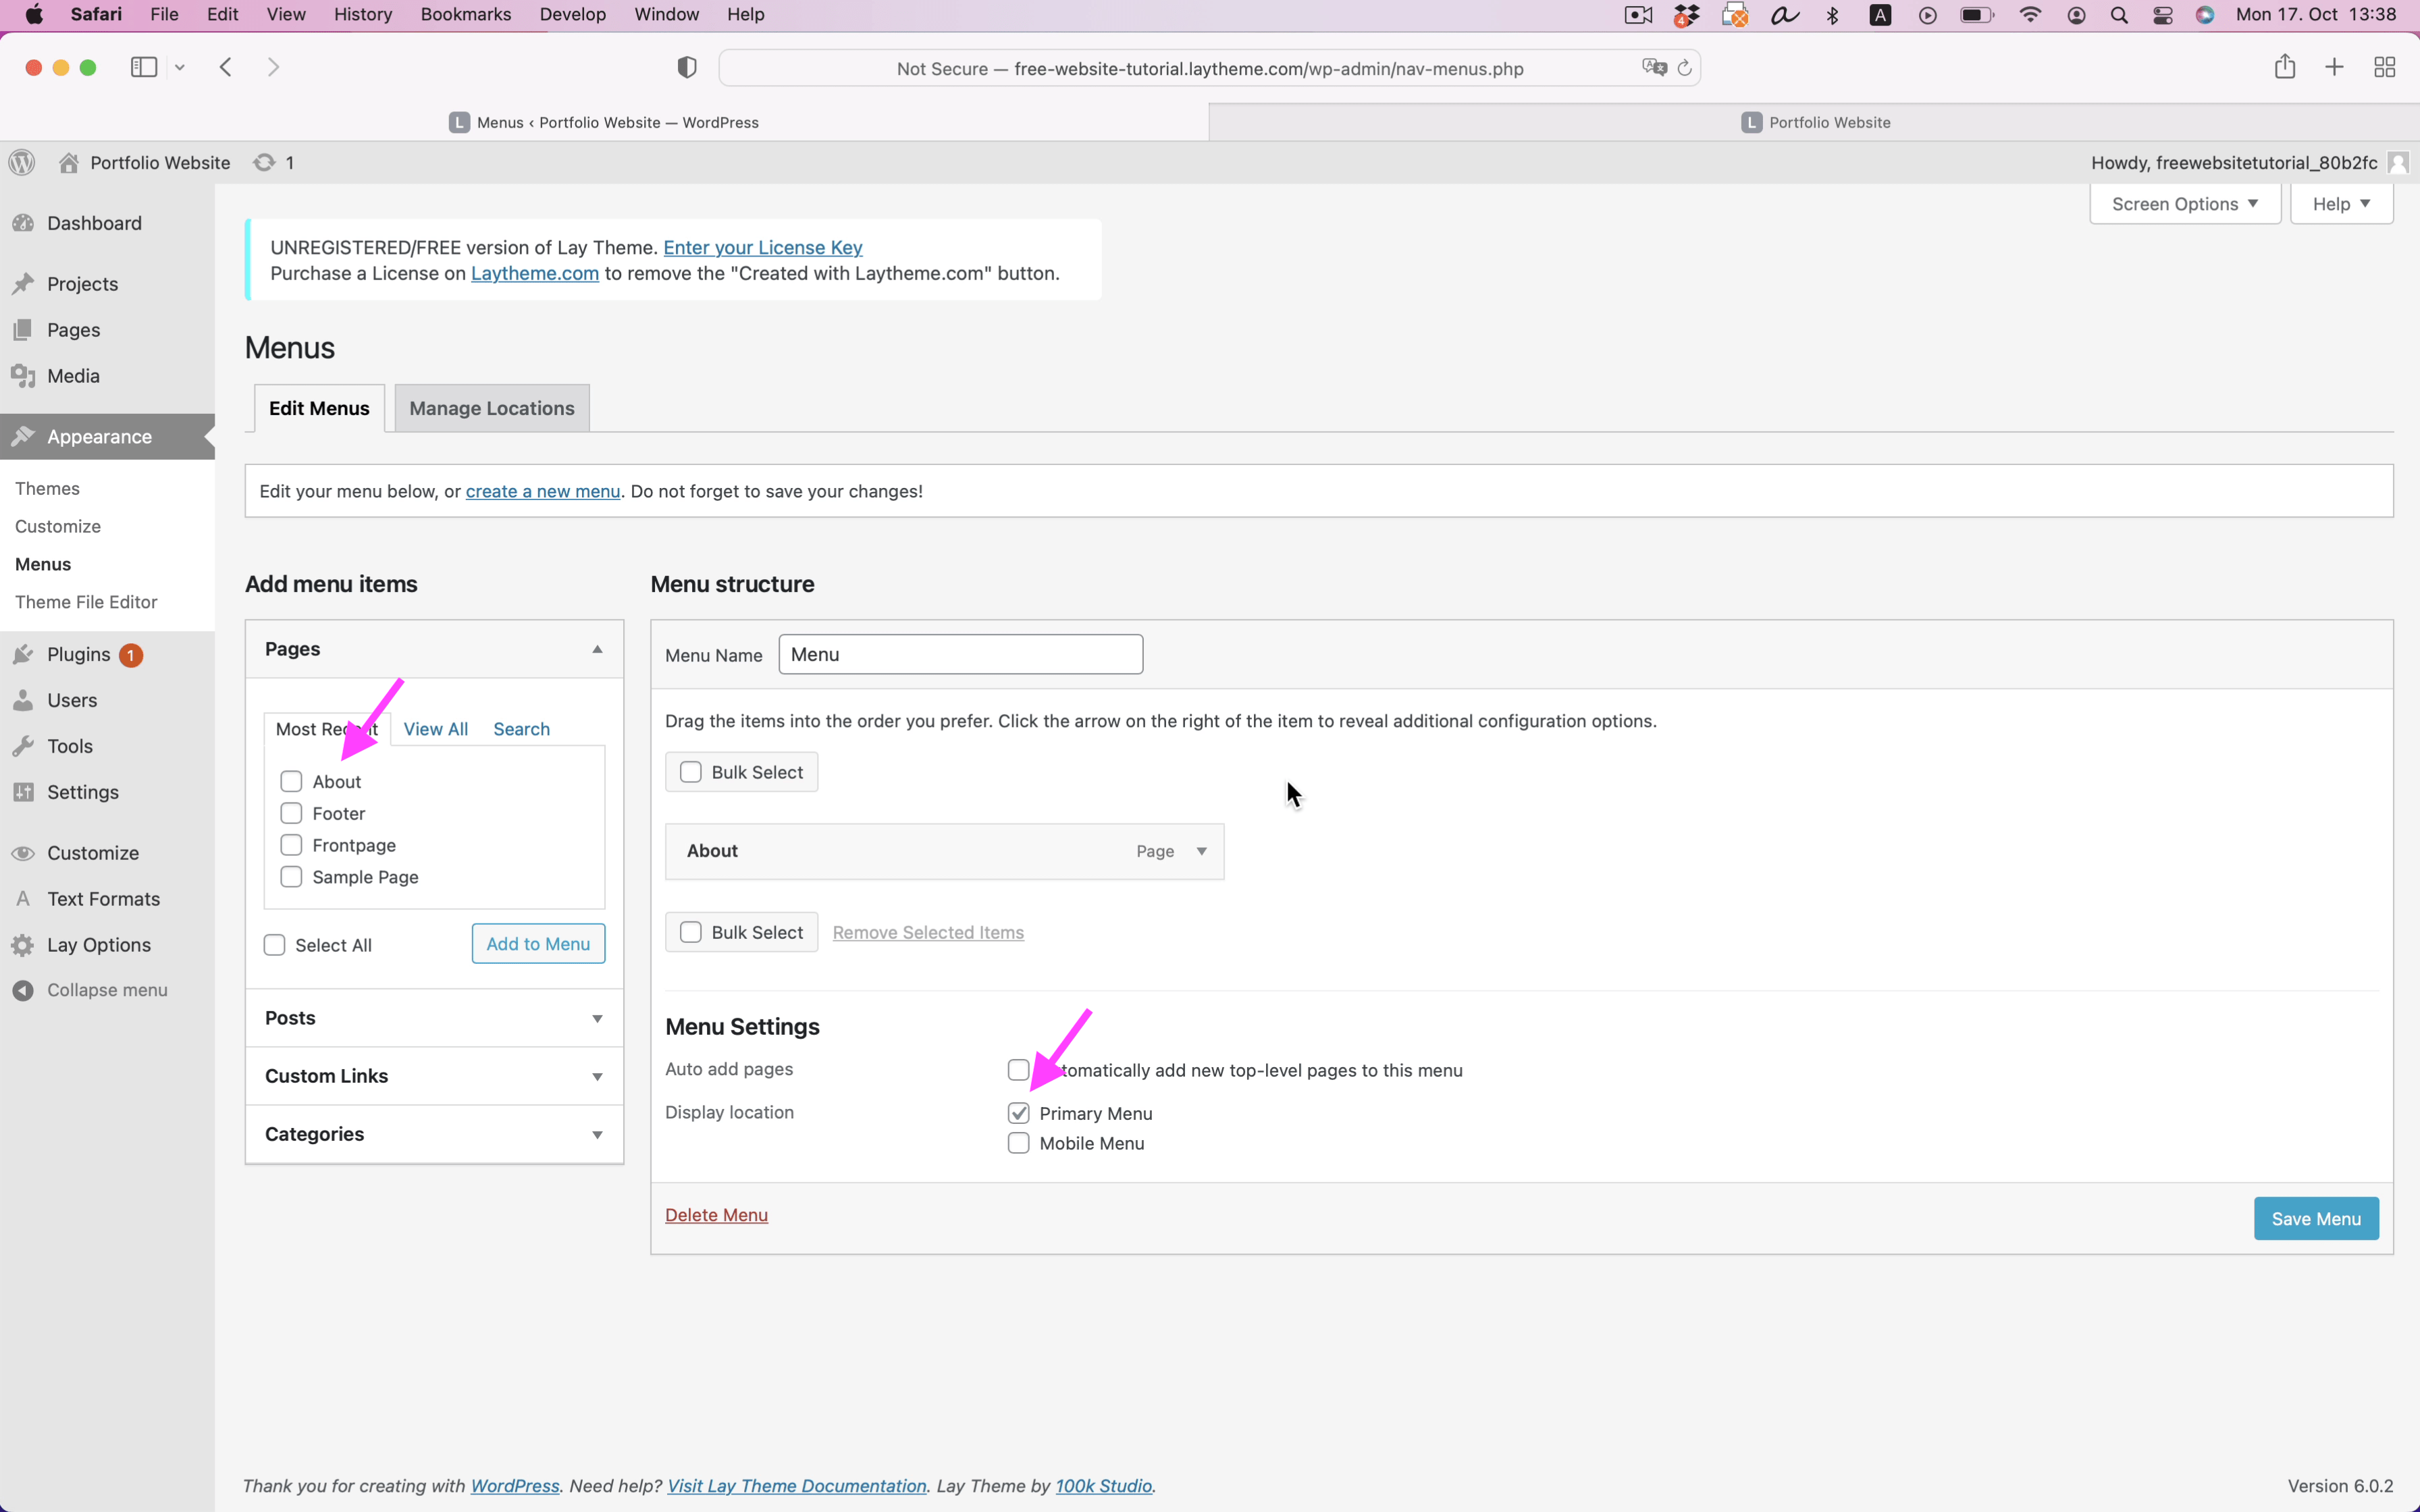
Now the menu shows up on your website:
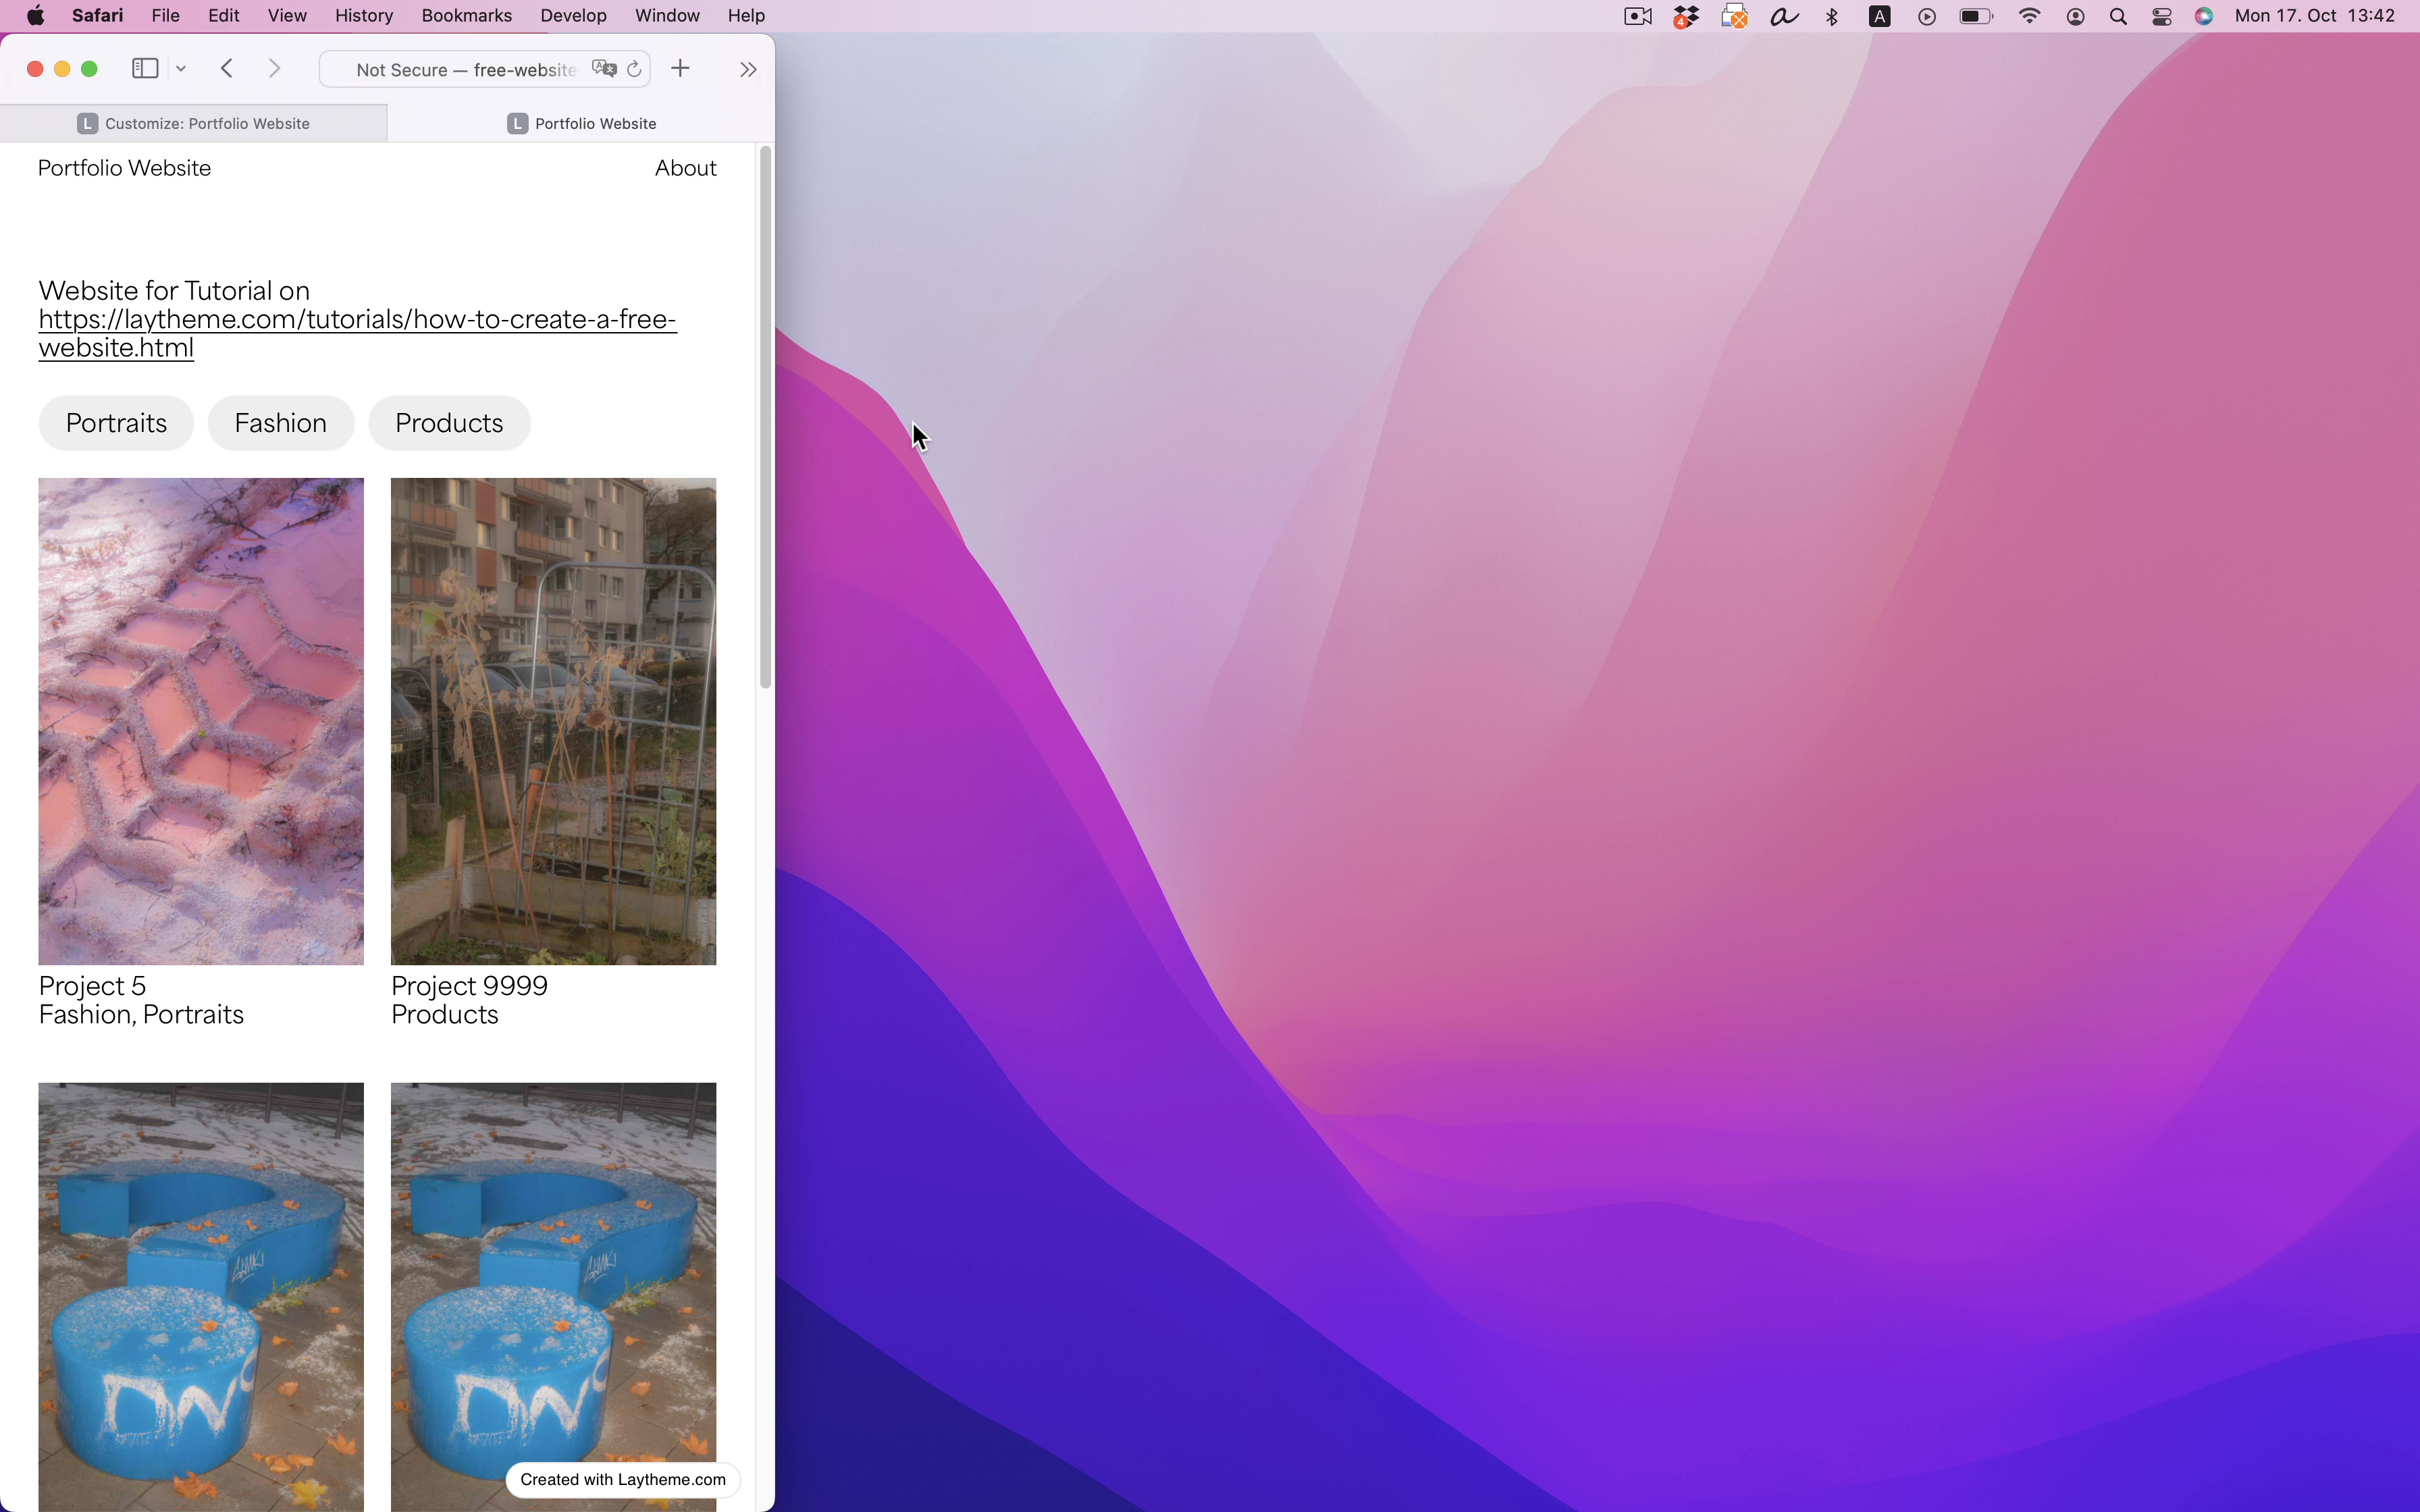
Customize the Mobile Version
When you resize your browser you'll see the mobile version.
We want our mobile version to look like this:
In "Customize" go to "Mobile (Smartphone)".
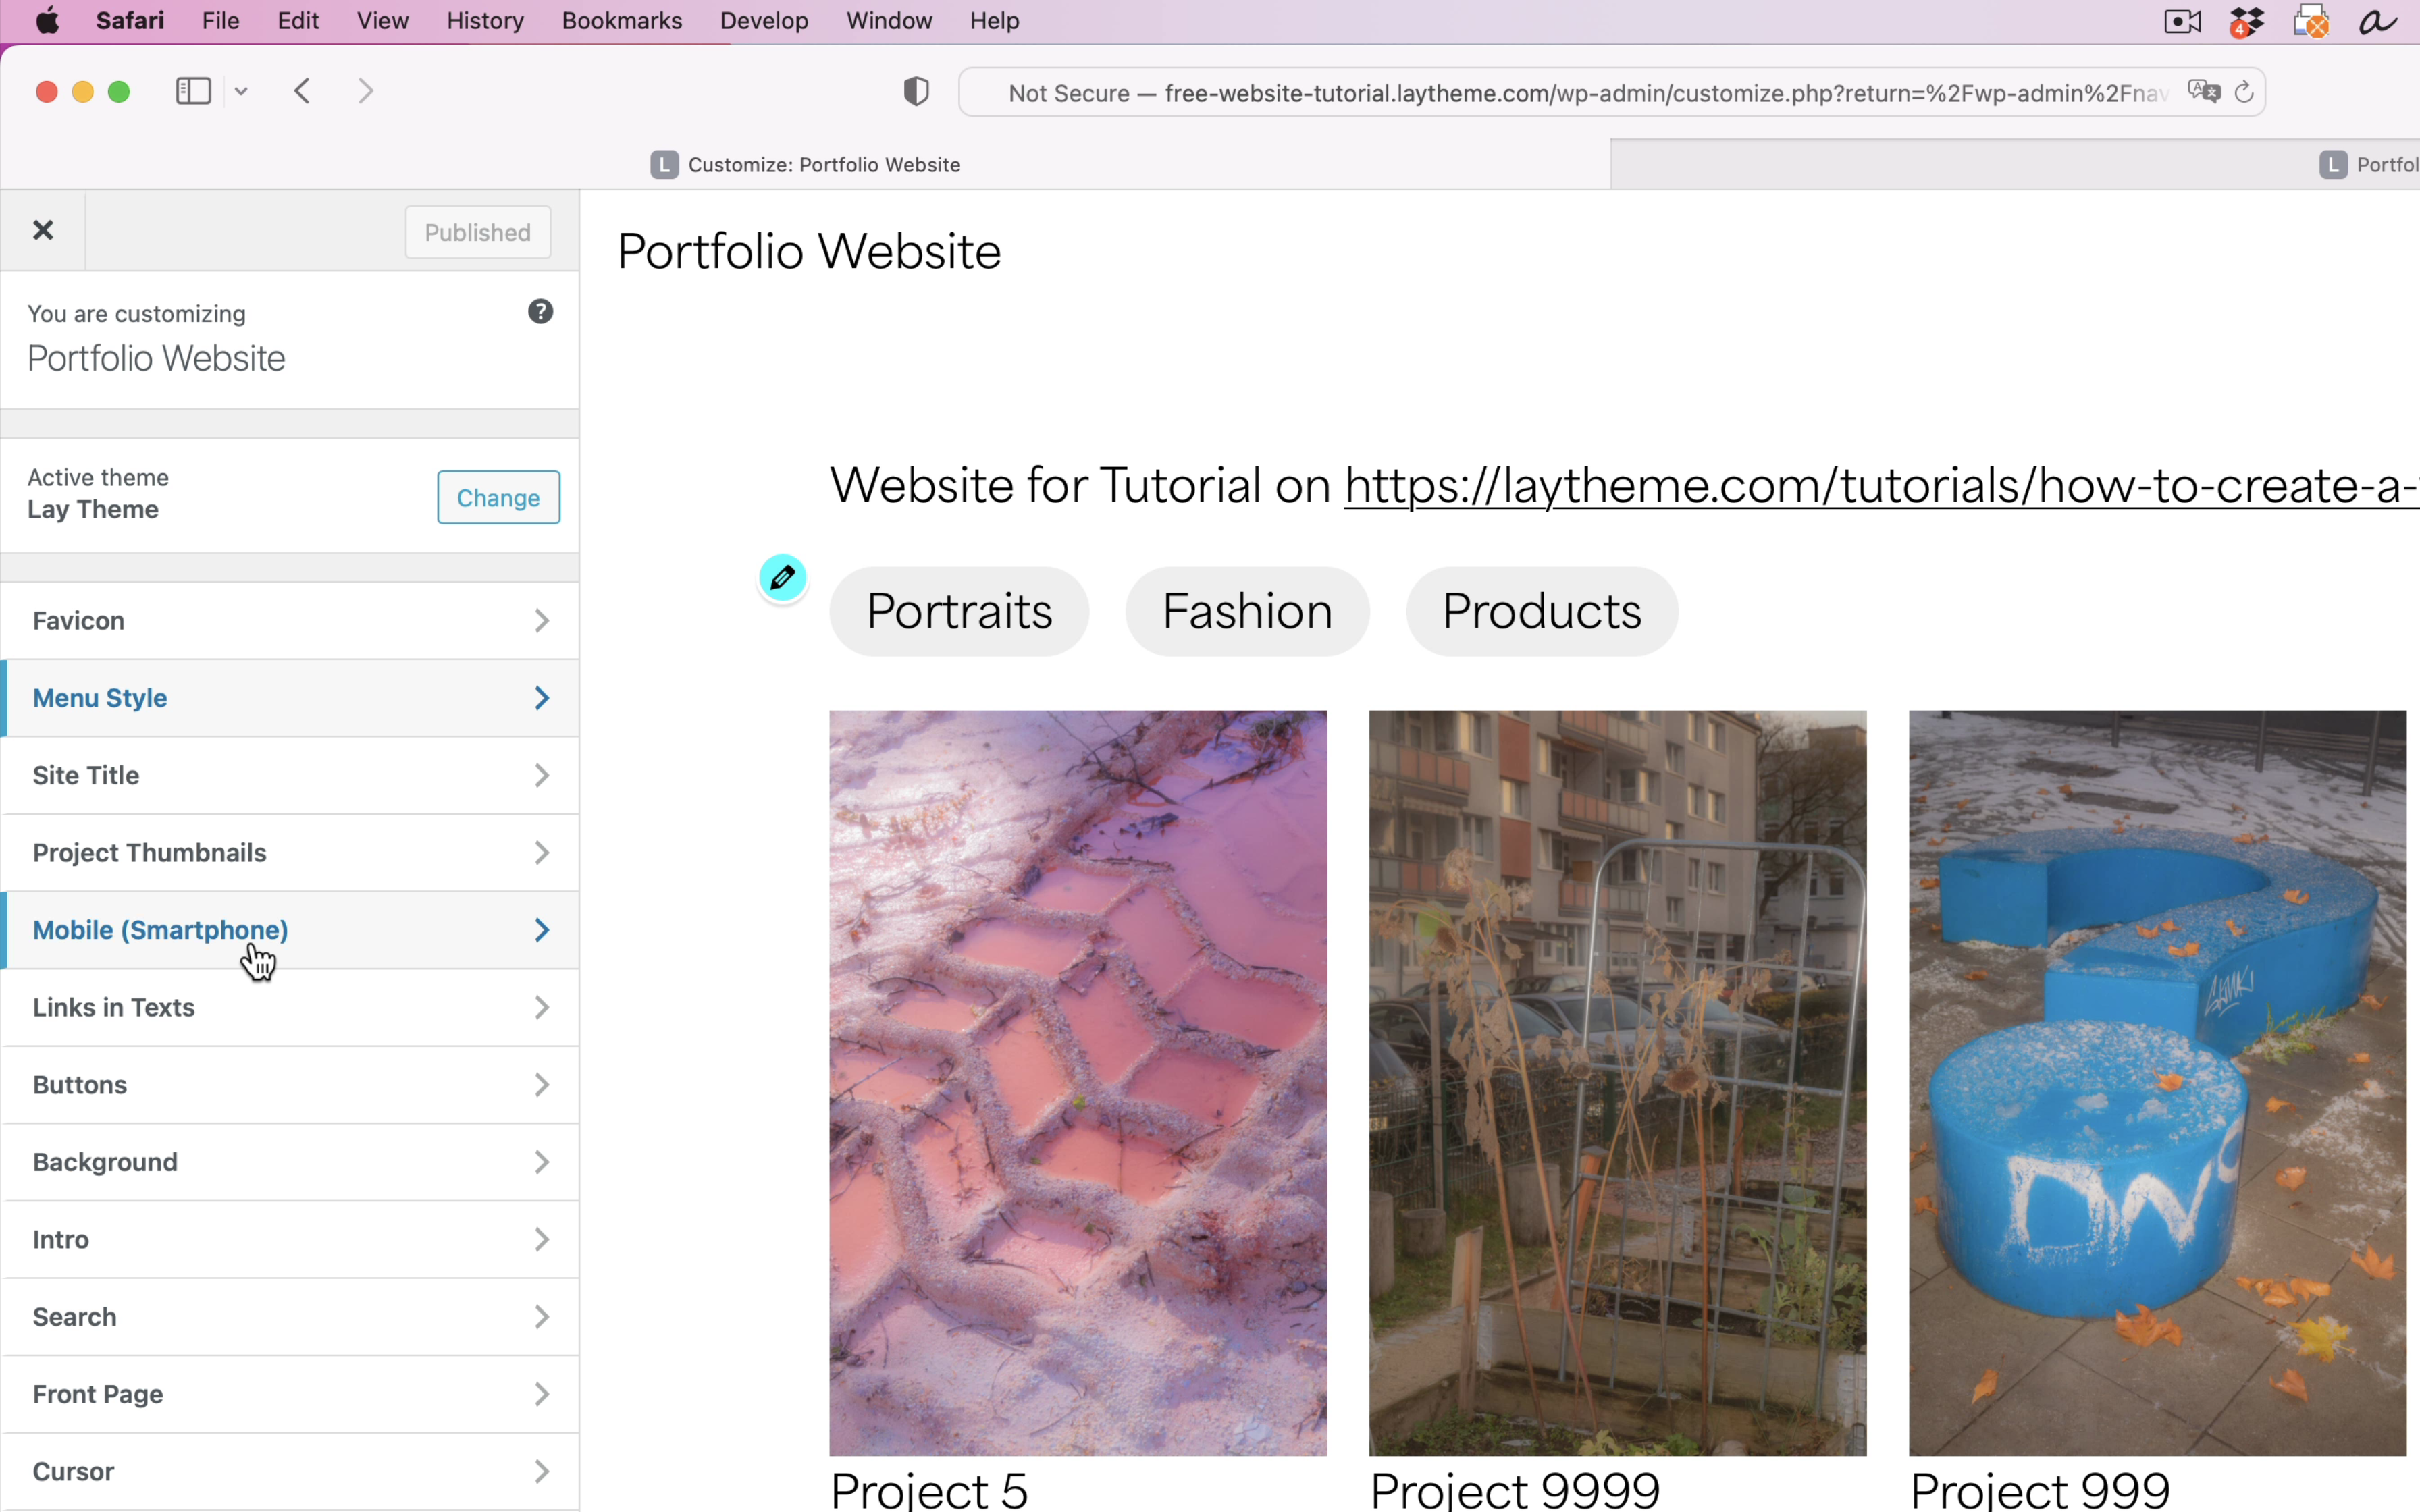
In here you find different sections for mobile settings:
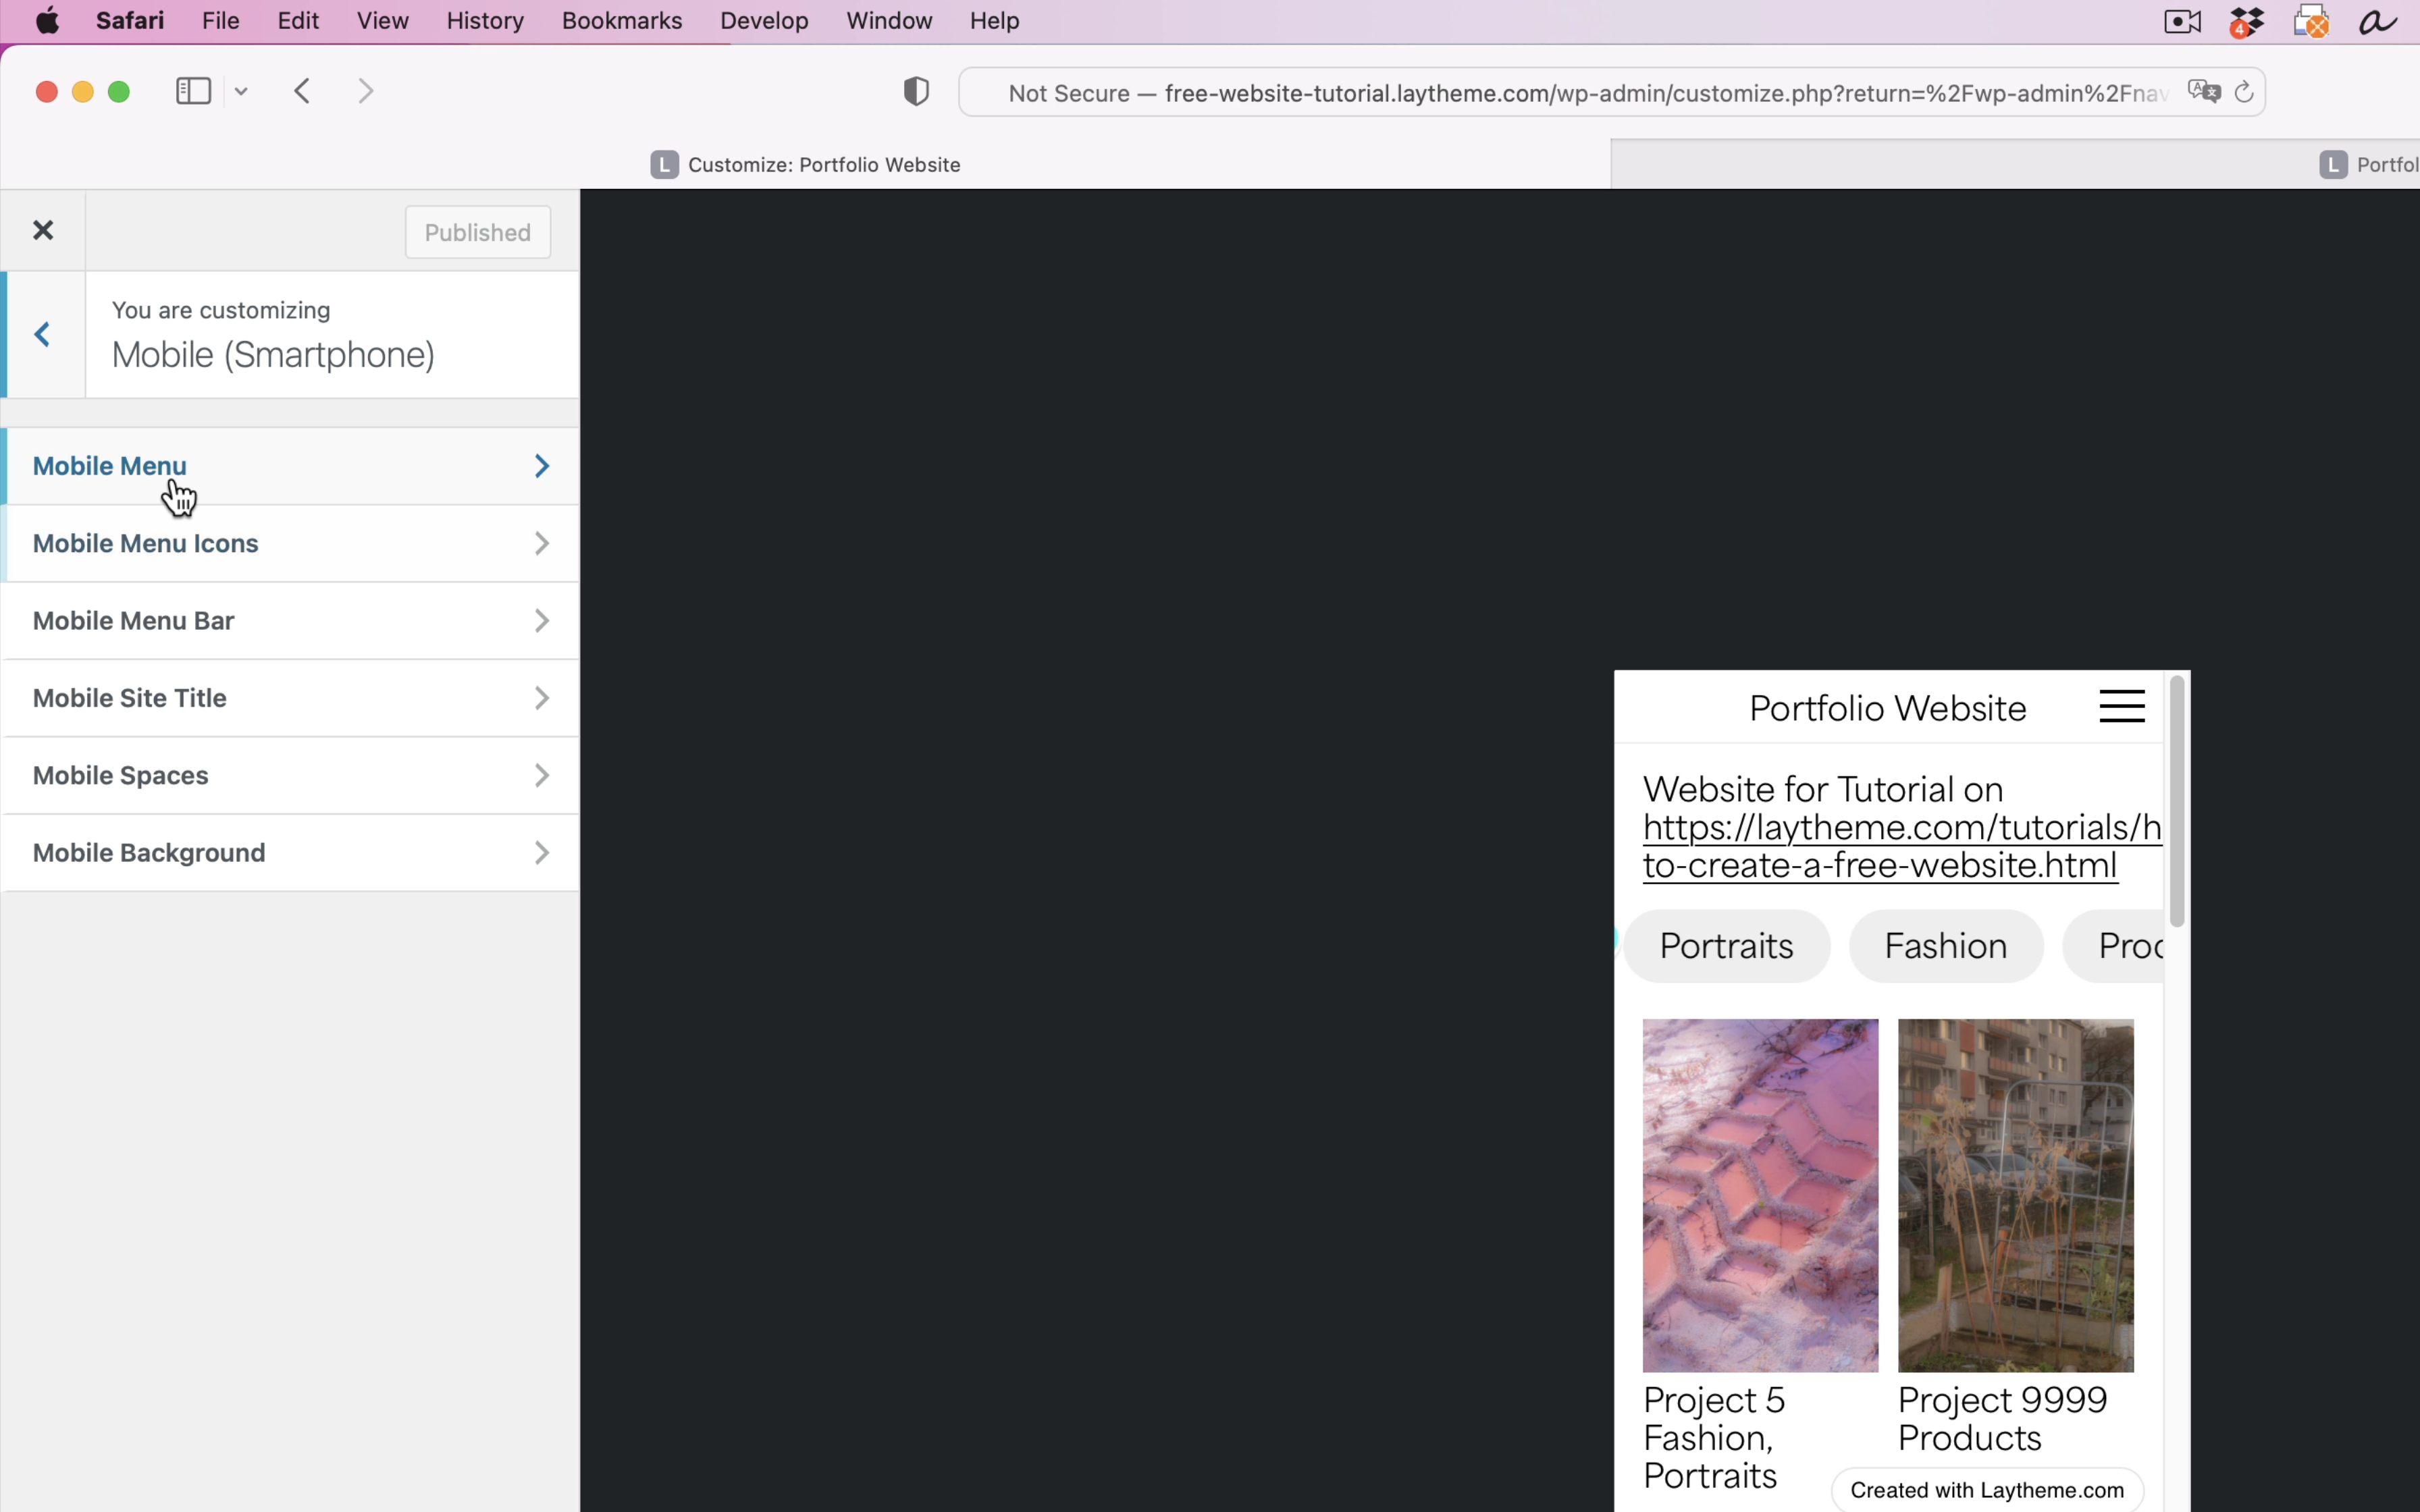
In "Mobile Menu" choose "Menu Style" → "Desktop Menu Style".
In "Mobile Menu Bar" click "hide".
In "Mobile Spaces" choose "Space Top in" → "px" and "Space Top" → "100".
In "Mobile Site Title" choose "Position" → "left" and "Font Size" → "15px" or any value that matches the font size of the "About" menu point.
While we're at it go back to "Customize" where you found the "Mobile (Smartphone)" section. In here, find the "Site Title" and "Menu Style" sections. Let's move the site title and menu closer to the edges of your website.
In "Site Title" and in "Menu Style" → "Primary Menu Style" you'll find position settings.
Congratulations! 🥳
That's it. You just built your first Lay Theme Website.
You may wonder how to make your website more sophisticated. Take a look at Documentation to explore more things you can do. Also look at the "Websites made with Lay Theme" section on laytheme.com for inspiration. Or take a look at our Instagram for more tips.
6. Get Webhosting and Go Online
Go online!
This is the only step that would require spending some cash.
We recommend these webhosts: Netcup (budget, choose server location in USA, Germany or Austria) or Kinsta (premium managed WordPress). We are affiliates of these.
Get webspace and install WordPress on it. Most webhosts include a one-click installer for WordPress.
If your website is less than 2GB in size, you can use the free version of the plugin "Backup Migration". Install it on your local website and just follow the instructions of that plugin.
The "local" website is the one you installed "Local" for in Step 2.
If your website data is bigger you can use the "Duplicator" plugin as described below:
On your local Lay Theme website install the plugin "Duplicator".
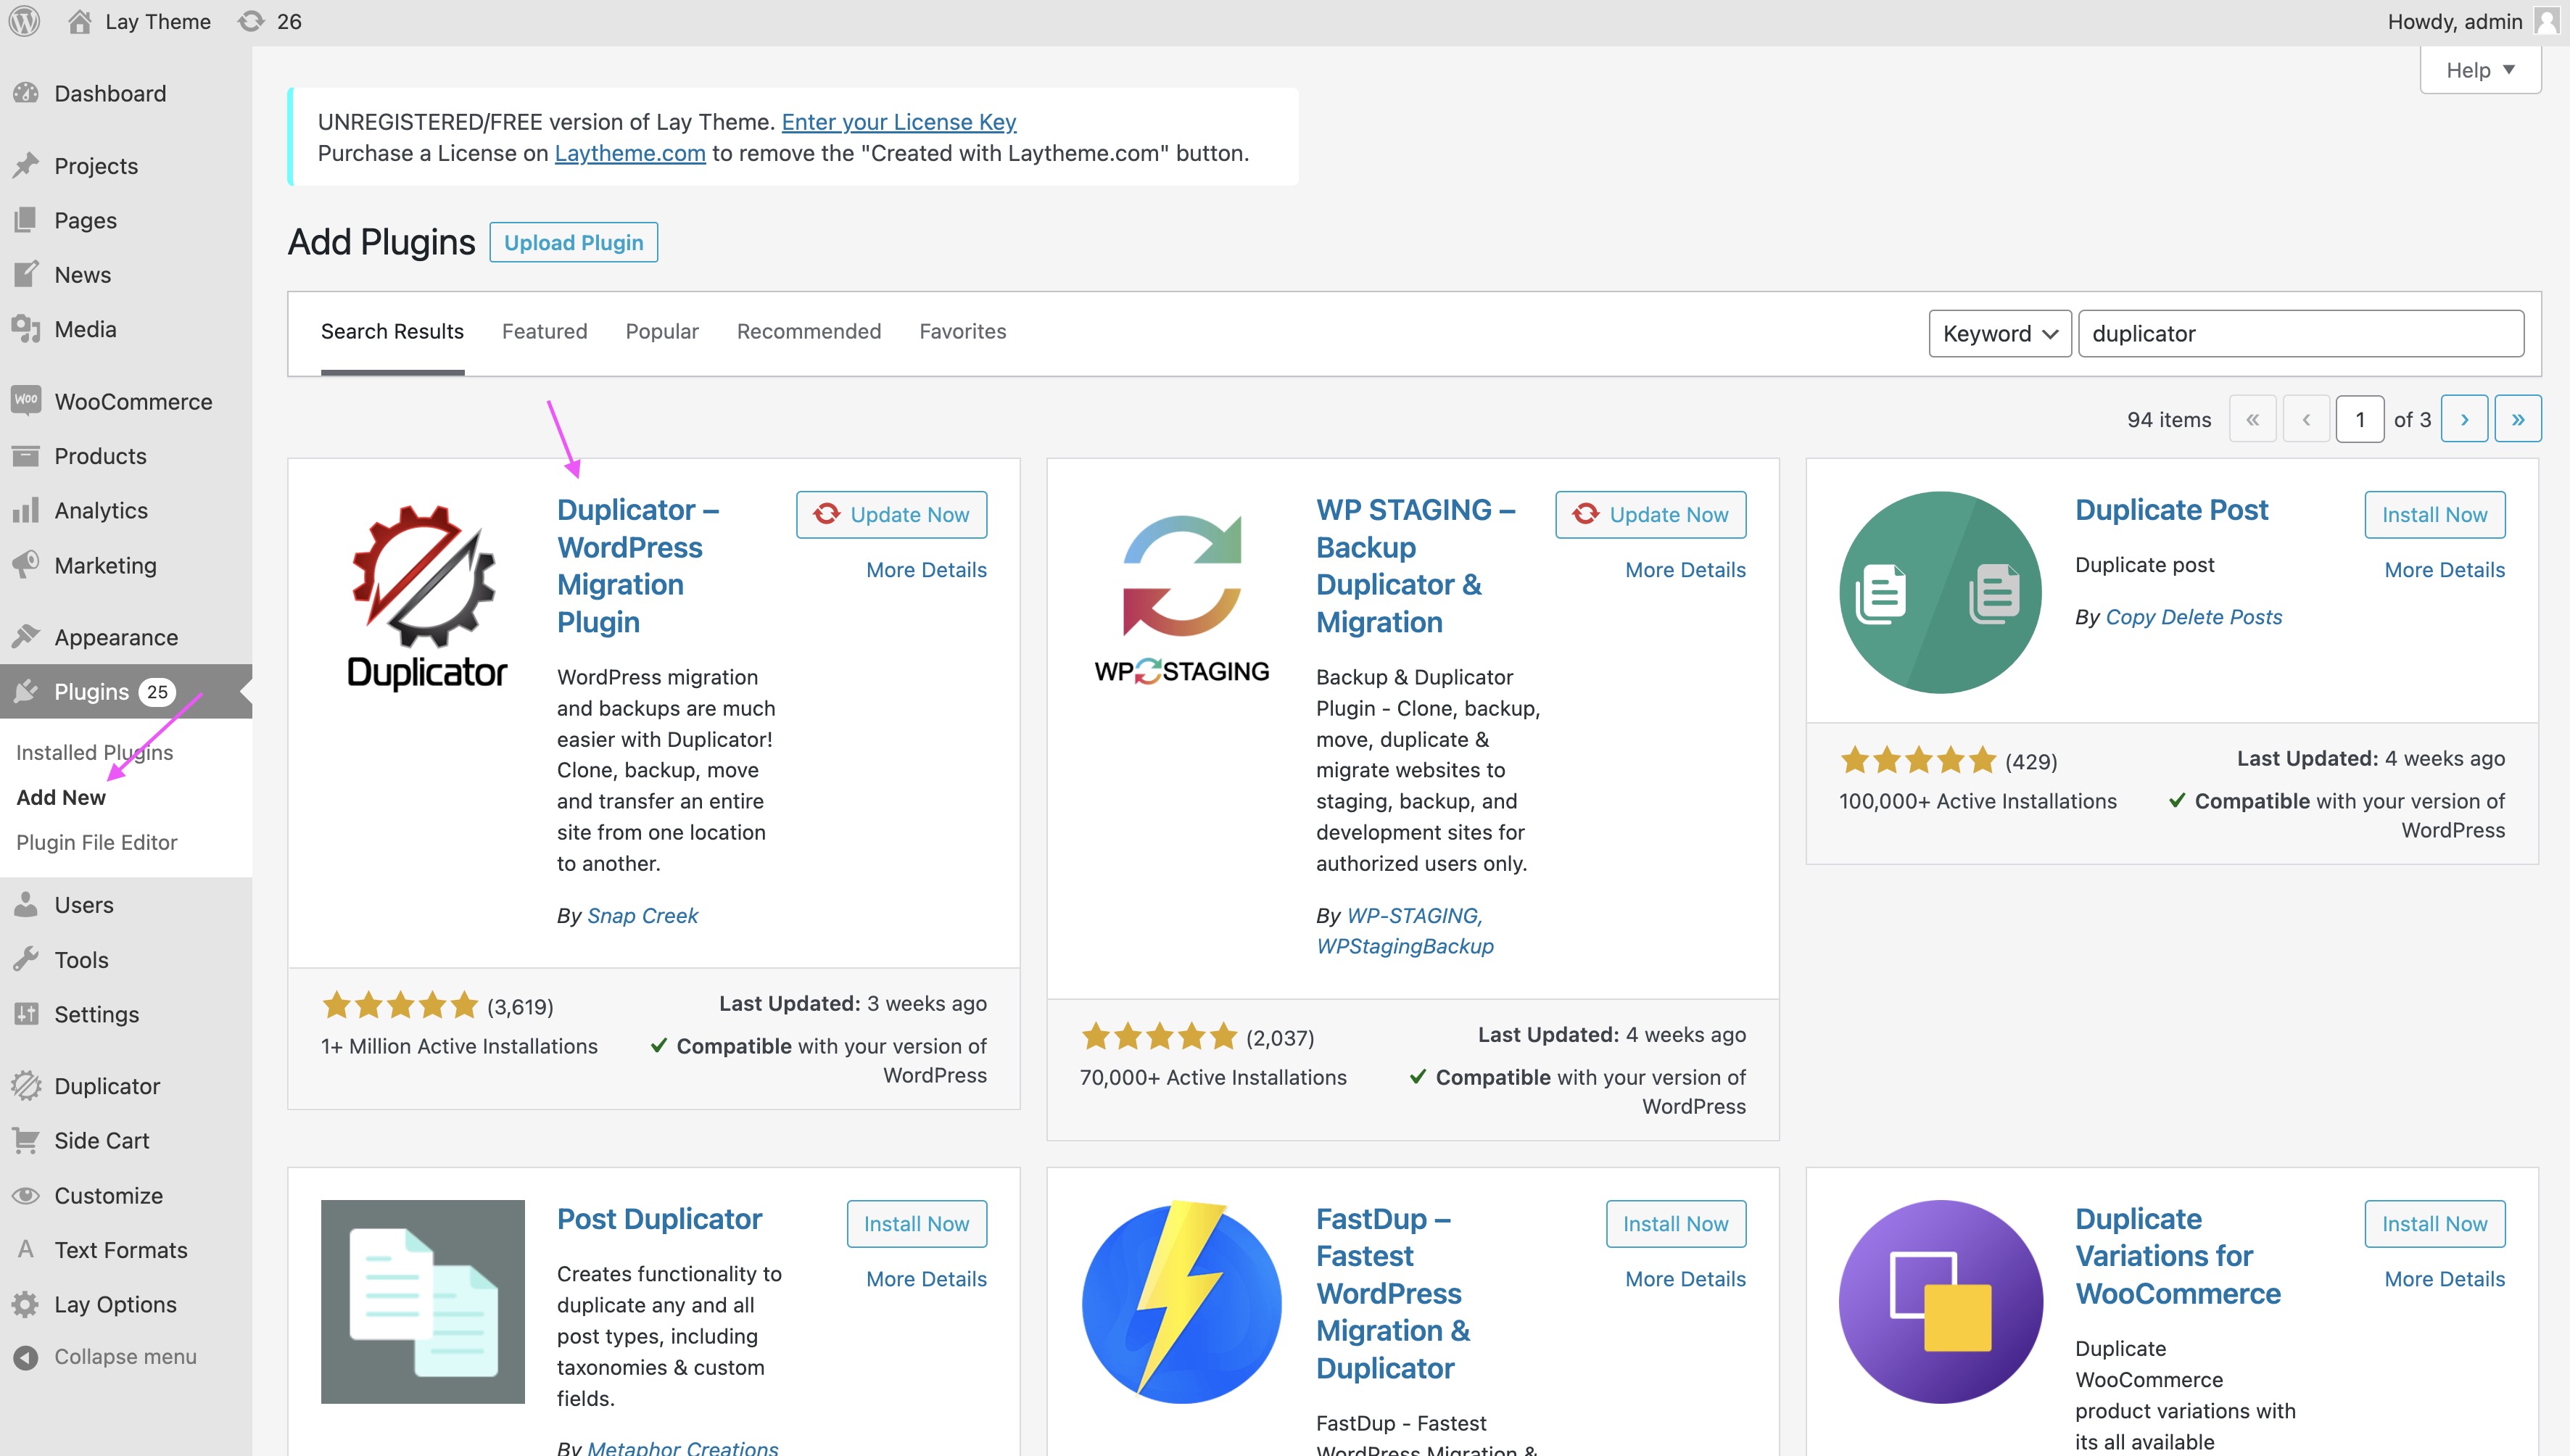
Go to "Duplicator" and use it to move your website to your webhost. You will need your FTP credentials which you can find in your webhost admin area.
Here is a Duplicator tutorial:
Once you export your website and got the files using duplicator you need to upload them to your webhost by using FTP.
Do this by using FileZilla or you can use webftp in your webhost control panel if your webhost provides this.
If you use FileZilla you need to get your FTP login data from your webhost control panel.
Upload the two files to your WordPress root folder where you see the folders "wp-content" and "wp-admin" and "wp-includes".
Then in your webbrowser go to: yourwebsite.com/installer.php
That's it!
Take a look at our Instagram for more tips.