Shop Setup
Make your website a Shop with Lay Theme's WooCommerce integration.
Introduction
To see what a Lay Theme Shop can look like please find an example Shop at http://sucuxshop.laytheme.com/.
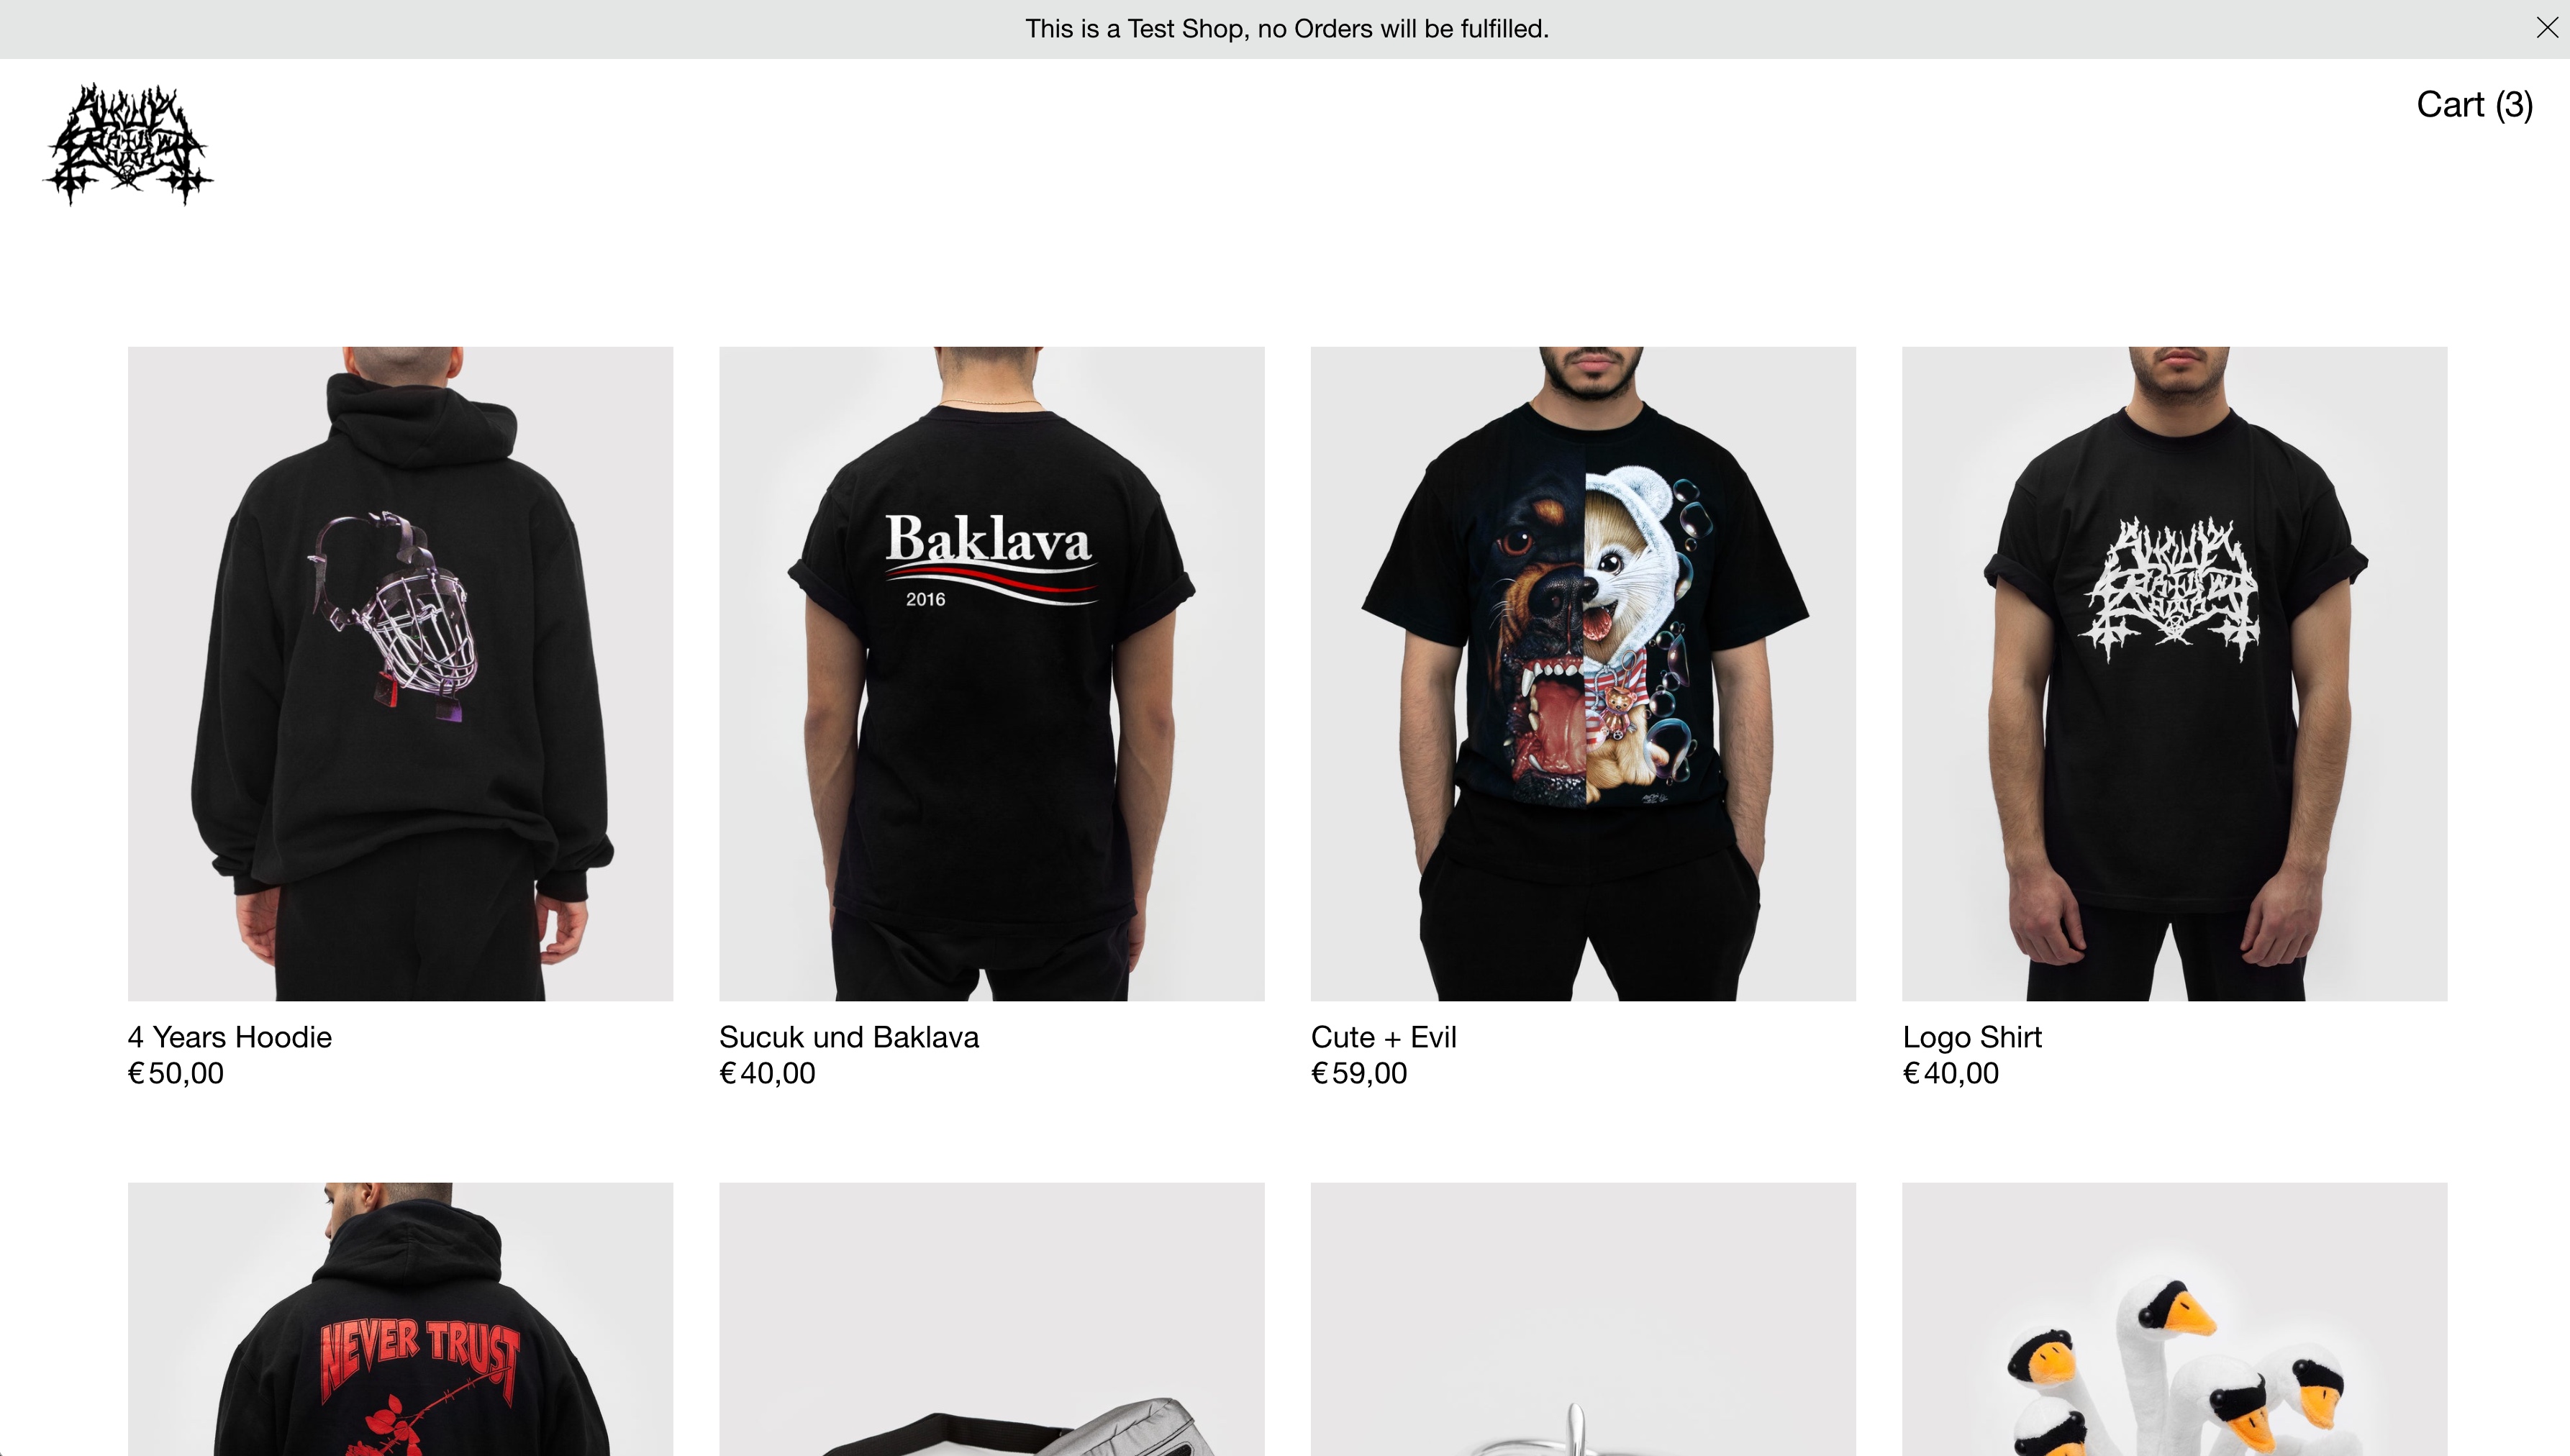
www.sucuxshop.laytheme.com
Take a quick look at WooCommerce's Getting Started Section. This is where most of your questions about how WooCommerce works will be answered and you can go back to that link after you set up the Shop.
If you have any questions please refer to the WooCommerce Docs.
If you cannot find an answer there please post your question in our Shop Forum Section.
These are some points that are still in Development:
- Make sure we have sufficient settings to use background colors other than white for Shops
- Test digital download products
- "My Account" Section where people can register and look at their orders
- WooCommerce is a very feature-rich Plugin. So Lay Theme might not support every WooCommerce Feature.
- We still need to add some kind of hint about Cookies being used and find out a way to make Shops GDPR compliant.
- Test Jetpack compatibility
- Style these pages: "My Account", "Orders", "Downloads", "Addresses", "Account details", "Logout", "Lost password"
1. WooCommerce Installation
- Go to: Plugins → Add New.
- Search for “WooCommerce”.
- Click Install Now.
- Click Activate Now and you’re ready for the WooCommerce Wizard.

WooCommerce Plugin
When WooCommerce is activated for the first time, the WooCommerce Setup Wizard will be the next screen you see after clicking “Activate”. This helps you set up and configure your site with WooCommerce functionality. You don't need to use Jetpack.
For a full walkthrough of the Setup Wizard (also known as the Onboarding Wizard), please read through the WooCommerce Setup Wizard documentation.
2. Prepare Cart, Checkout, Products, Shop Page
Since 2024 we need to do this because of some changes WooCommerce made:
Prepare Cart
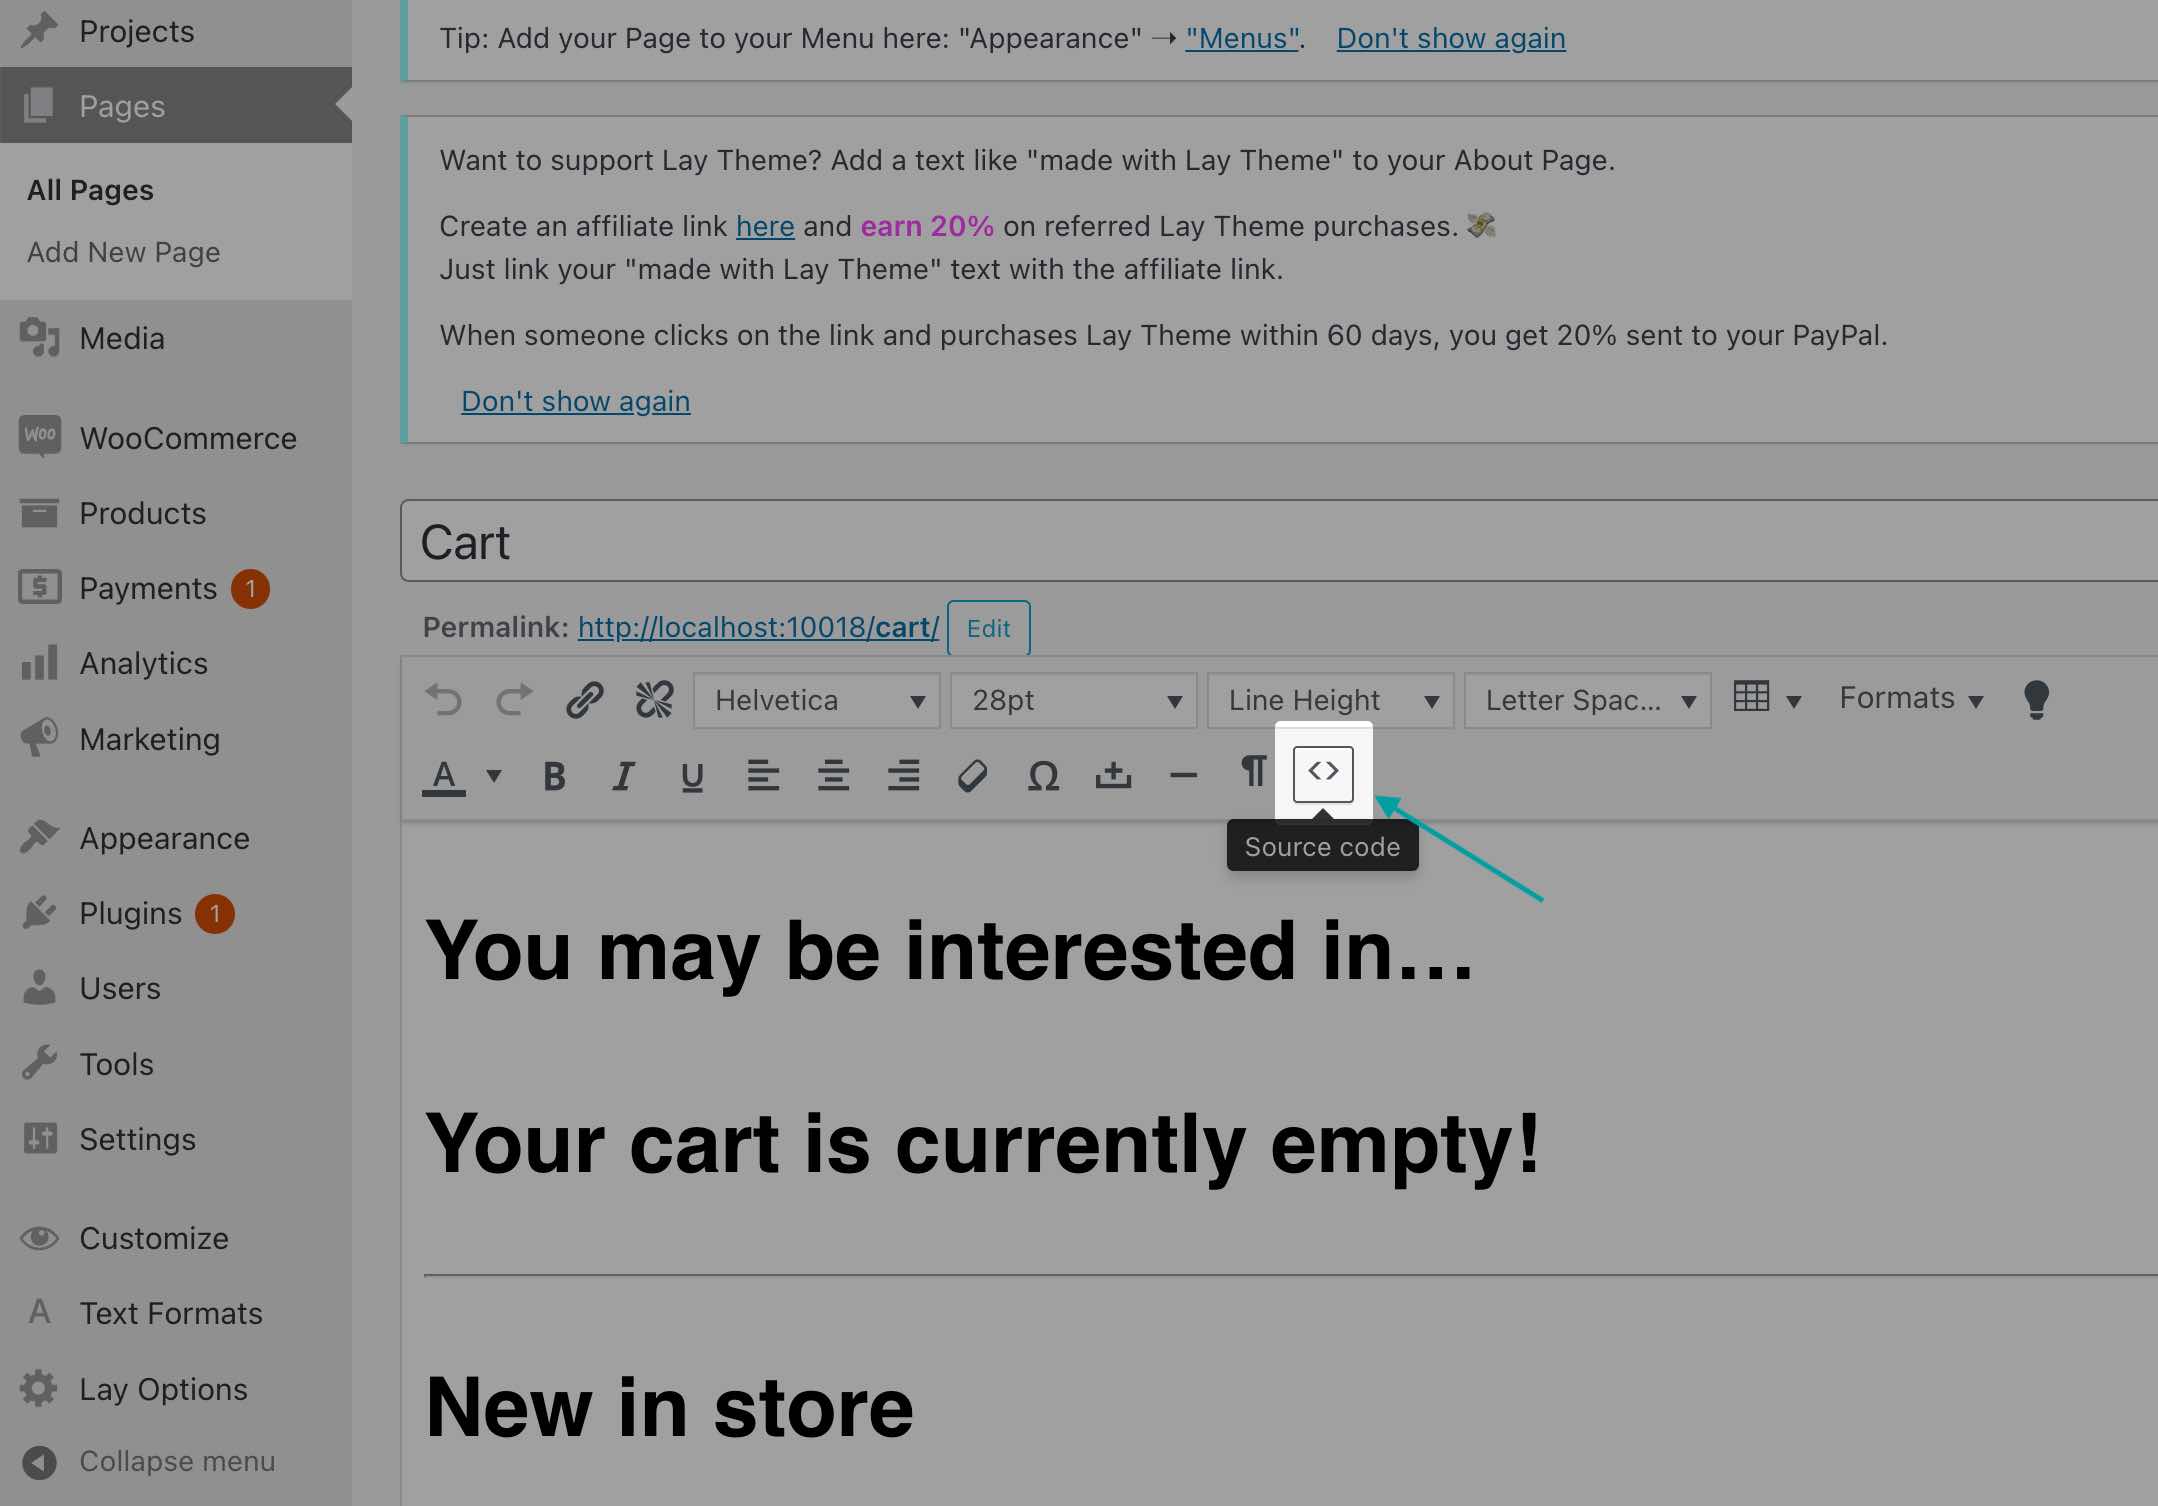
Go to "Pages" → "Cart" and click the "<>" Source Code button. Now delete everything in that source code window.
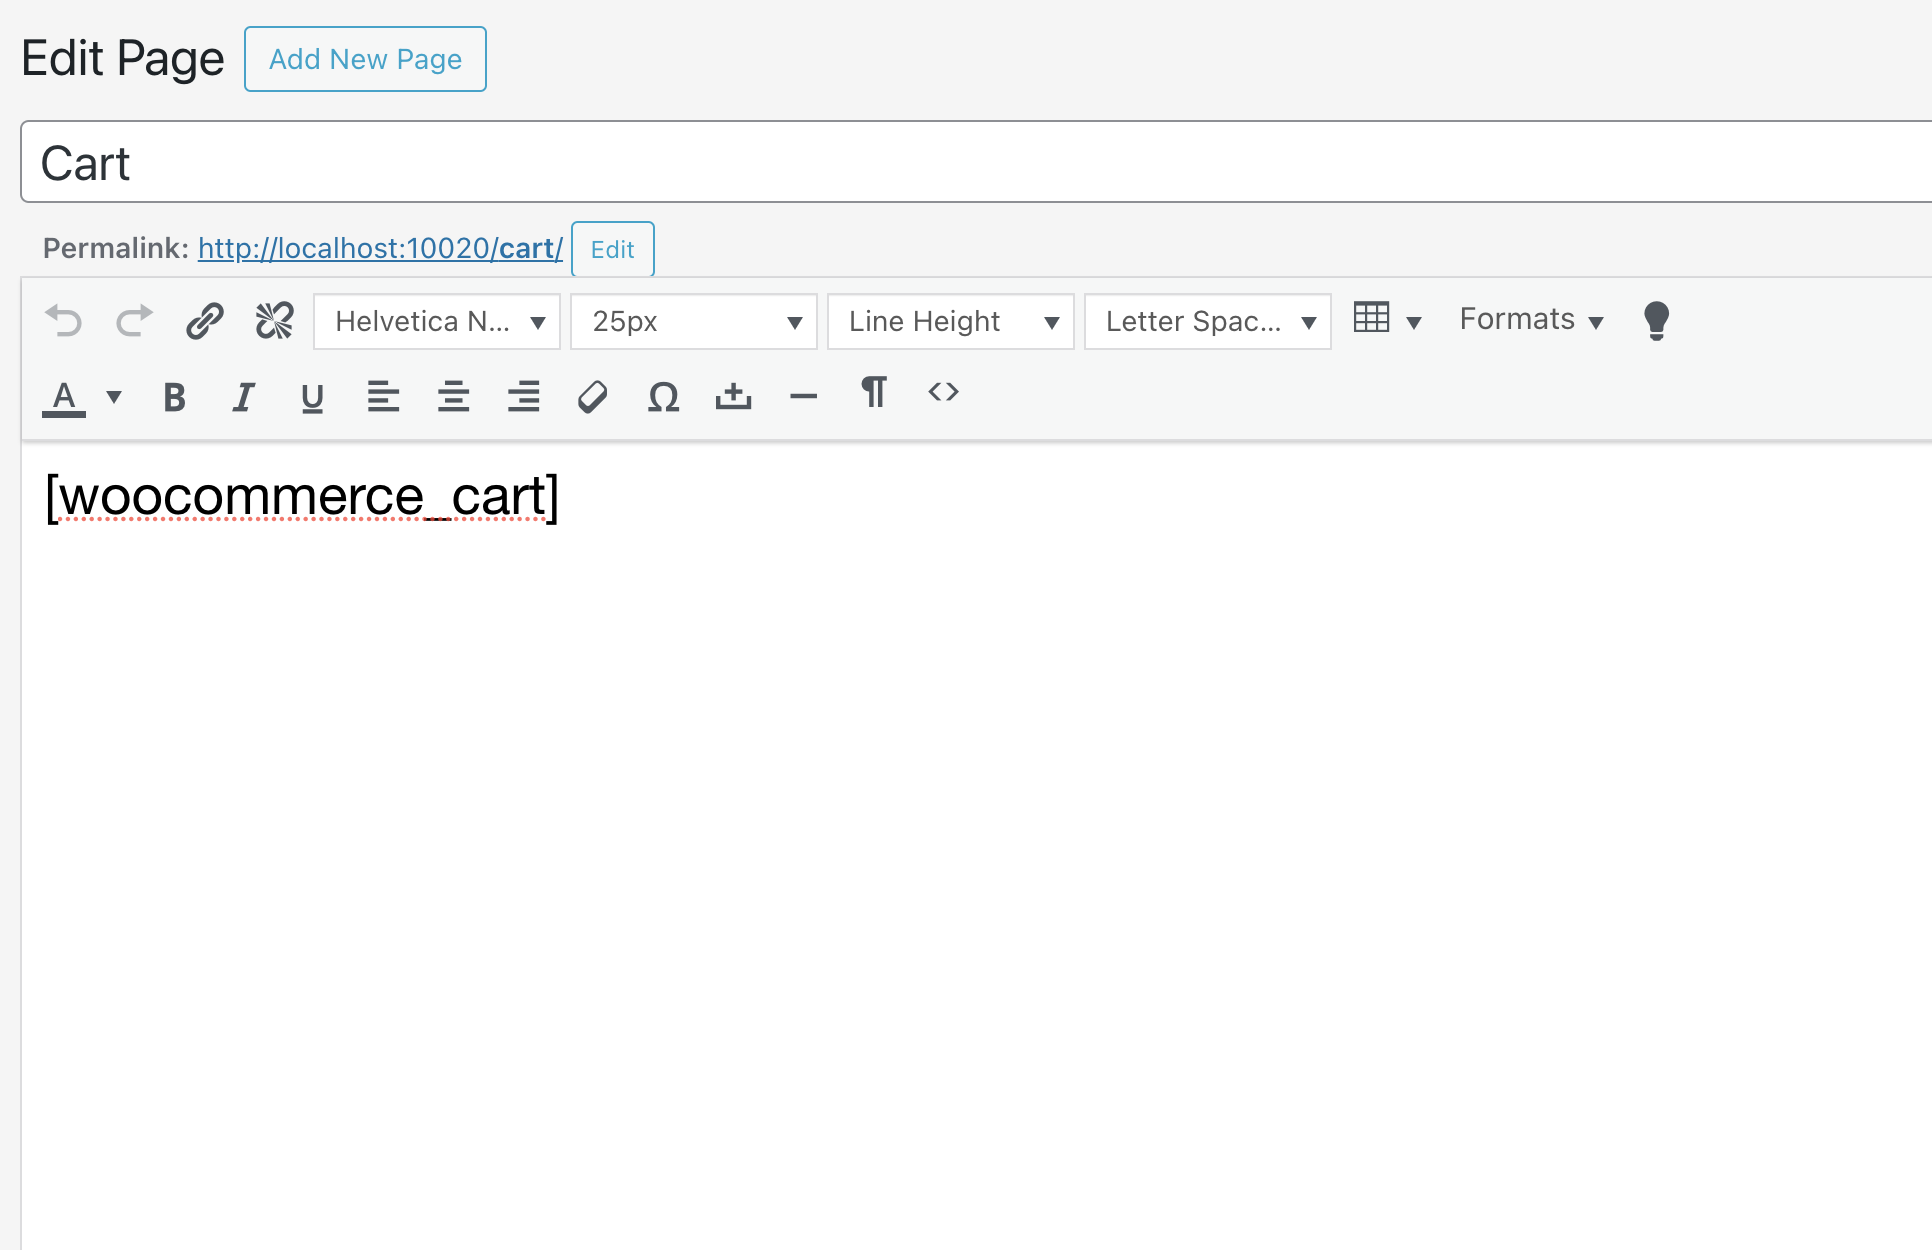
Now enter: [woocommerce_cart] and save the page. It should look like this:
Prepare Checkout
Now we do the same for the "Checkout" page:
In "Pages" → "Checkout", click the "<>" Source Code button. Now delete everything in that source code window:
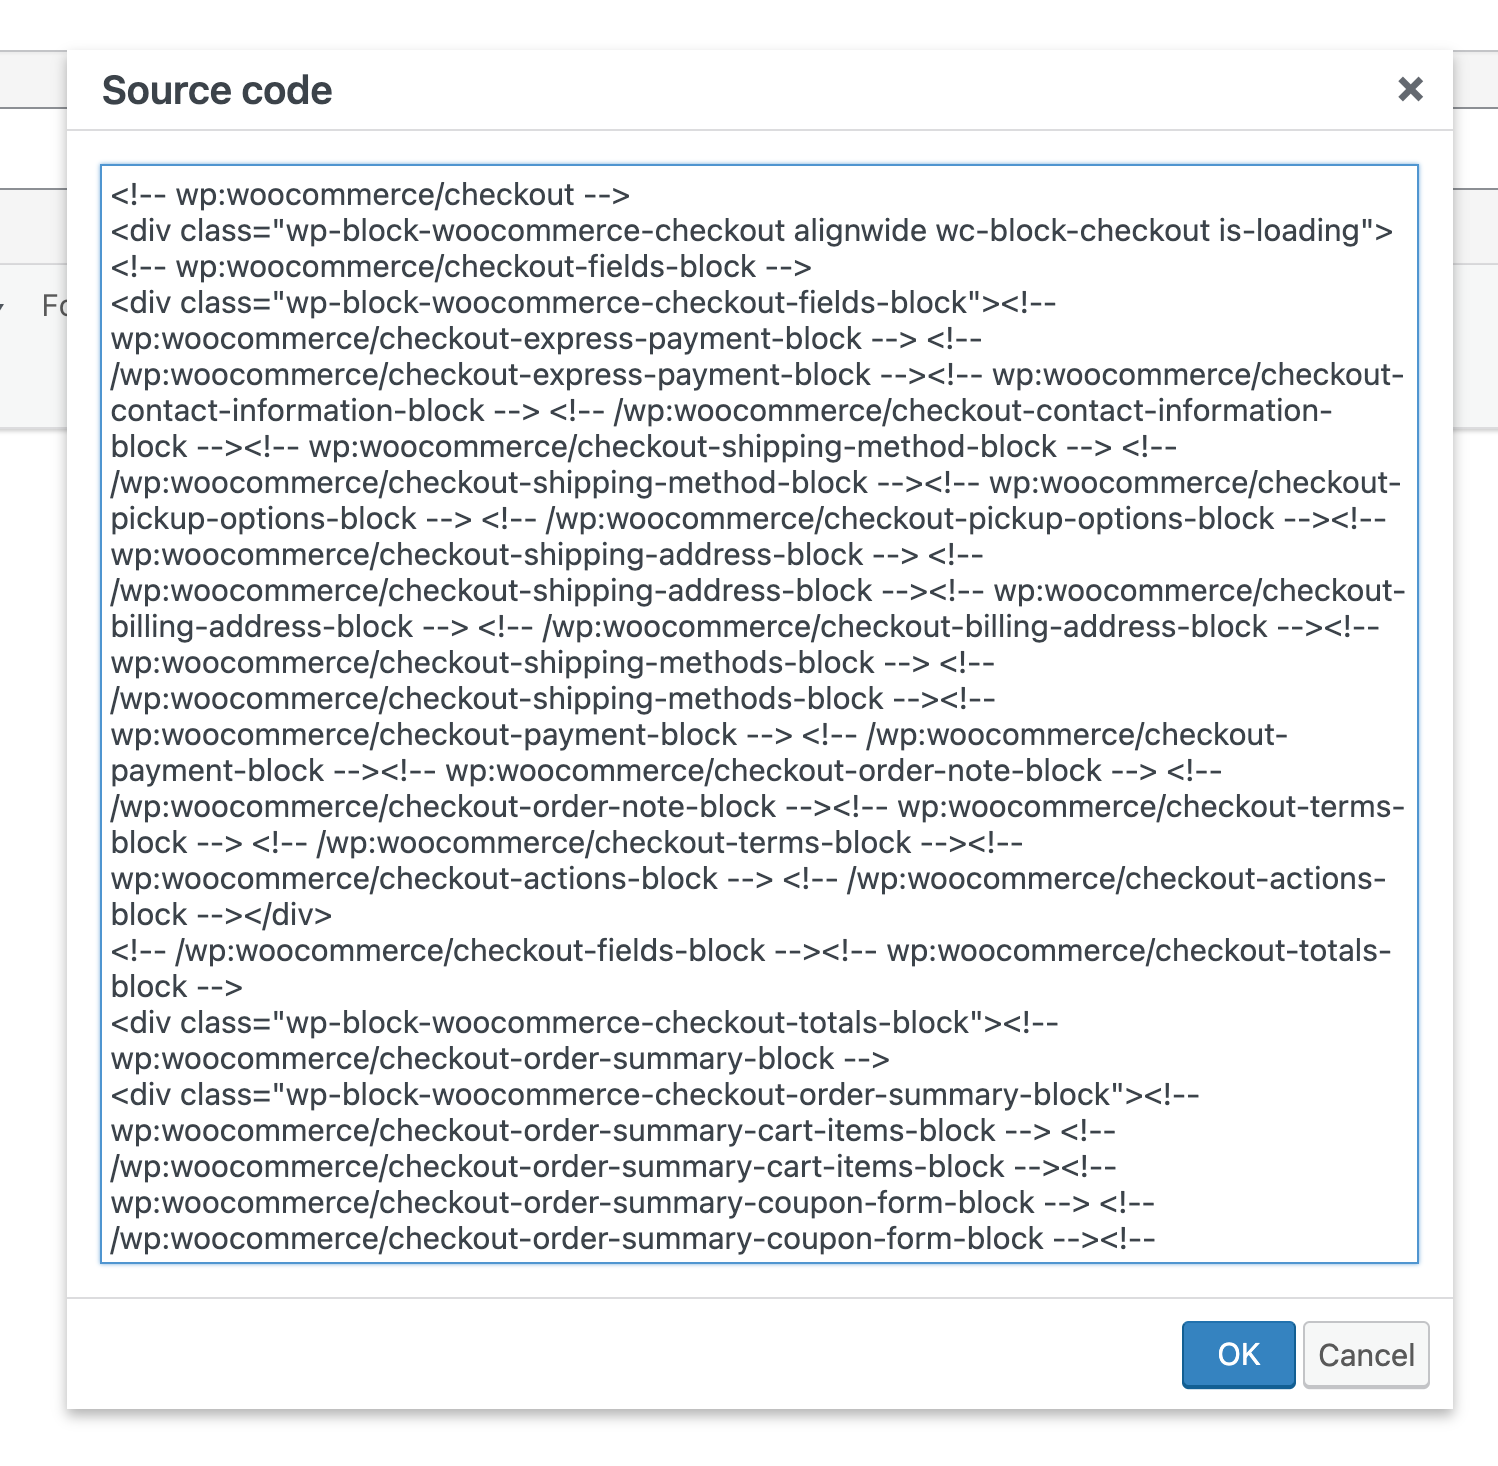
Delete this text
Then insert the text [woocommerce_checkout] and save the page.
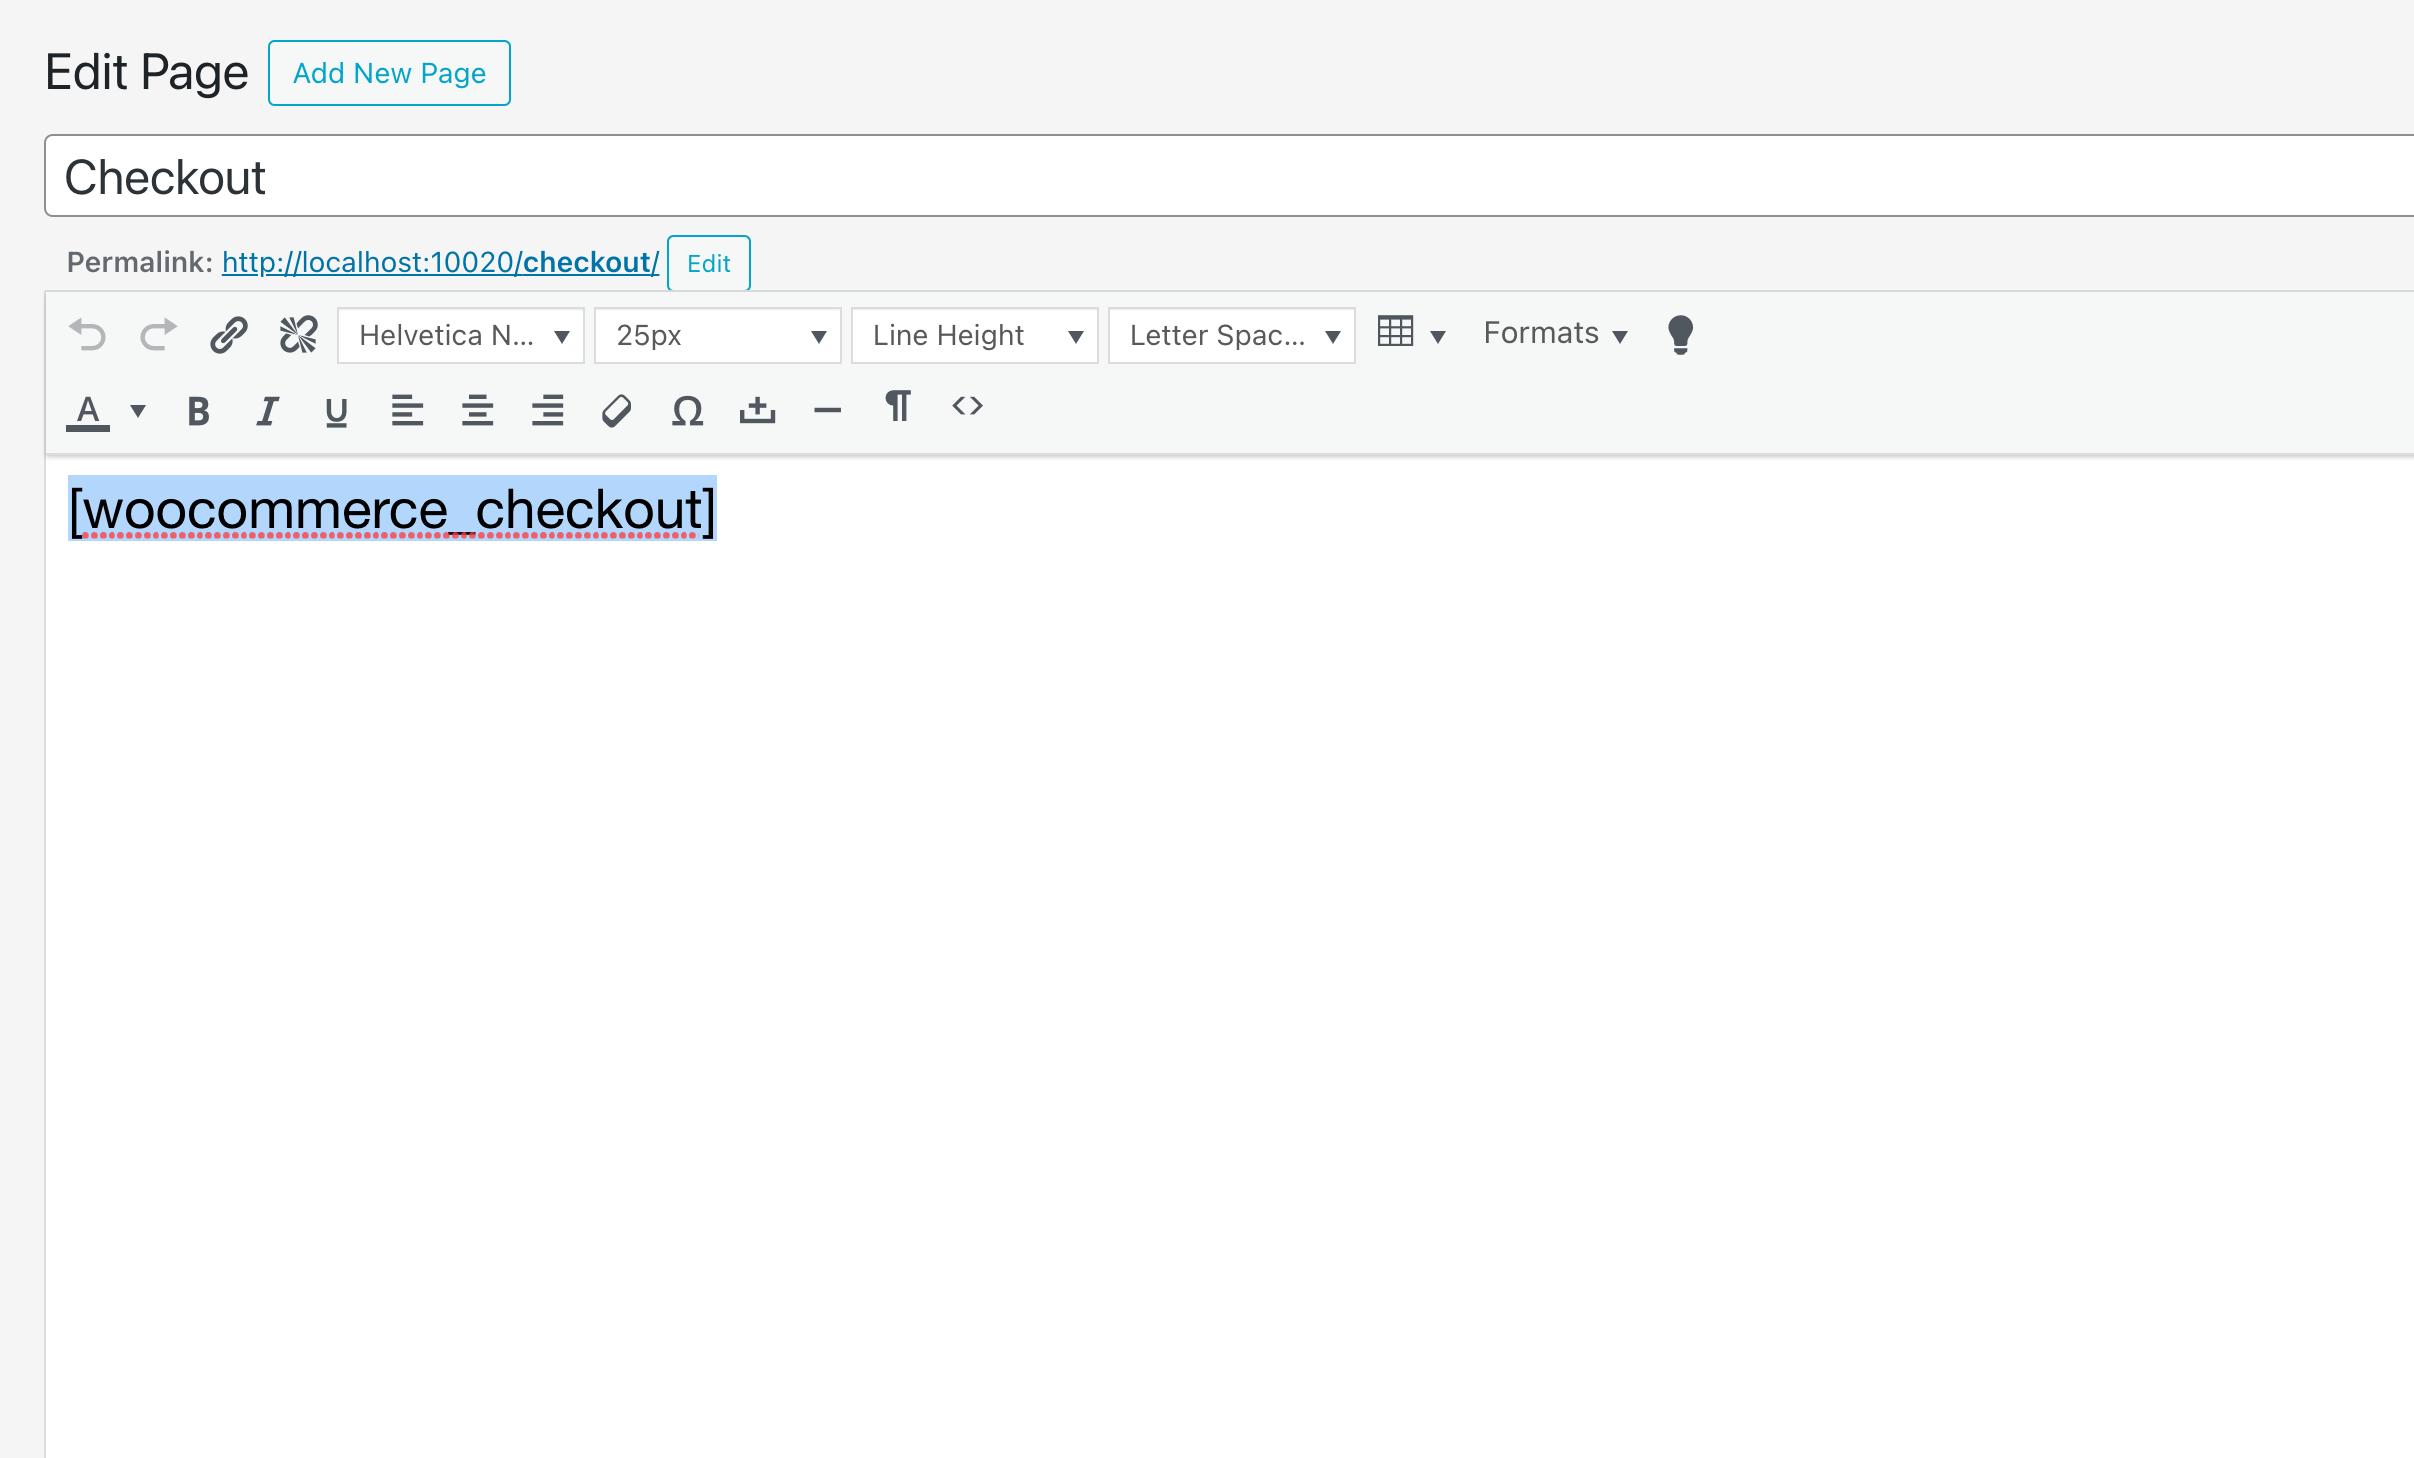
The text field should look like this
Prepare Shop Page
Go to WooCommerce → Settings → "Products" Tab and make sure to deselect any pages in "Shop Page":
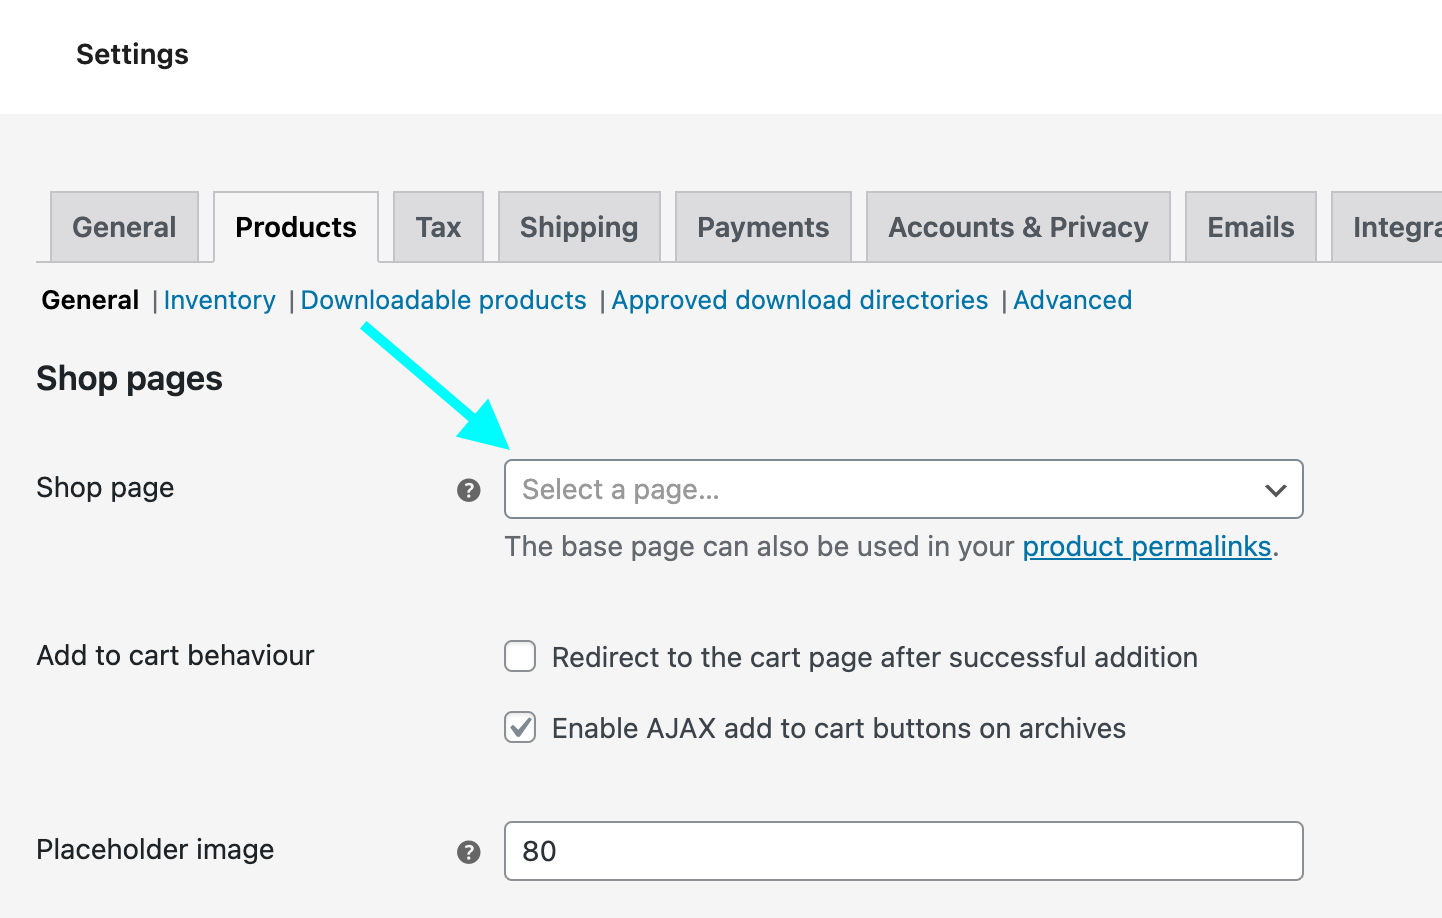
Make sure this input is empty
The shop page can be just any page where you add your Product Grid Element for example. It seems like when a page is set to the "Shop" page above, when we try to edit the page WordPress just opens the Customizer, which is not what we want.
Prepare Product editing
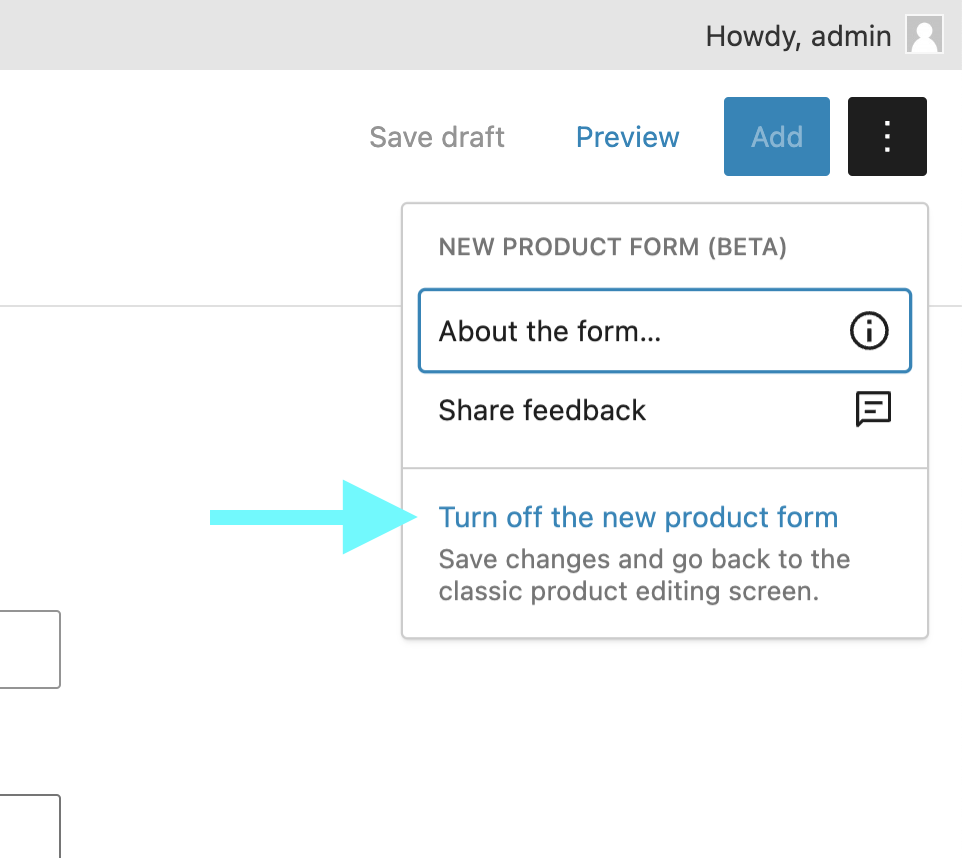
In "Products", click "Add New".
Then in the top right corner, click the three points and click "Turn off the new product form".
3. SSL
Make sure your website uses SSL/https. This is needed for the payment gateways to work properly.
Here's a WooCommerce Tutorial about SSL.
If your website address does not start with "https://" but with "http://", you need to set your domain to use SSL. This can typically be done in your Webhost Control Panel. If you're unsure of how to do this, please write your webhost support.
After you have activated SSL for your website, you might need to use a Plugin like "Really Simple SSL" to make it work.
4. Sidecart Plugin (optional)
“WooCommerce Side Cart (Ajax)” is a plugin by XootiX, but we have changed its style and added settings to the Customizer for it.
The Sidecart pops up when you add a product to your cart
Sidecart Installation
This is how you install WooCommerce Side Cart (Ajax) for a flying side cart:
- Go to: Plugins → Add New.
- Search for “WooCommerce Side Cart (Ajax)” (by XootiX).
- Click Install Now.
- Click Activate Now.
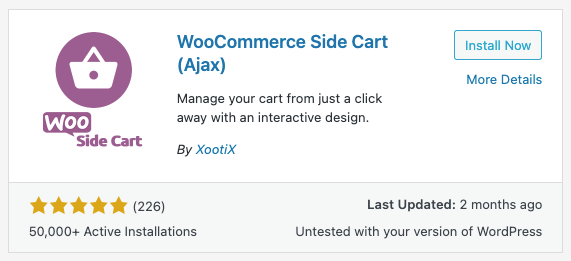
The Sidecart Plugin
Please make sure to NOT turn off the option "Side Cart Header" → "Basket Icon". If you do, the cart menu point will not show the correct amount of items in the cart.
Sidecart Settings
After installing the Plugin, go to the Plugin's settings "Sidecart".
If you don't want a Cart Button, choose "Always Hide" in the "Style" tab under "Side Cart Basket". Also turn off "Show on Mobile":
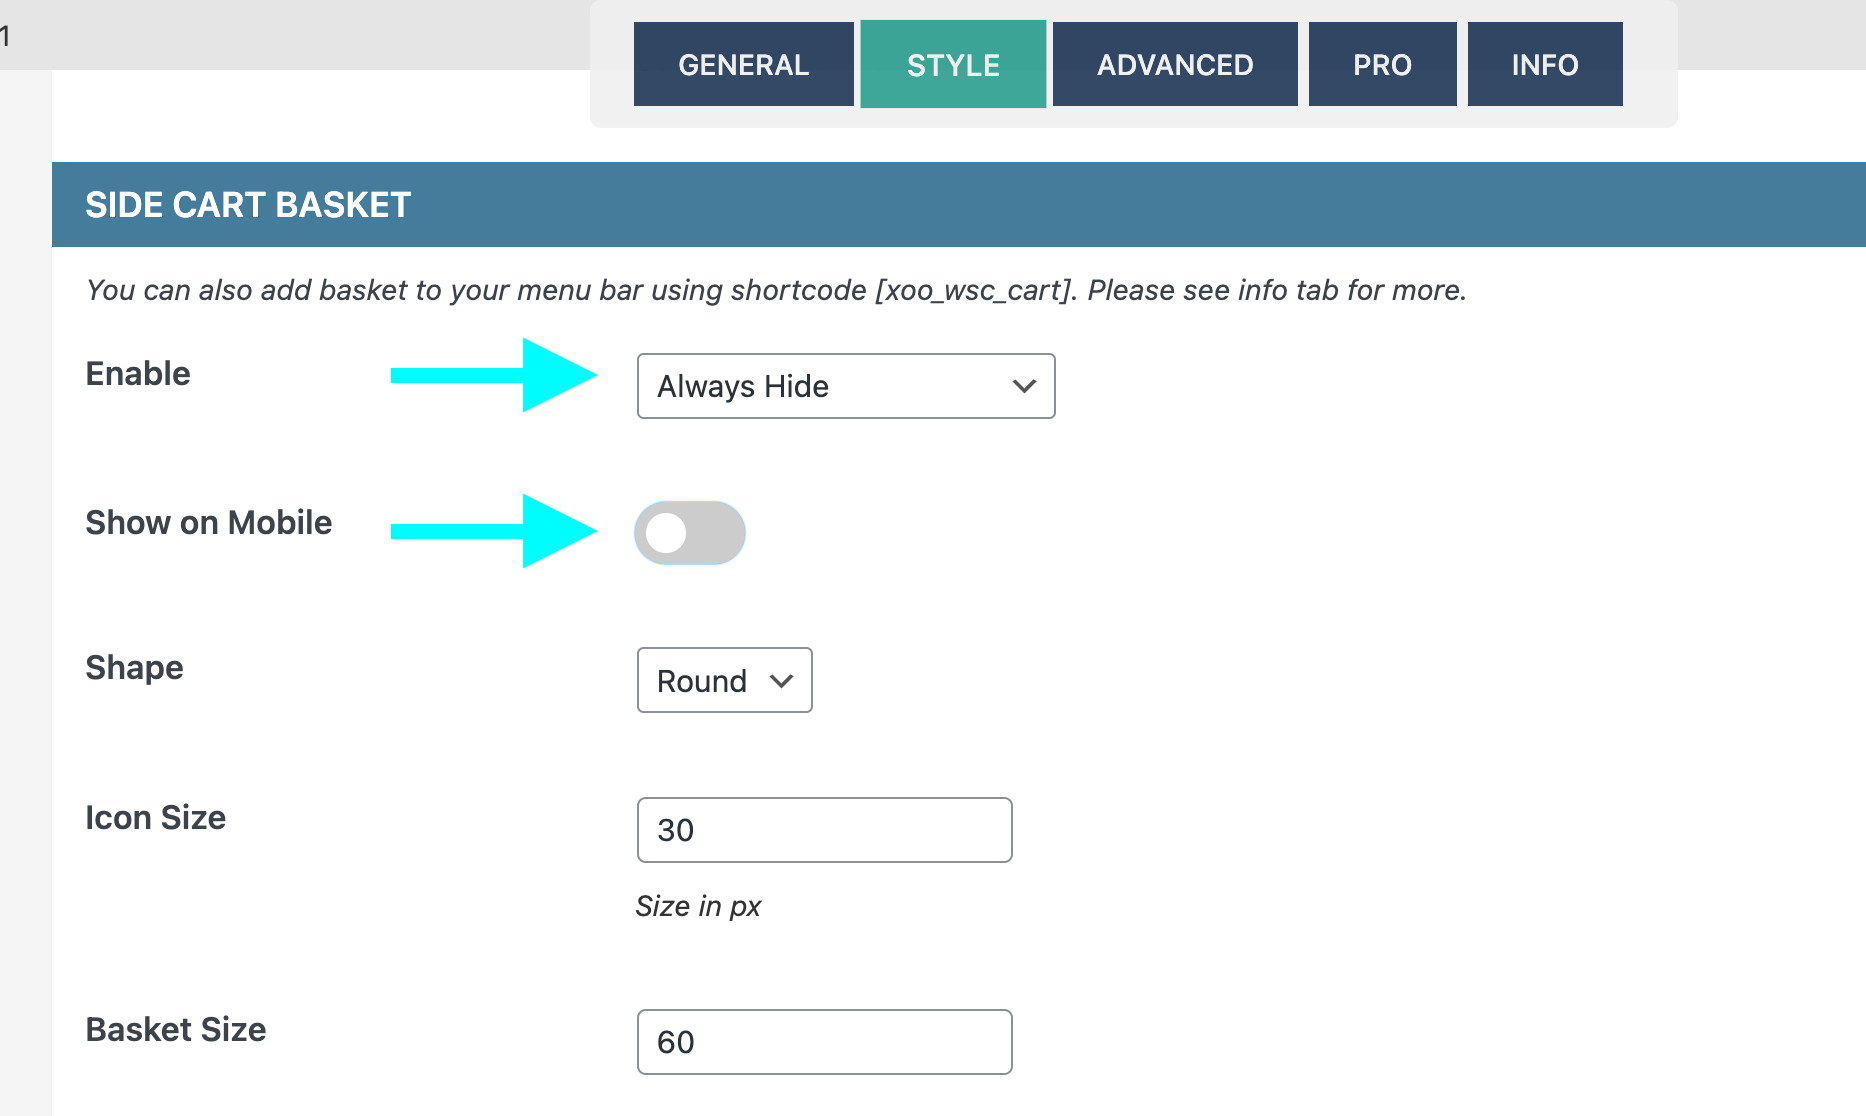
Turn off "Show on Mobile" and for enable, choose "Always Hide"
We will just add a cart menu point instead in step number 5.
Sidecart Styling
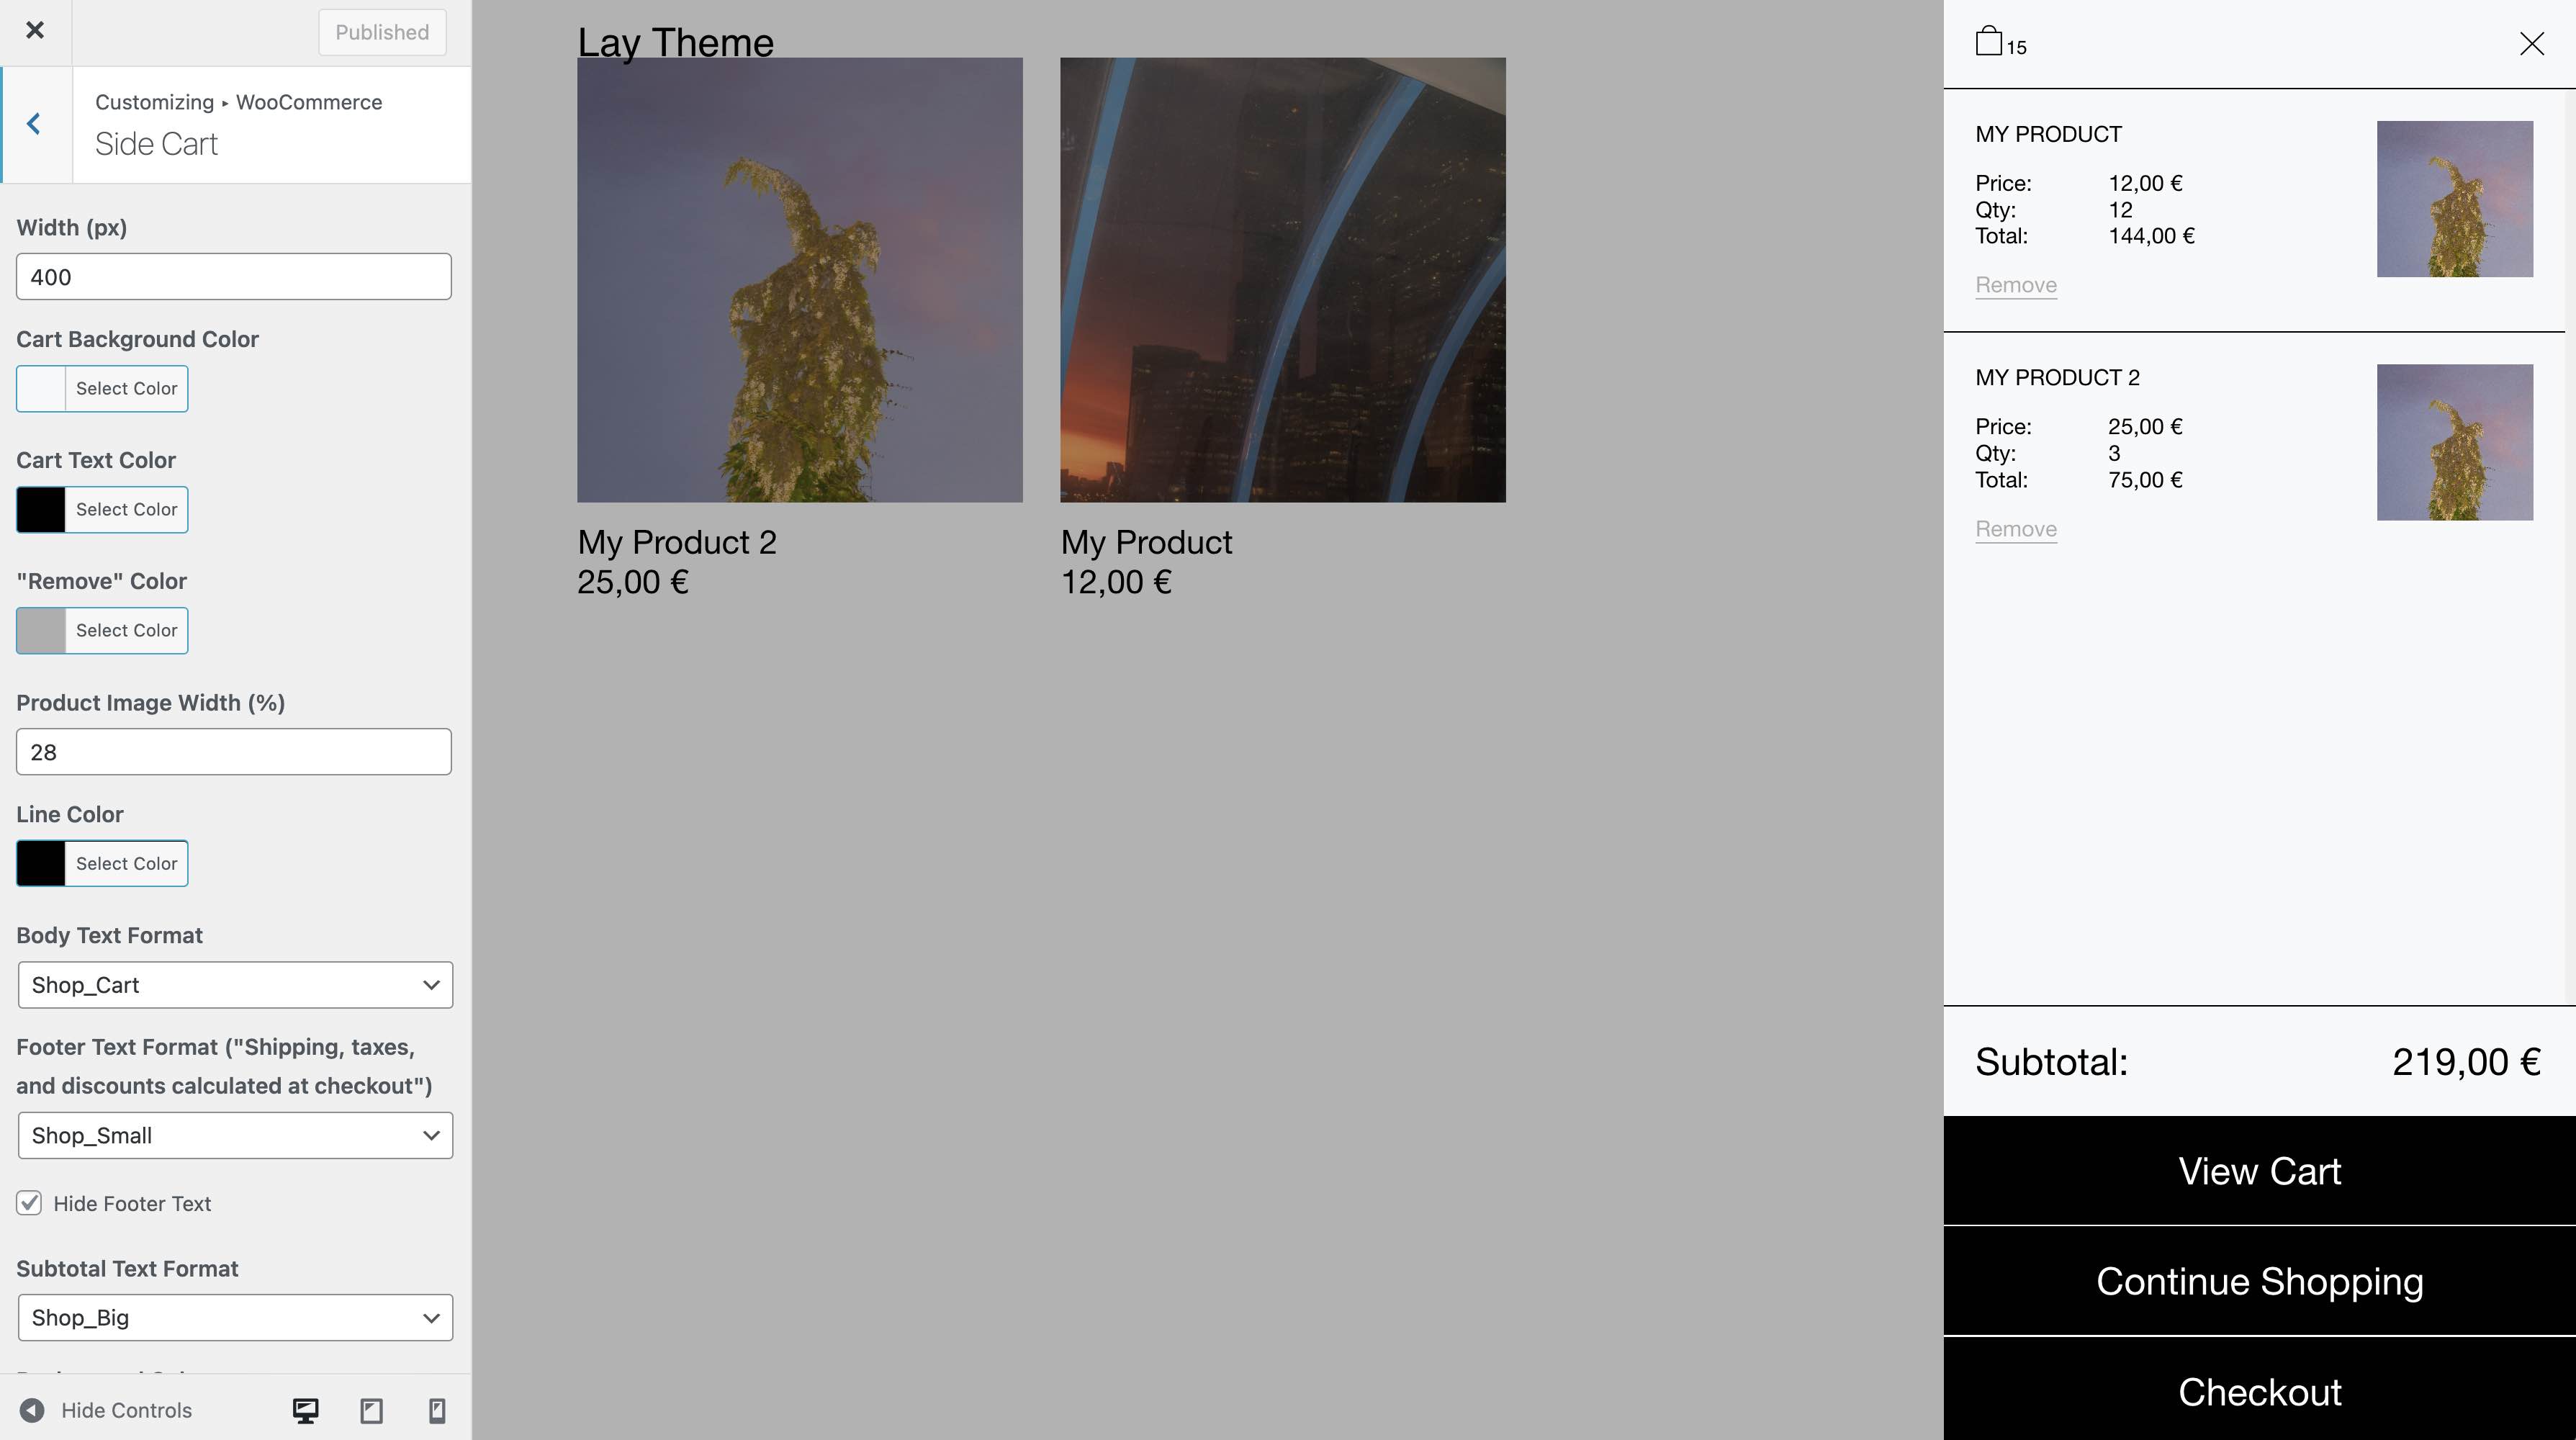
In "Customize" → "WooCommerce" → "Side Cart" and "Side Cart Buttons" you'll find settings for styling.
Sidecart Pro Version
Please note, if you want to be able to change product quantities in the sidecart, you need to purchase the Sidecart Pro plugin by XootiX for 25$. It is possible to just remove a product in the sidecart though.
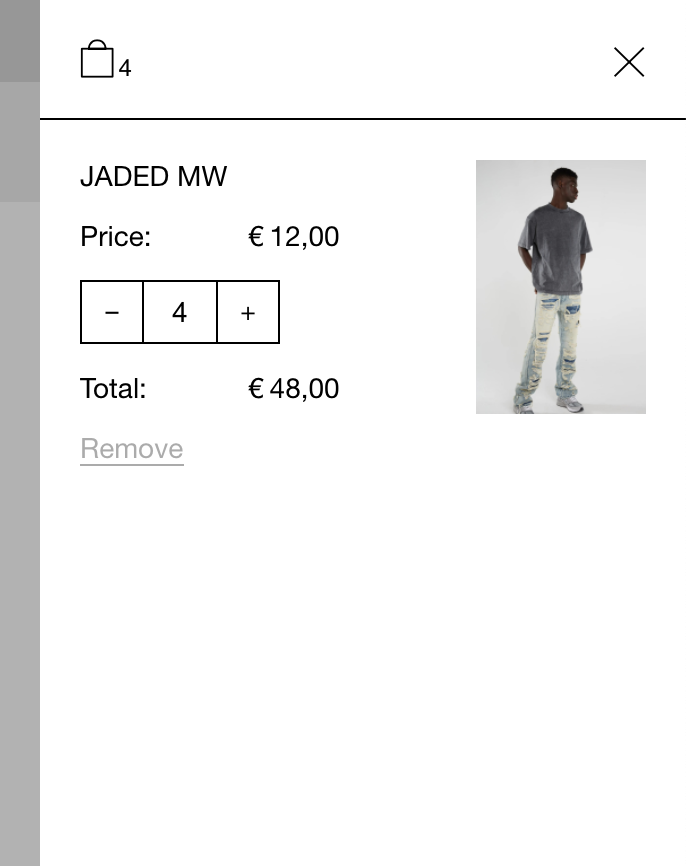
When you install the Sidecart Pro Version you get quantity inputs for your sidecart.
If you use the Pro version just make sure to turn off the "Fly to Cart Animation"
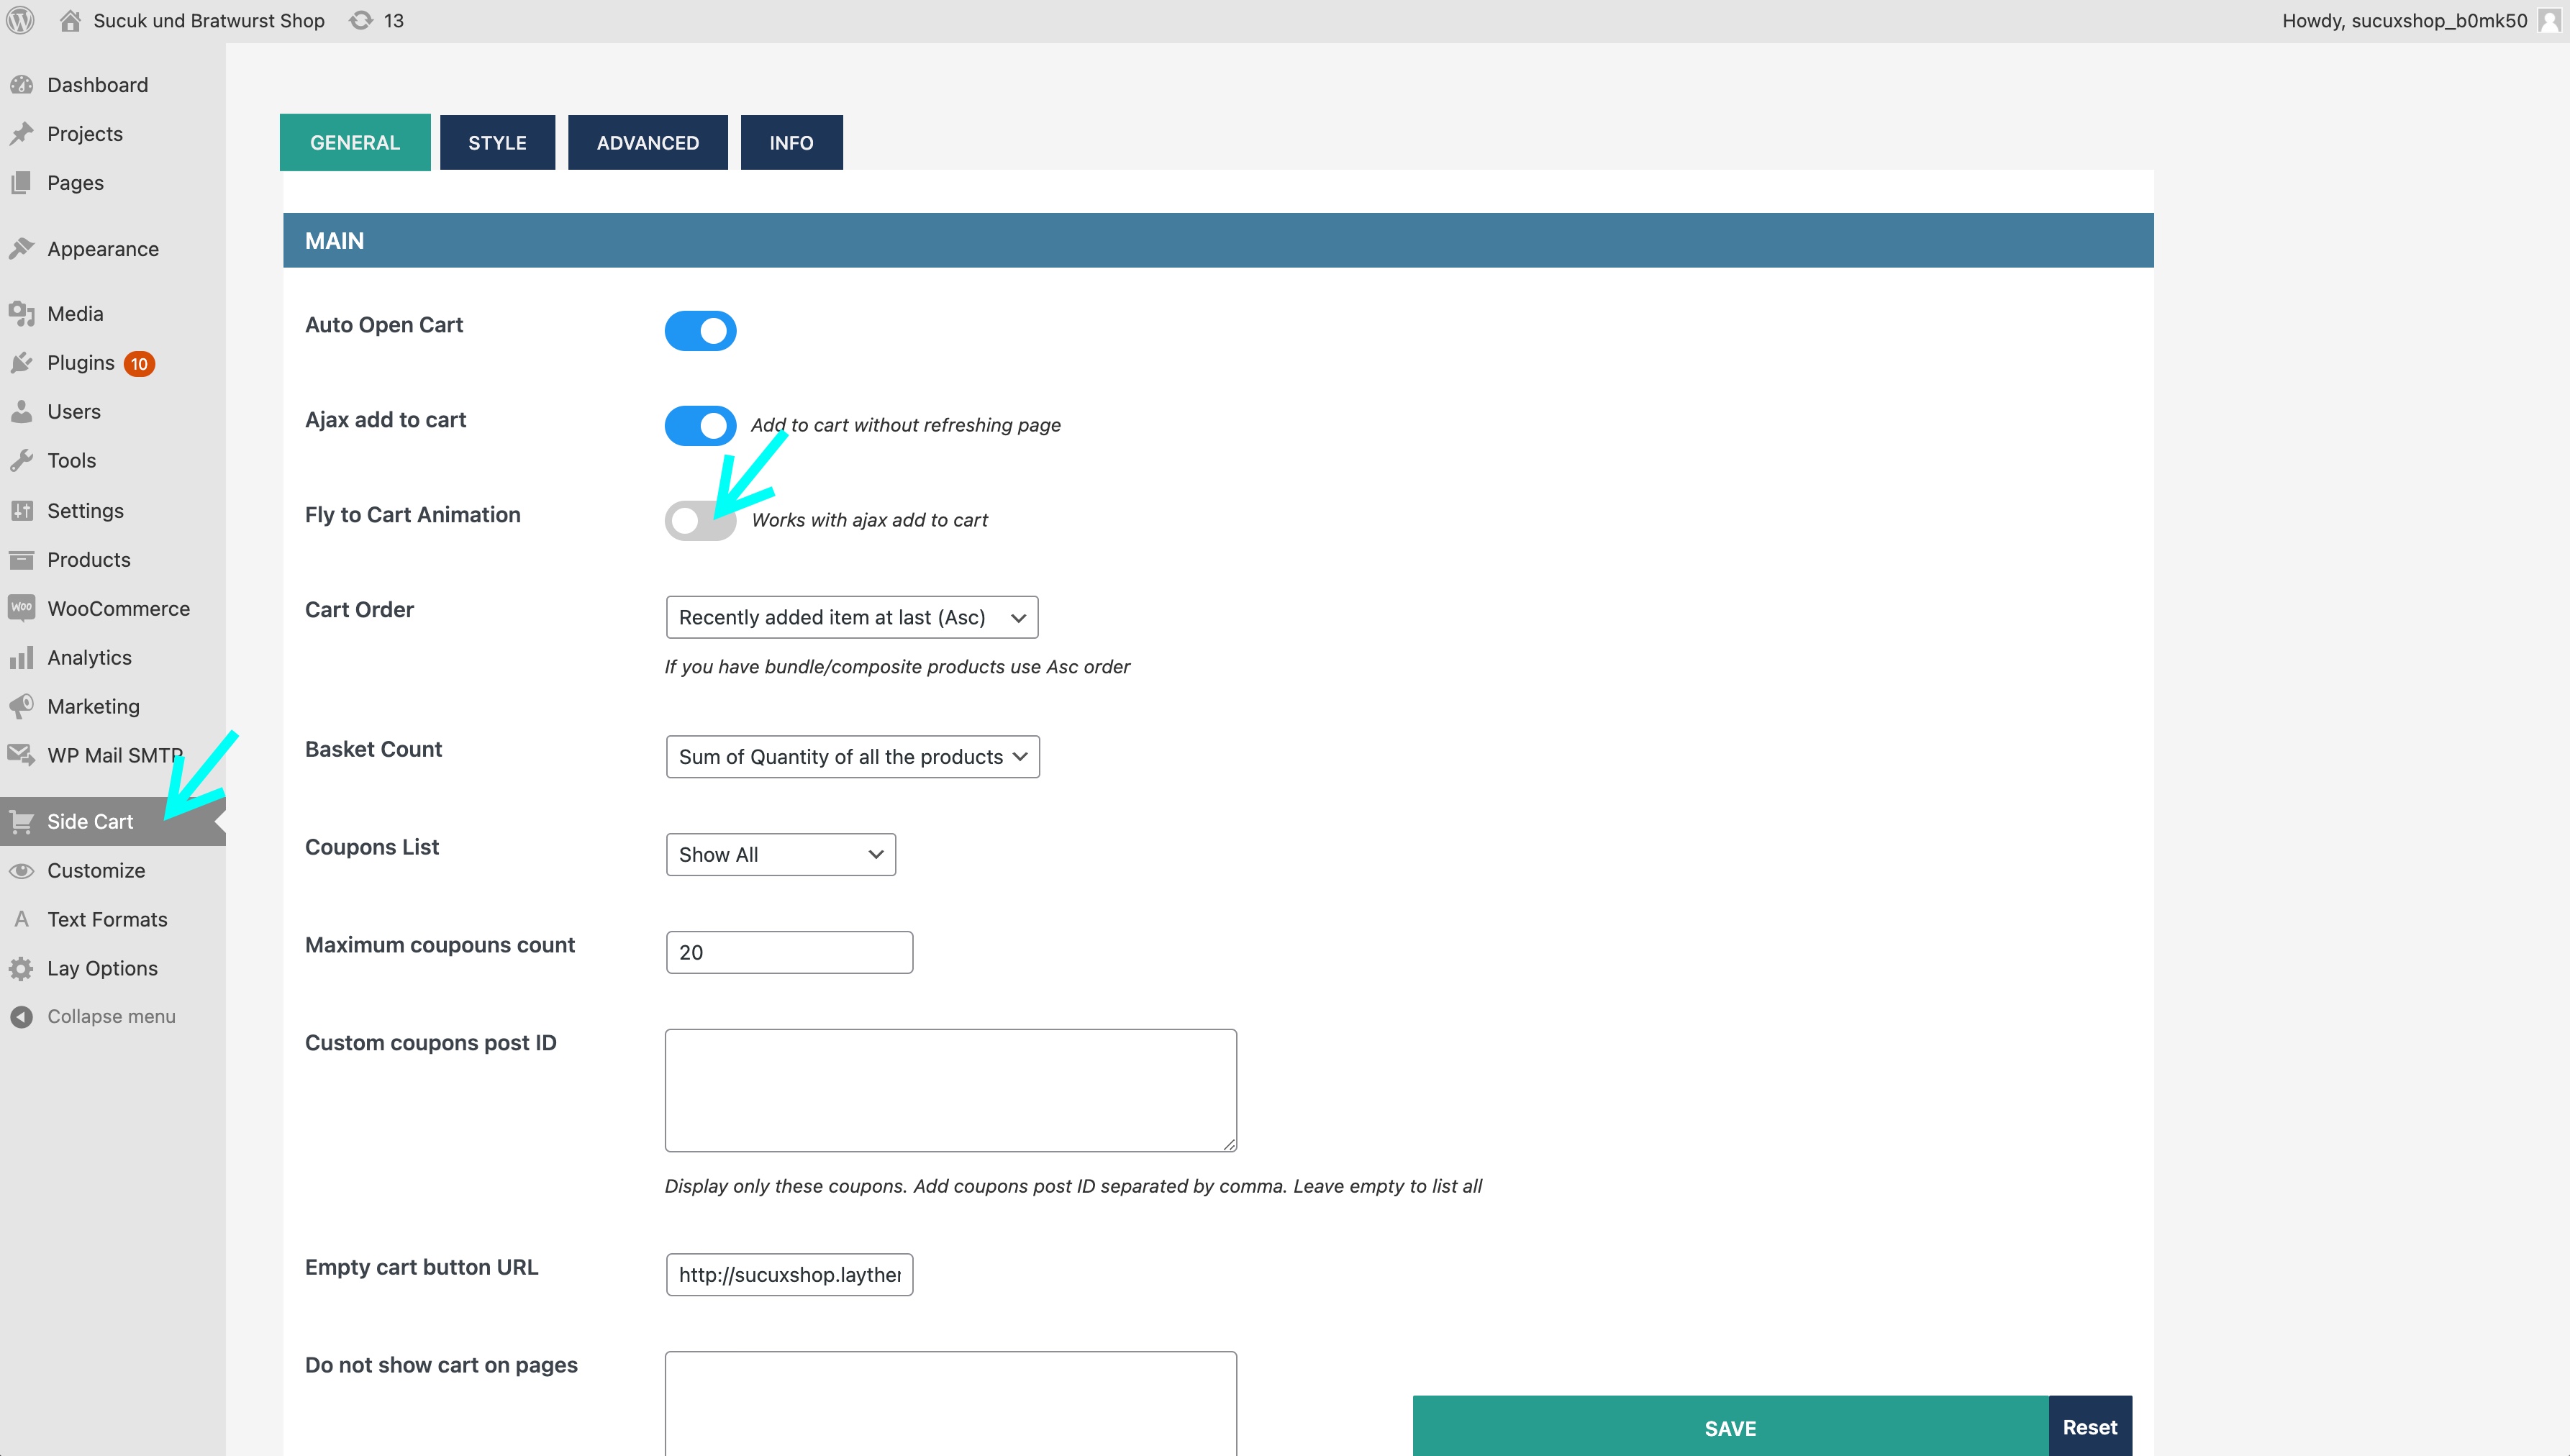
This is where to turn off the "Fly to Cart Animation"
5. Cart Menu Point
Make sure in your Menu in "Appearance" → "Menus" the Cart Menu Point is added.
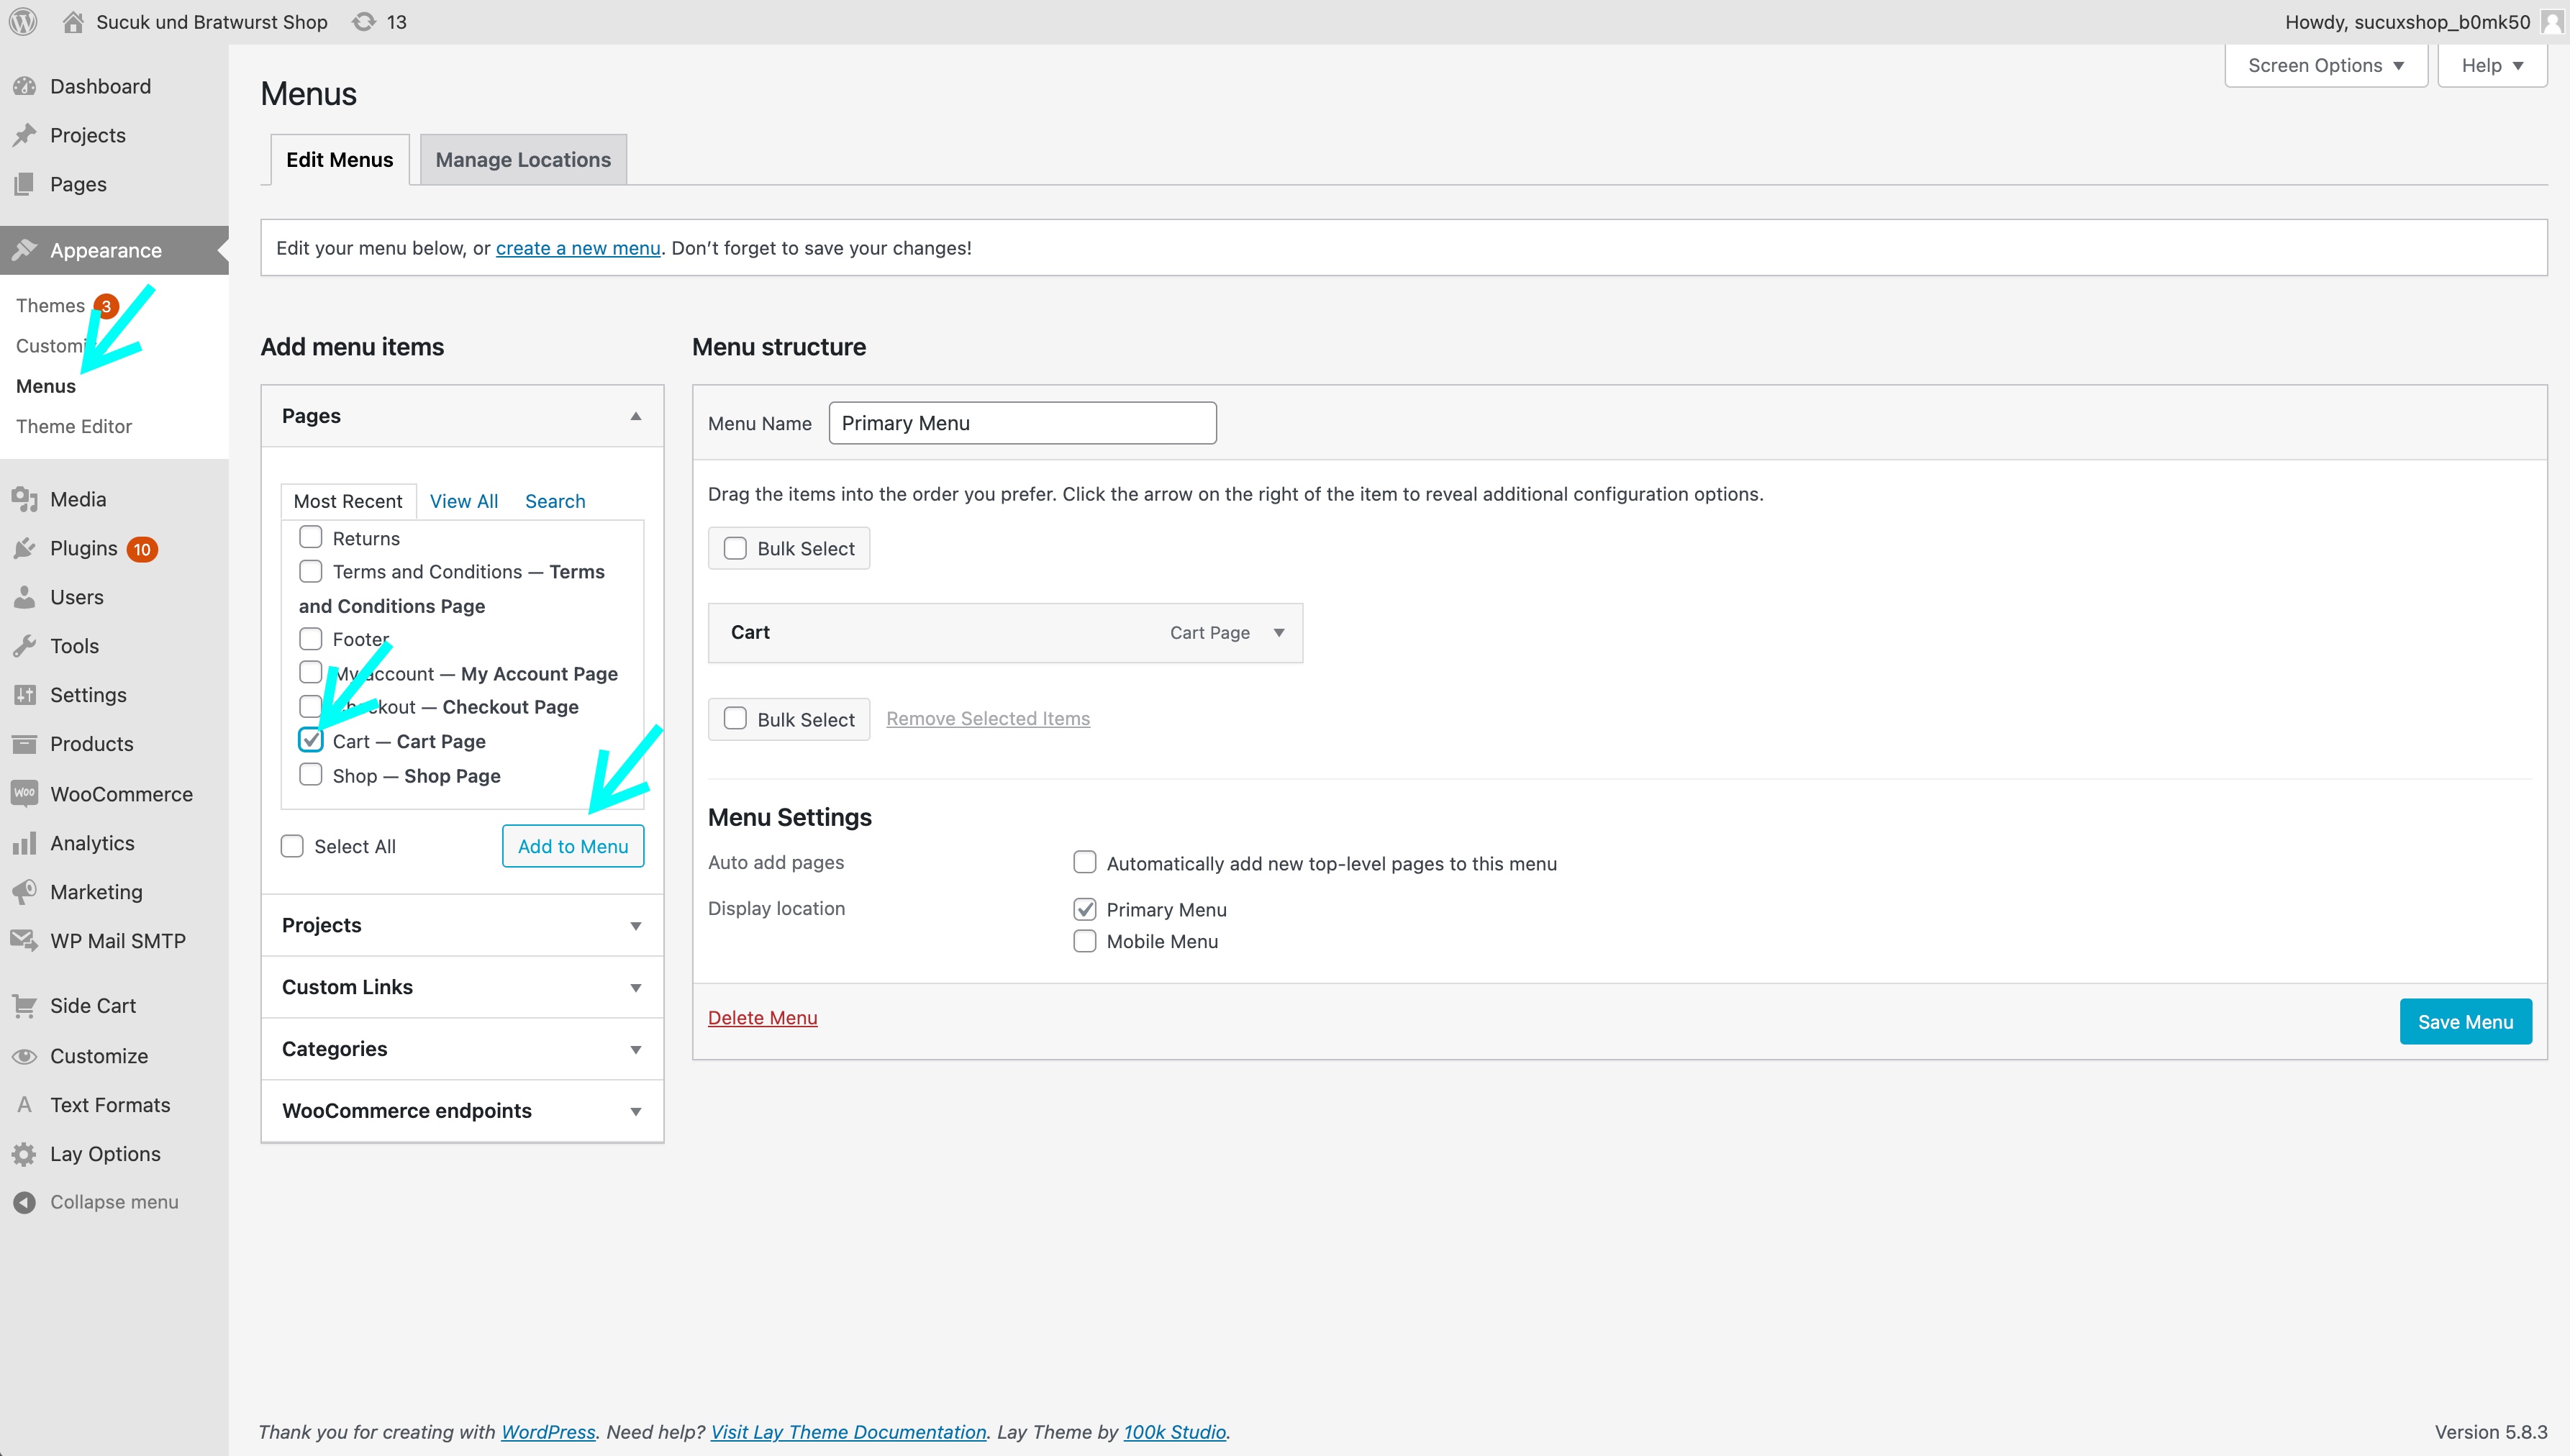
Cart Menu Point
6. Create Products
Create Products in "Products". You might want to take a look at Managing Products and Adding Product Images and Galleries.
For Product Images Lay Theme works best if all of your product photos are in portrait format instead of landscape and have the same aspect ratio.
For variable Products like T-Shirts with different T-Shirt sizes, please take a look at Variable Product.
If you use variable Products you may also want to use this plugin WooCommerce Force Default Variant.
If you would like to have an additional info tab for example for "Sizing" like below, please install the plugin Custom Product Tabs for WooCommerce.
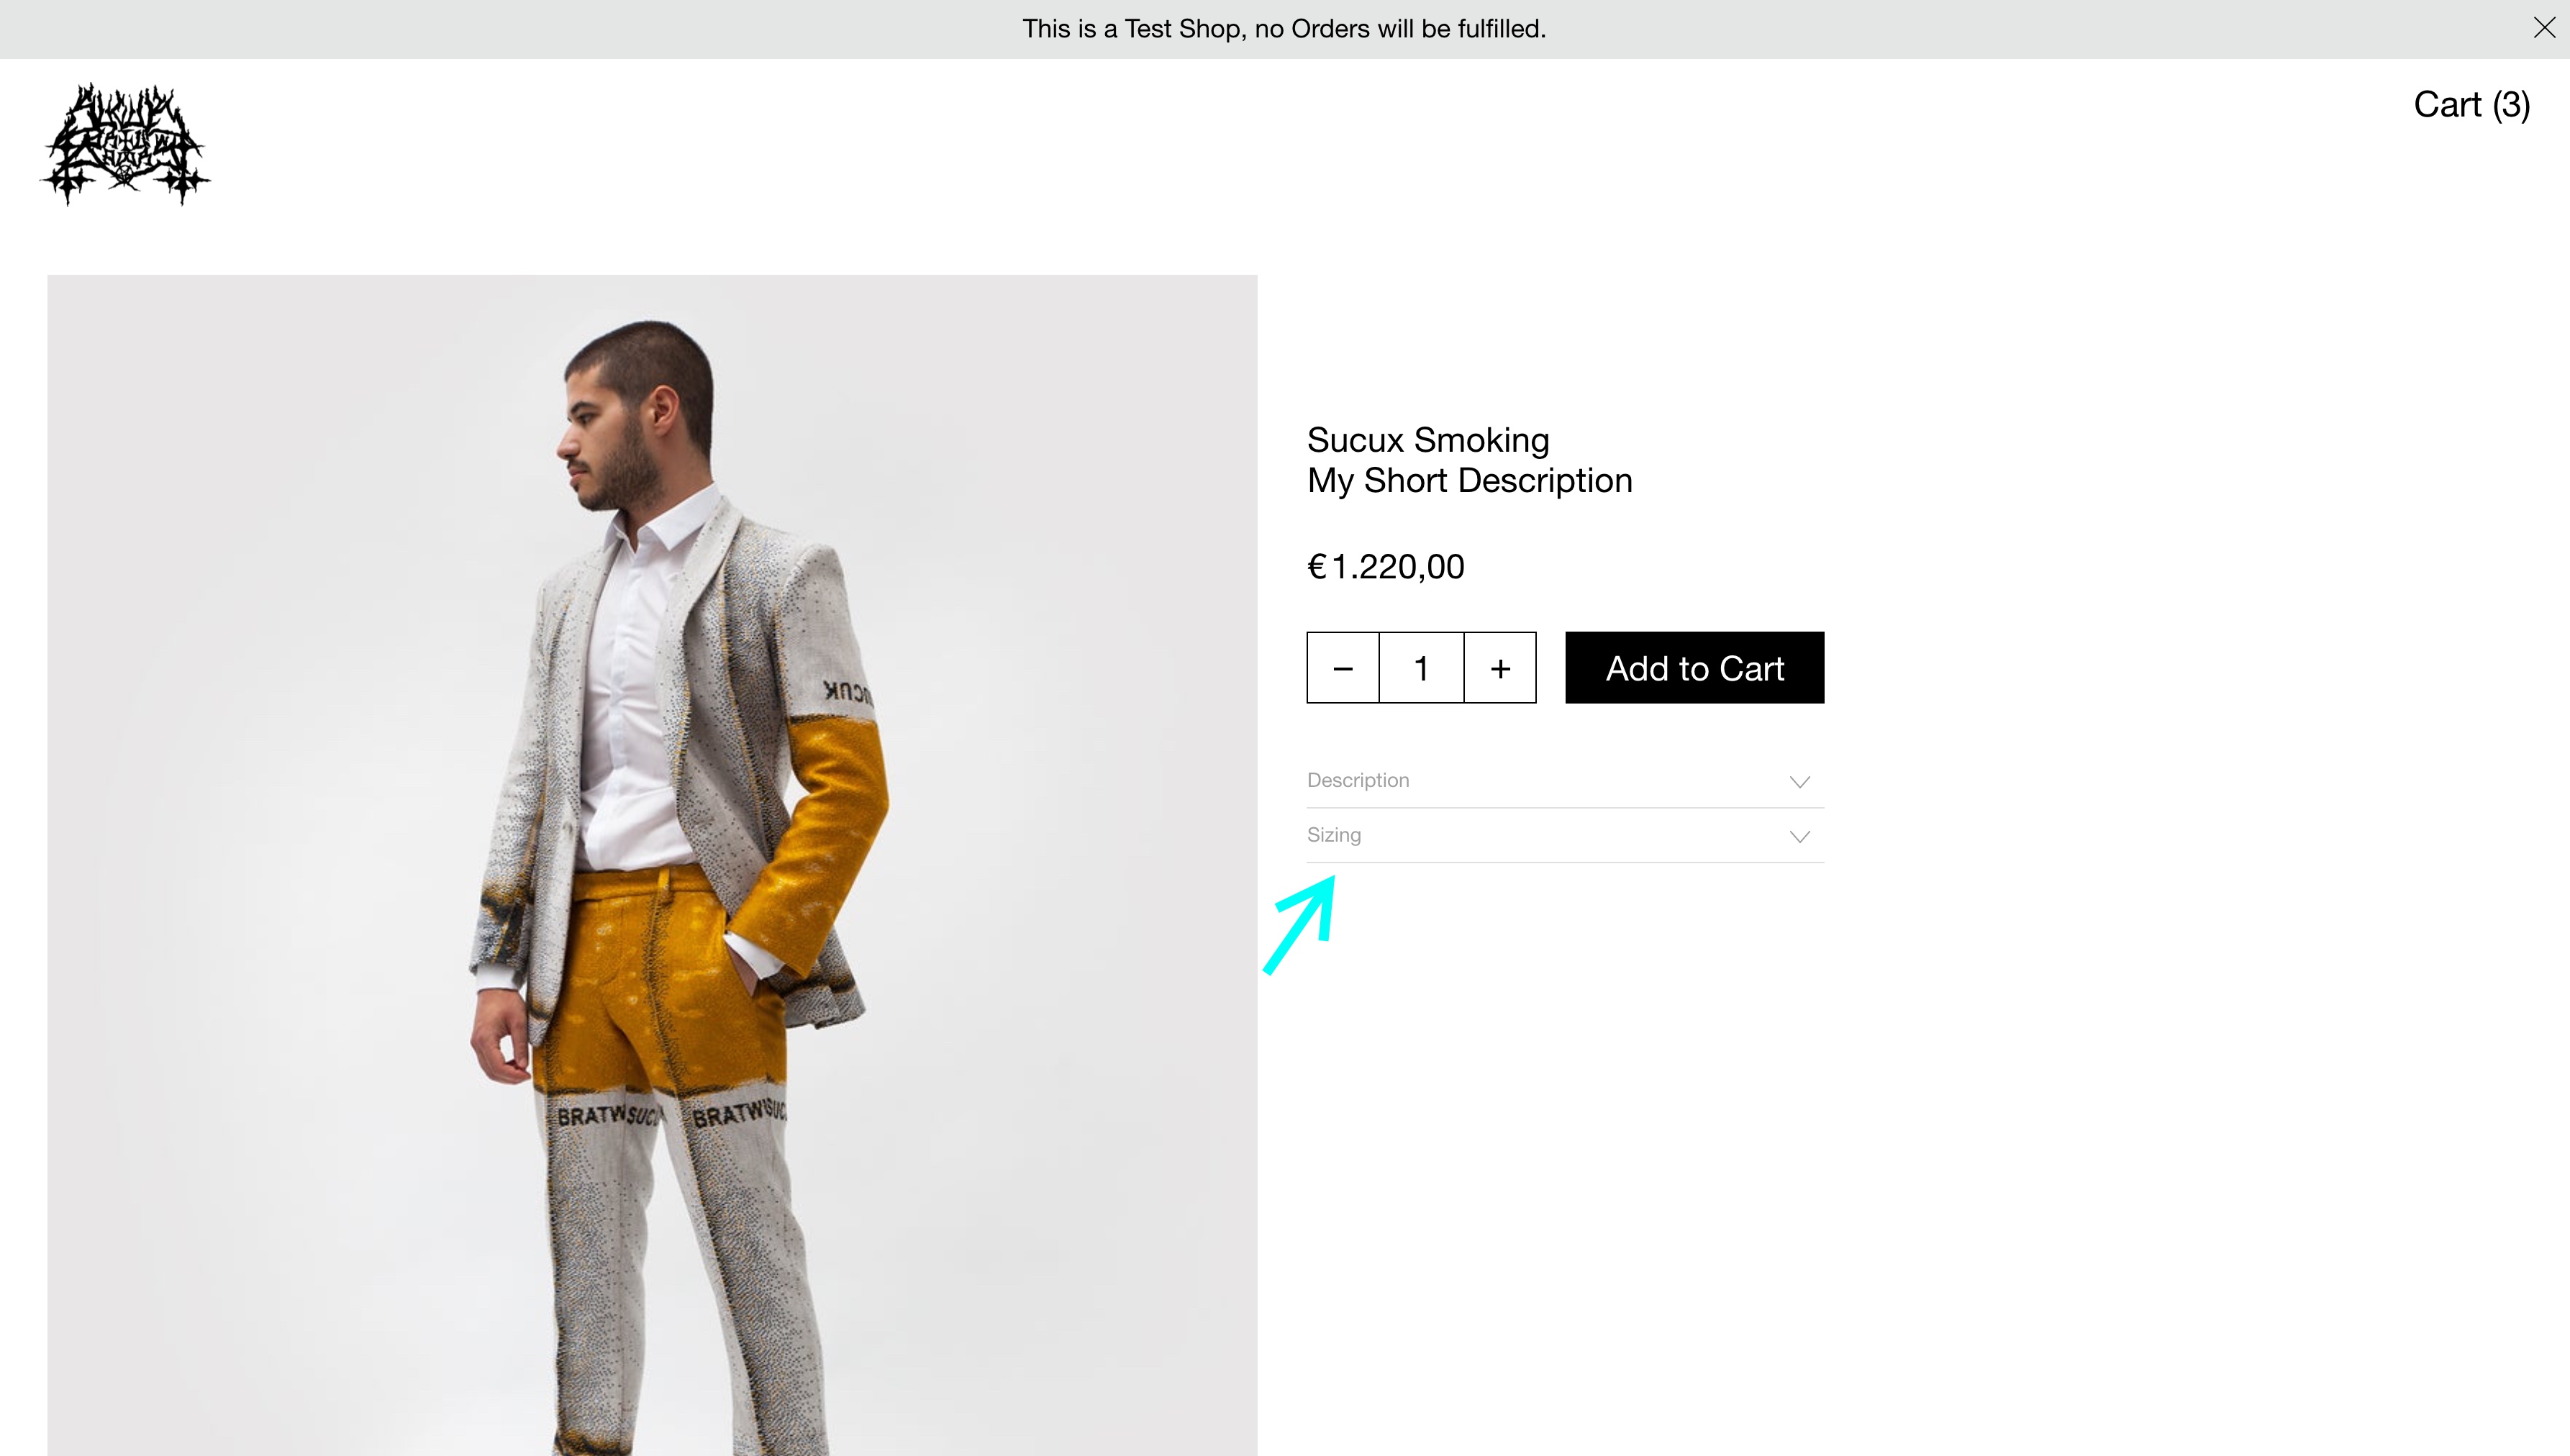
An additional info tab called "Sizing"
7. Add a Product Thumbnail Grid
On a page in the Gridder, add the "Product Thumbnail Grid" Element. This is an overview of your Products. Clicking on a Product Thumbnail leads to the Product.
You might want to make this page your frontpage. Set your frontpage in "Customize" → "Front Page".
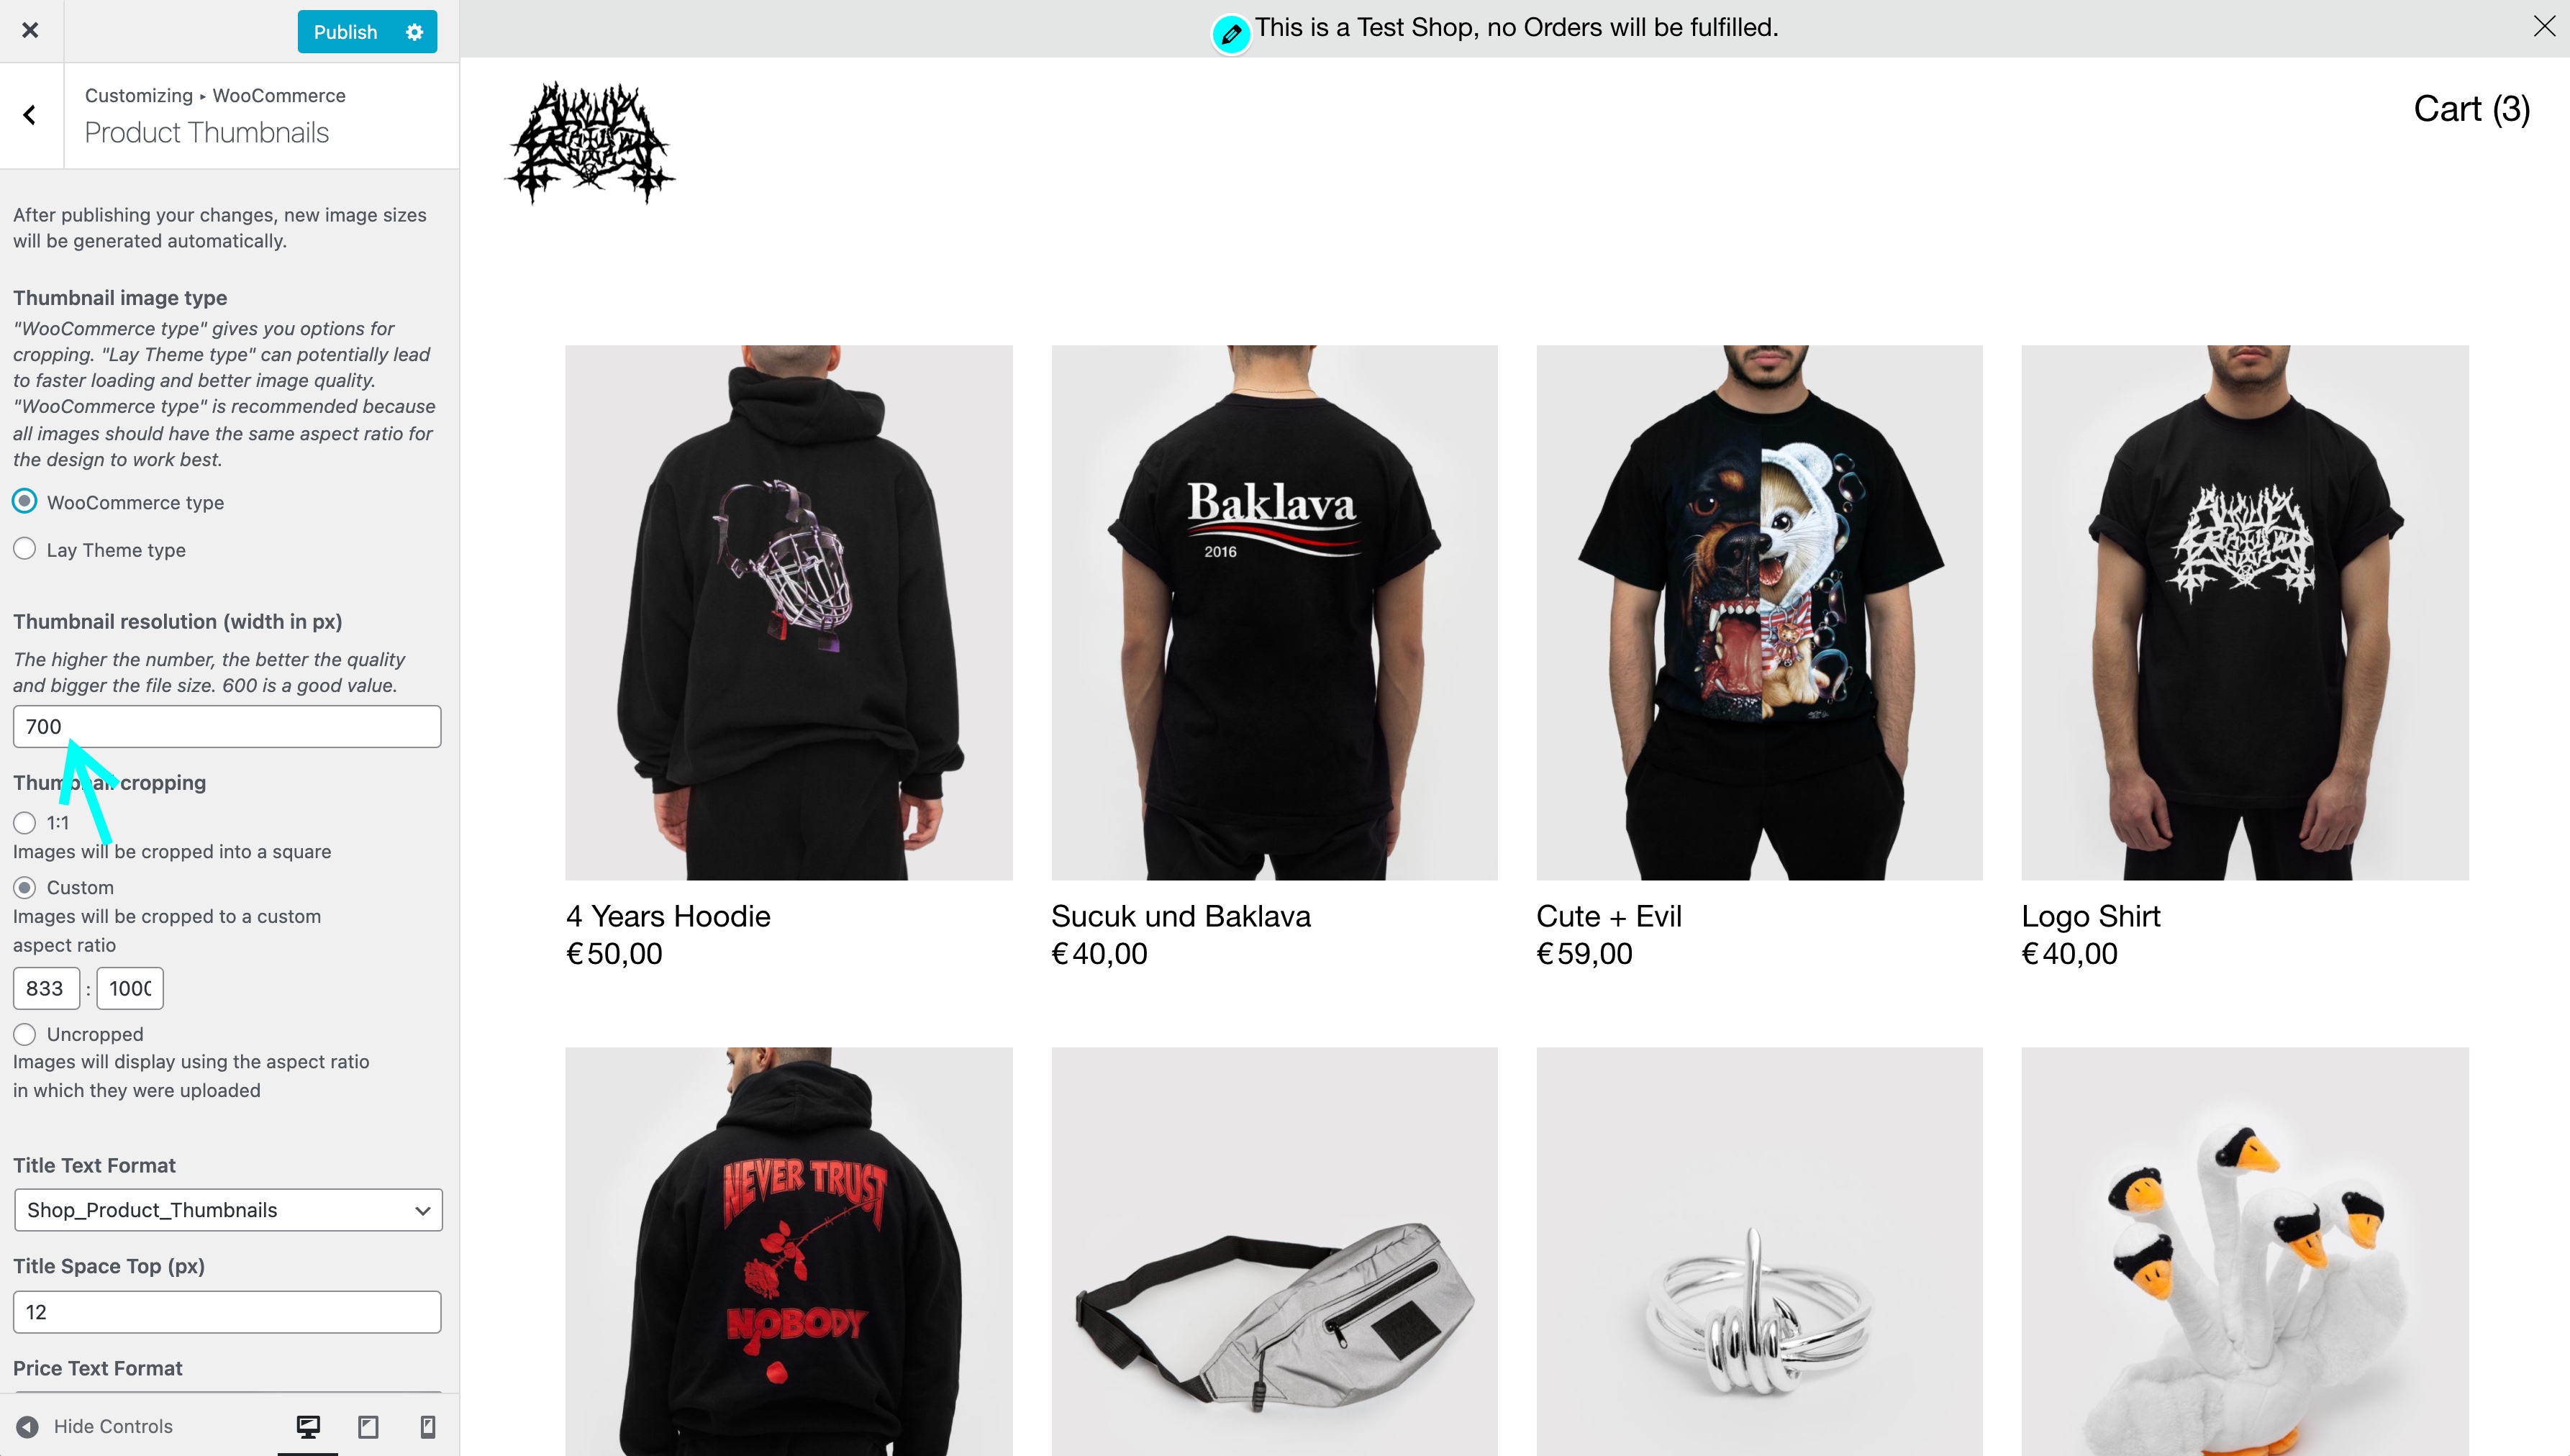
You can customize the appearance of your product thumbnails in "Customize" → "WooCommerce" → "Product Thumbnails".
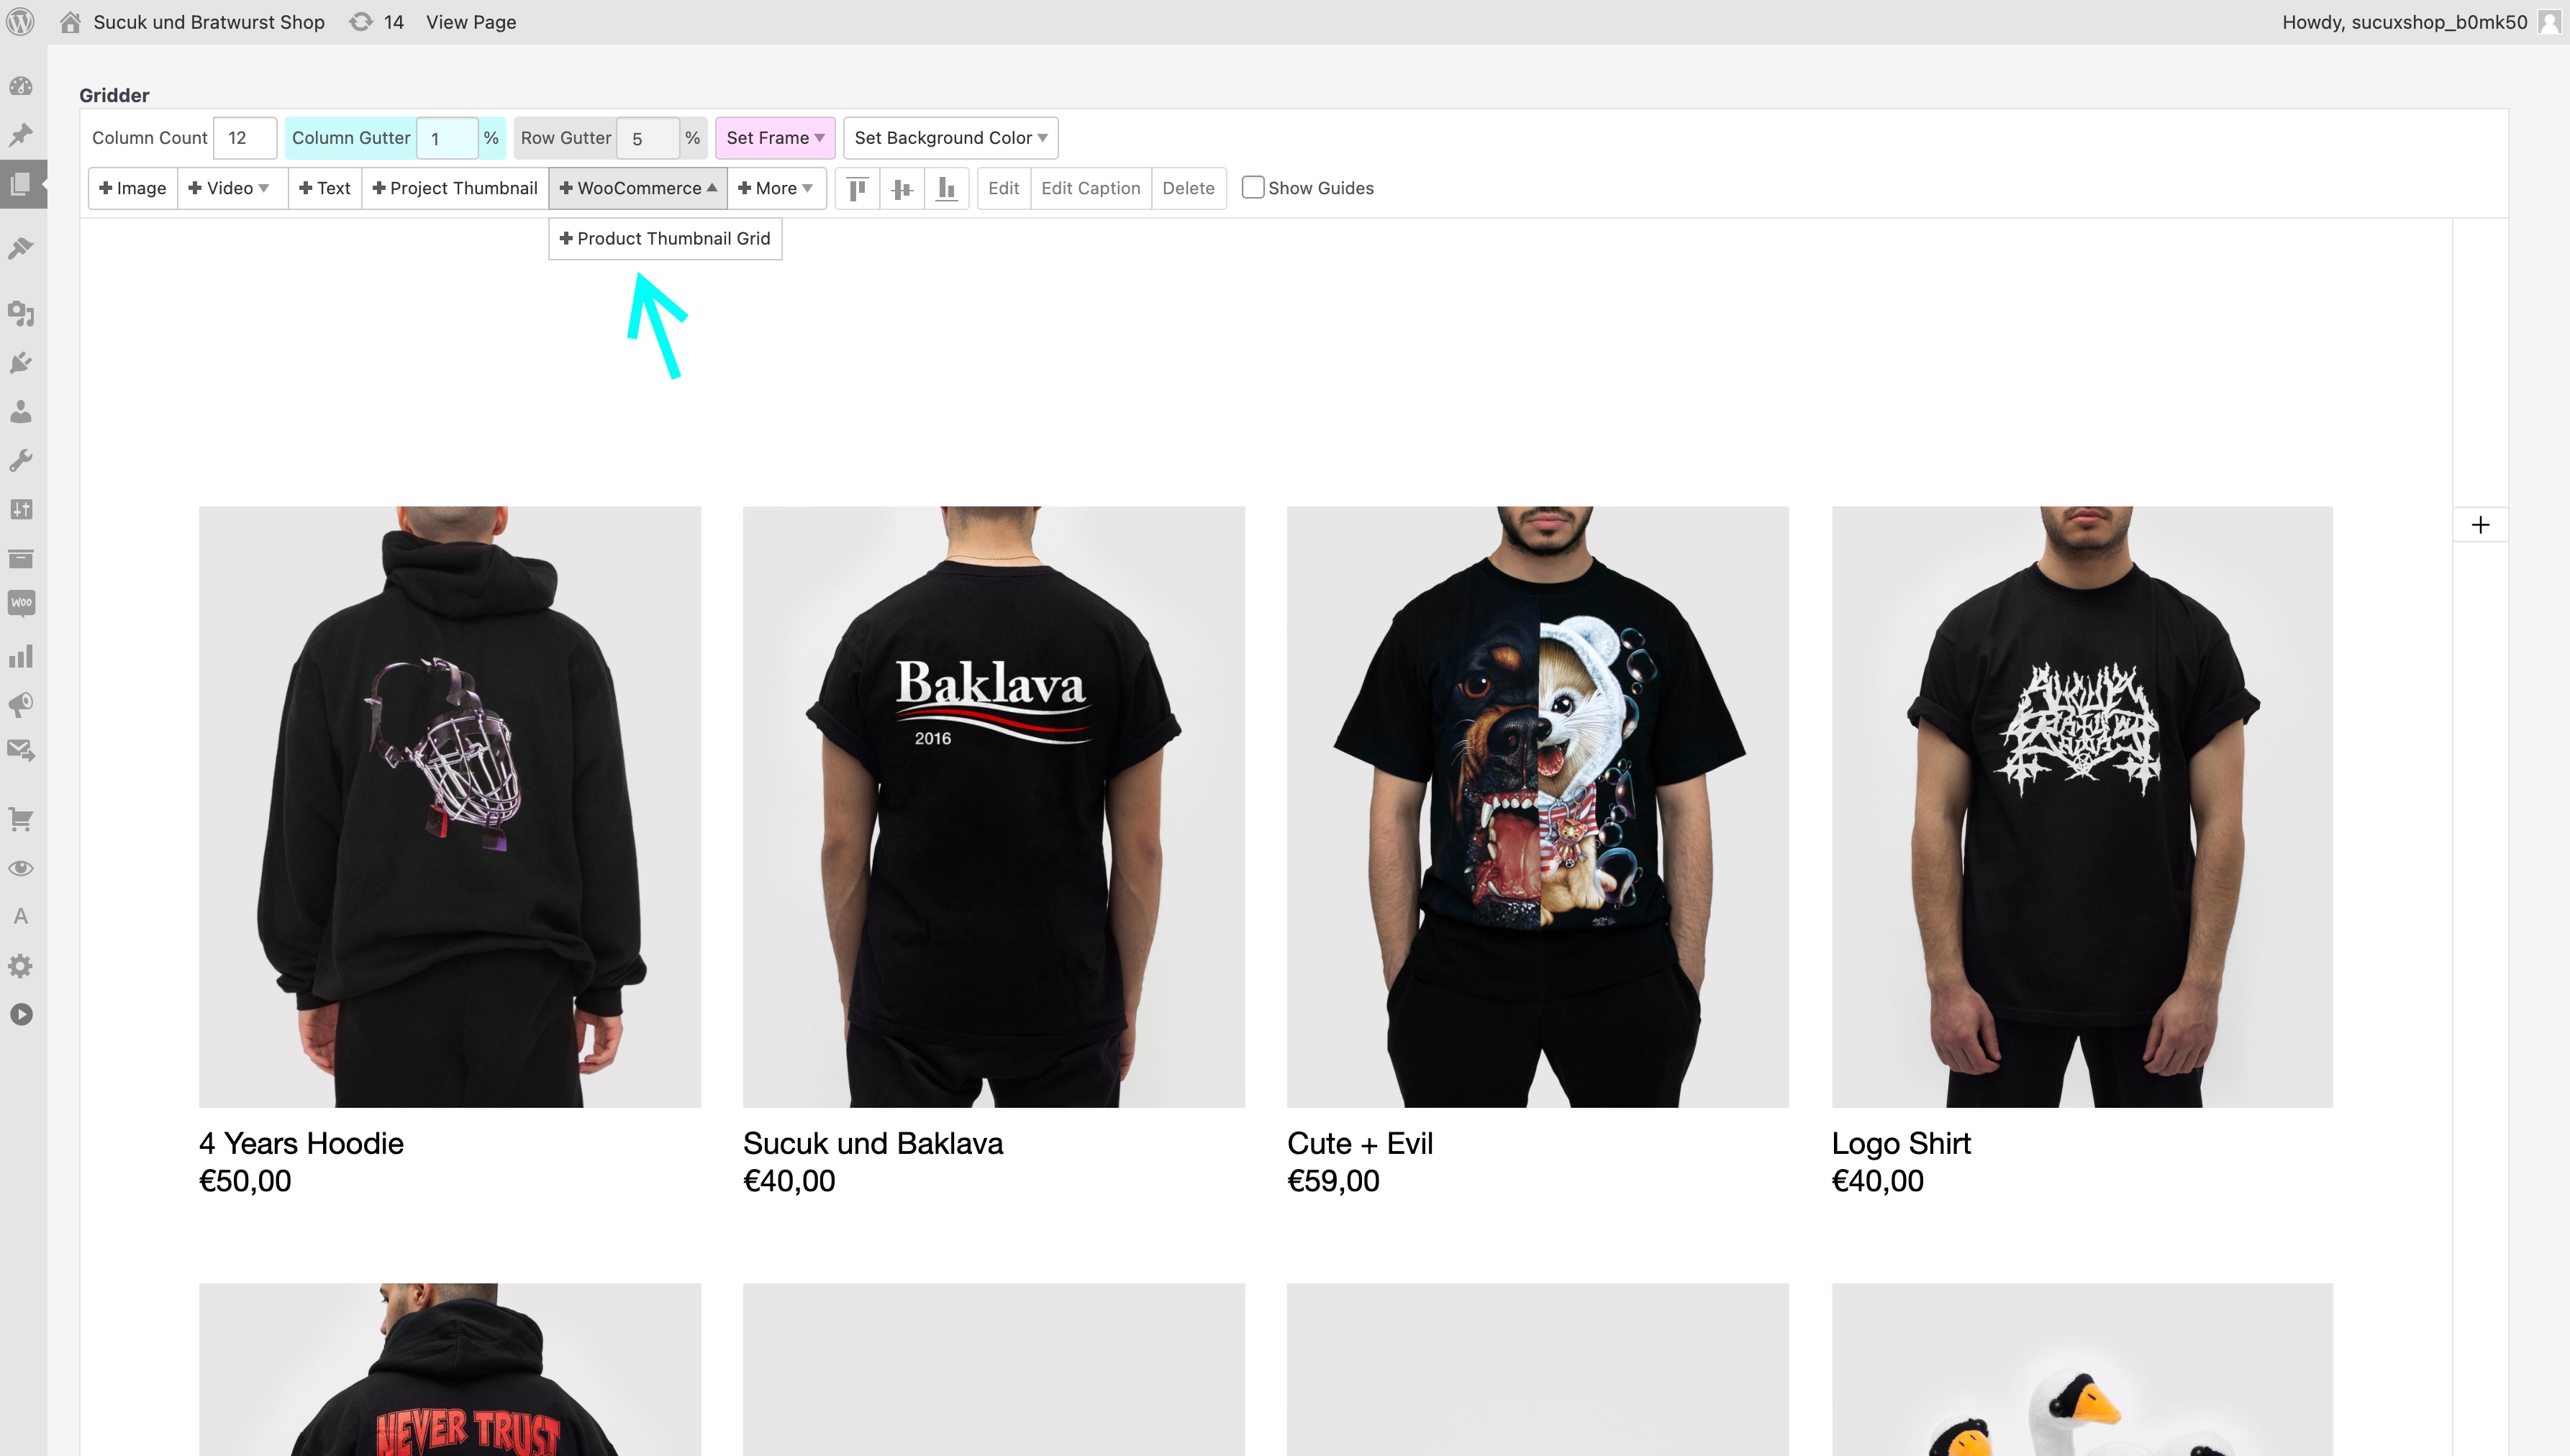
The Product Thumbnail Grid Button
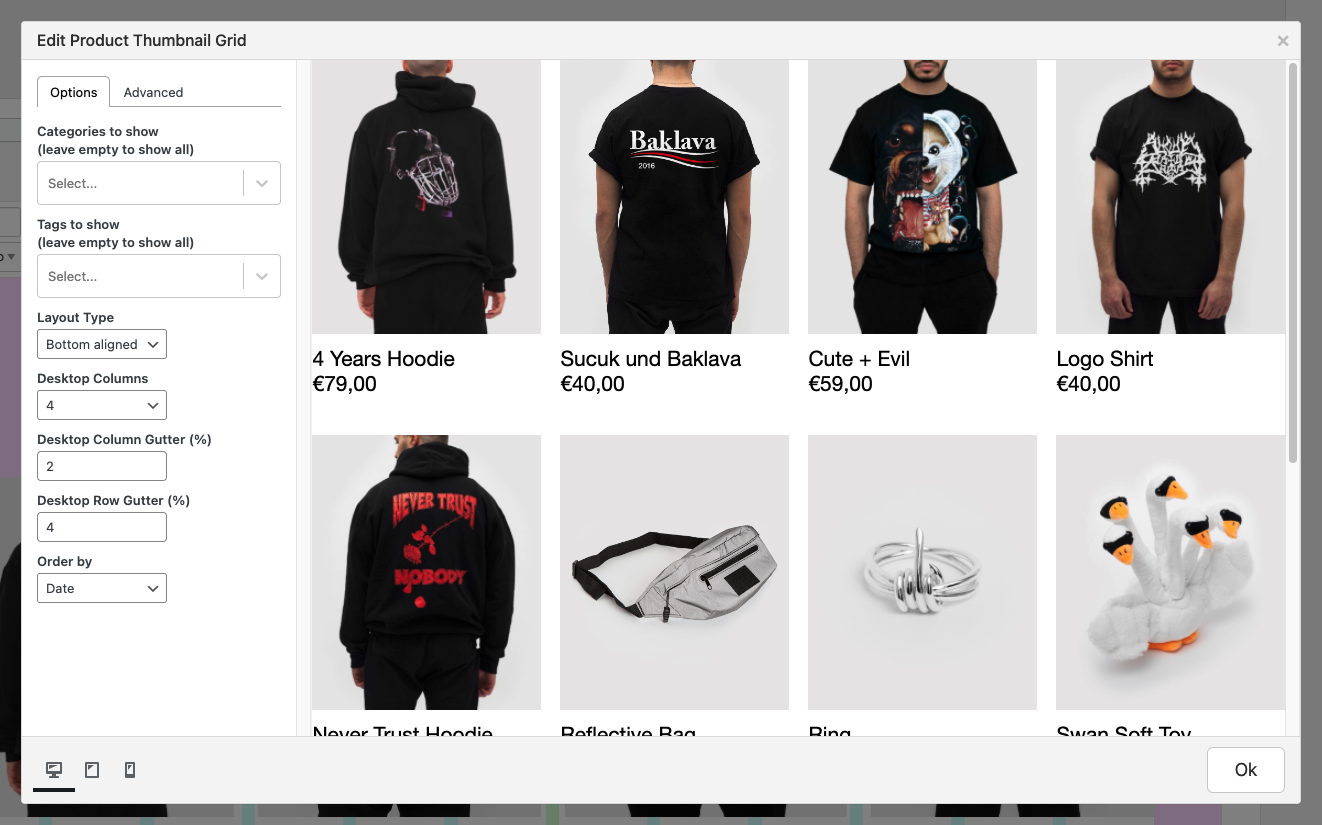
The Product Thumbnail Grid Modal
8. Customize the Look of your Shop
Find all Customizer Settings to change the Appearance of your Shop in "Customize" → "WooCommerce".
In "Customize" → "WooCommerce" → "Product Thumbnails" make sure to use a value of 600 or higher for "Thumbnail Resolution".
Many Settings use new predefined Shop Textformats. Find the new Shop Textformats in "Textformats". About Textformats
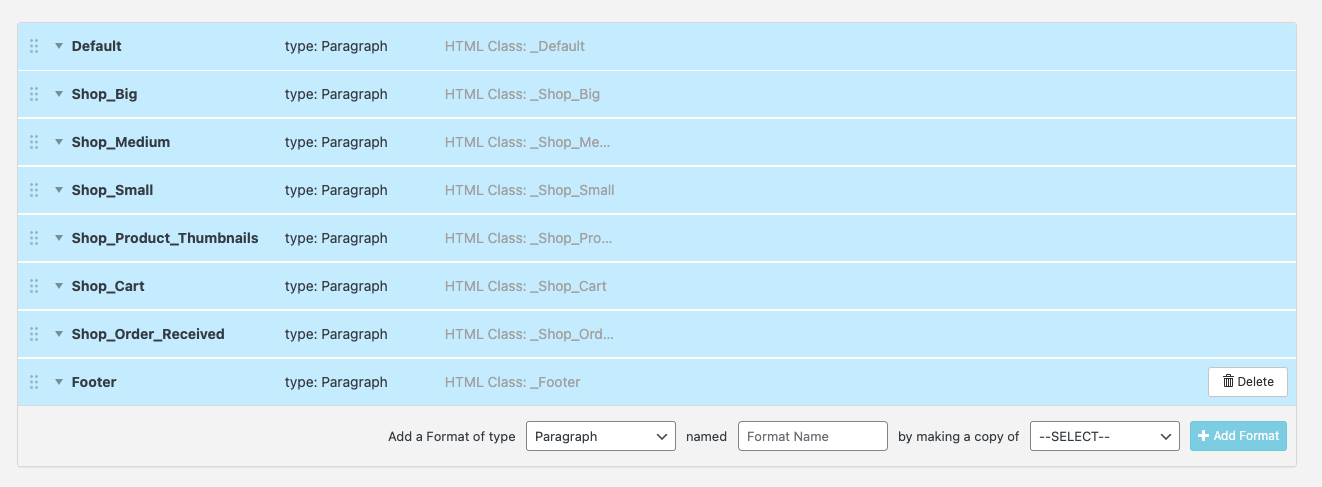
All new Shop Textformats, like "Shop_Big"
9. Footer with Shop-related links
Activate the Footer Feature. Now in the Gridder of your Footer Page, add the "Text Footer" Element.
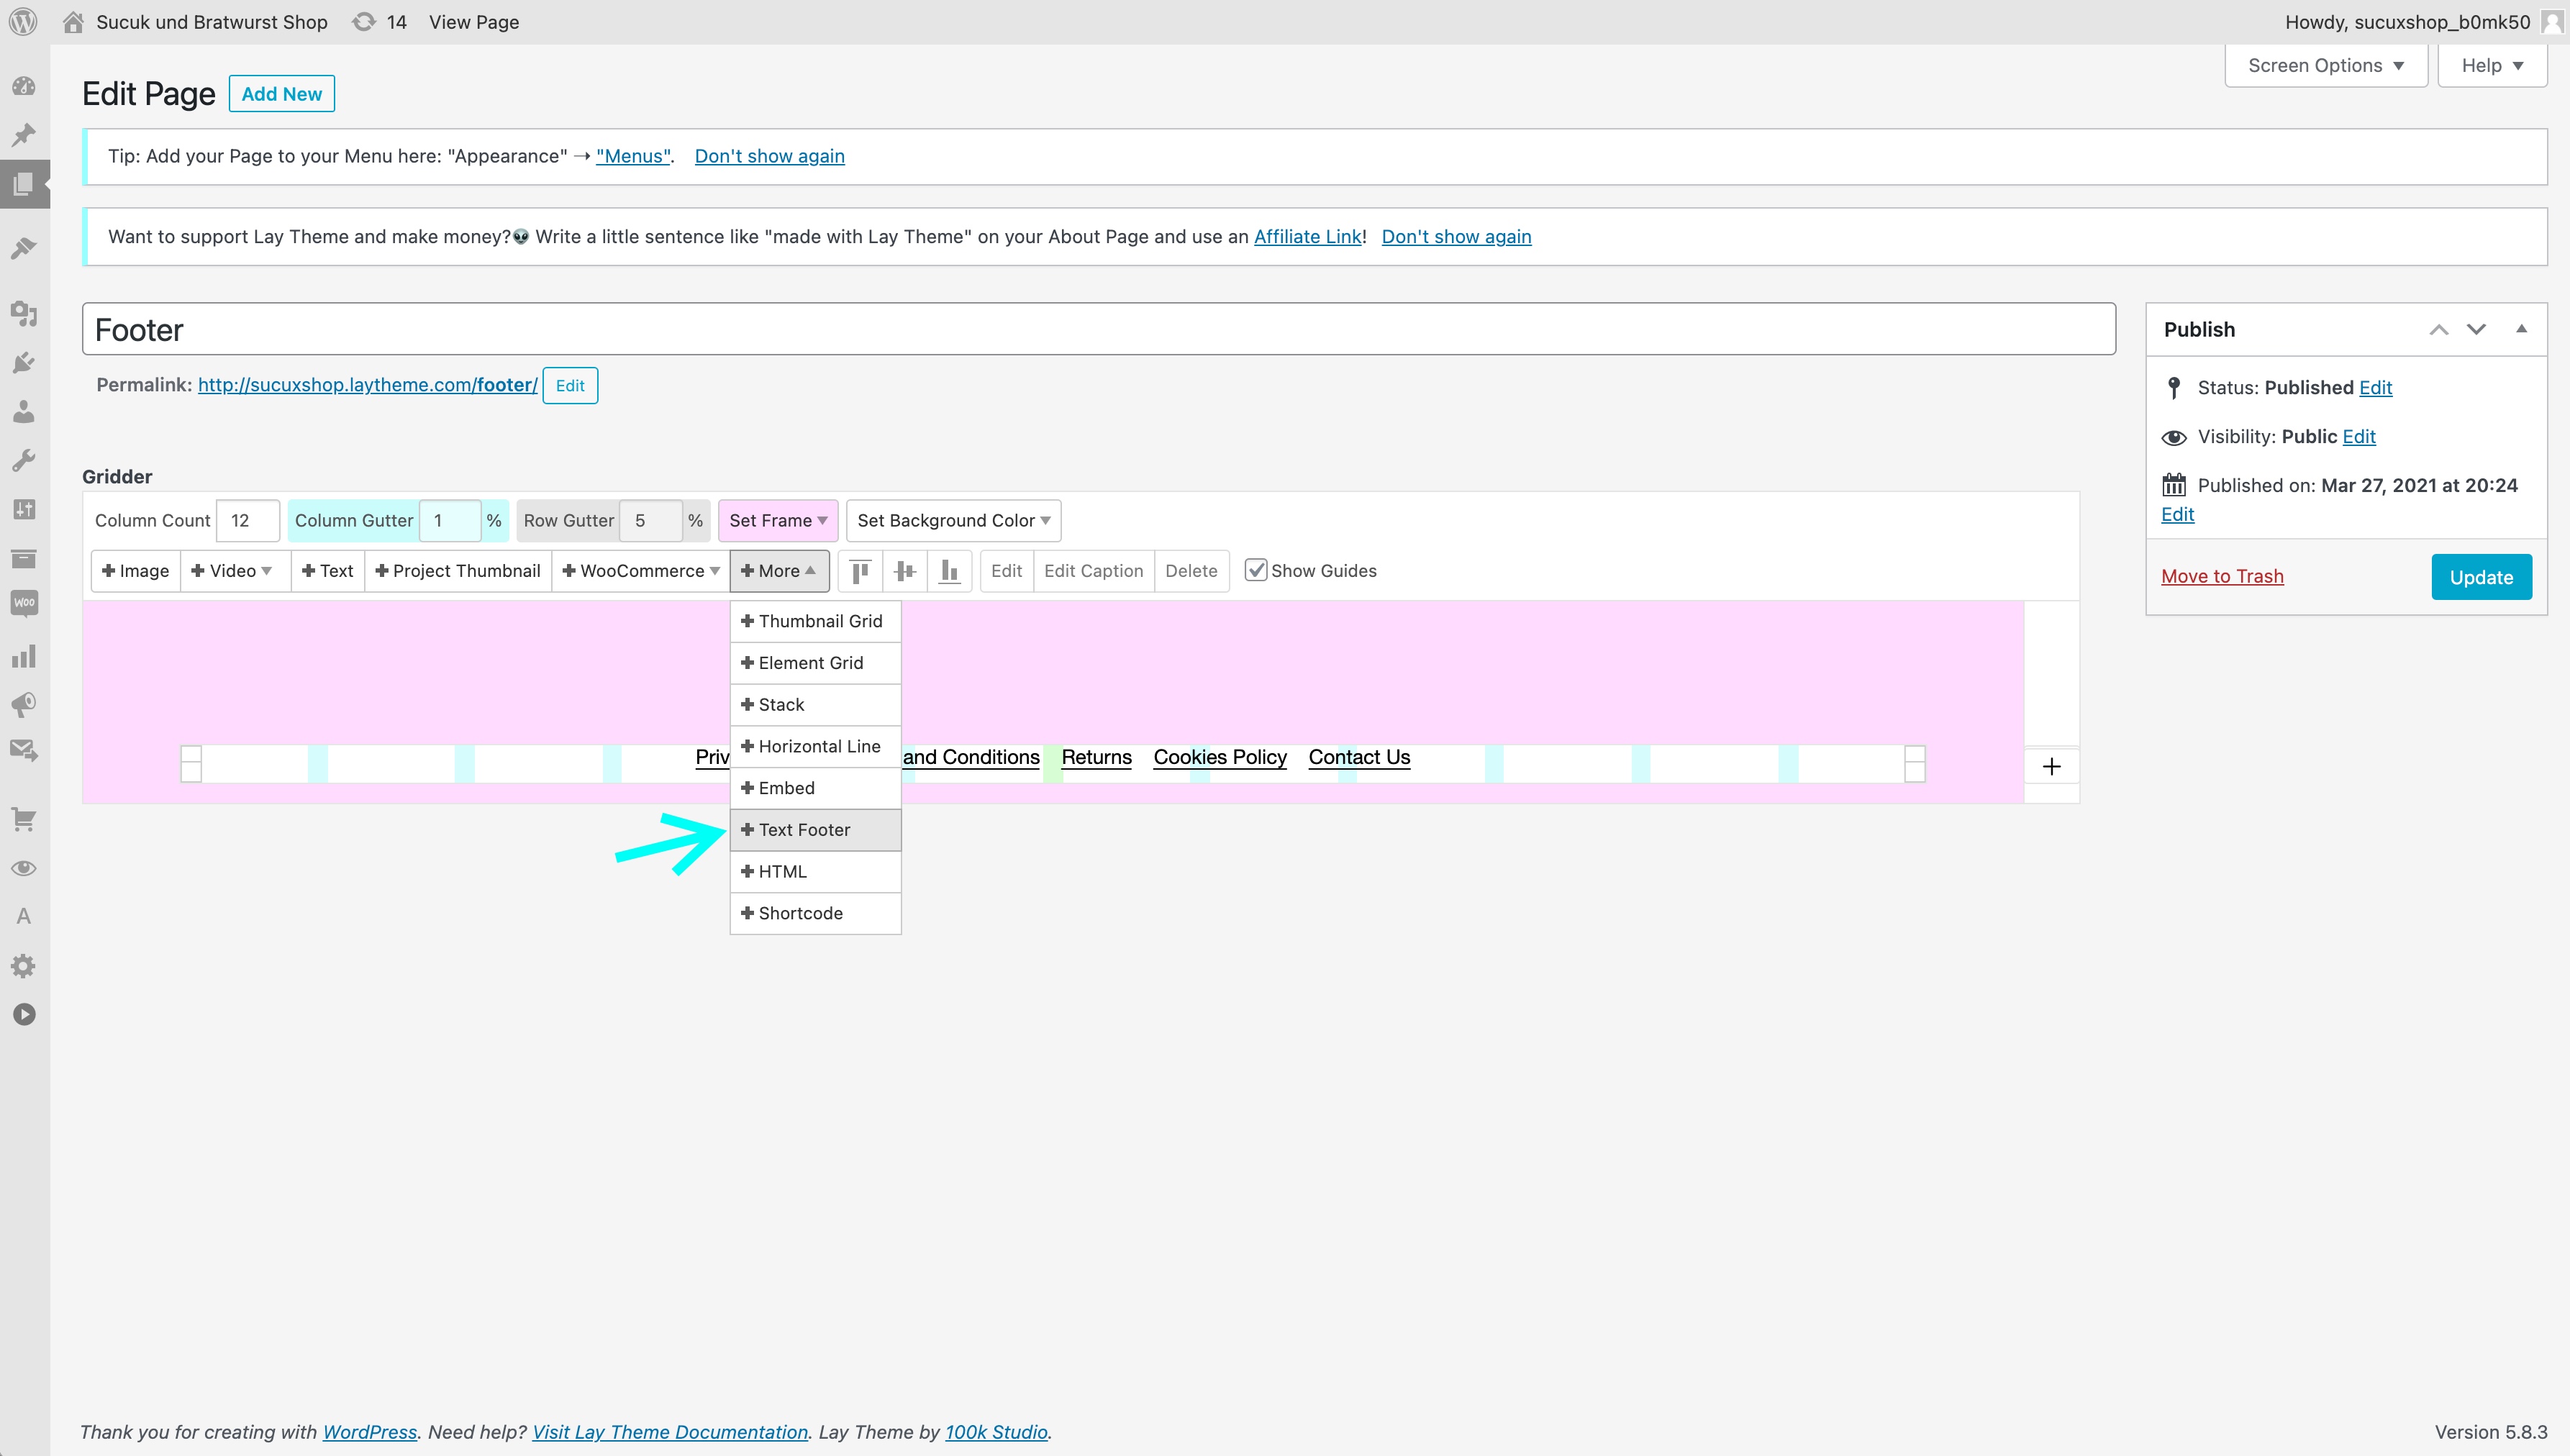
The "Text Footer" Button
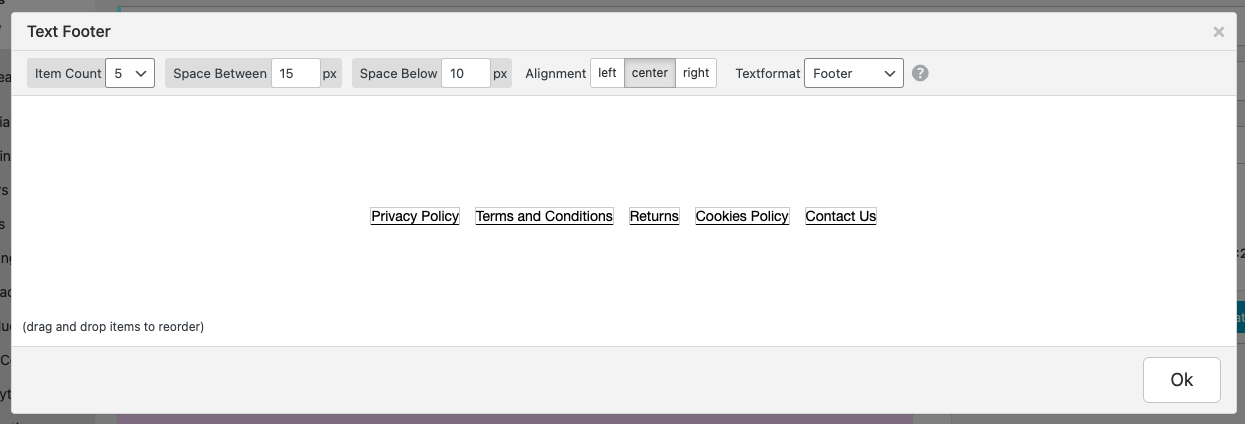
The "Text Footer" Modal
In your footer, you can add links to your shop-related pages like "Privacy Policy", "Terms and Conditions", "Returns", "Contact Us" and more.
10. Privacy Policy, Terms and Conditions, Returns
To find texts for your "Privacy Policy" page go to "Settings" → "Privacy" → "Policy Guide".
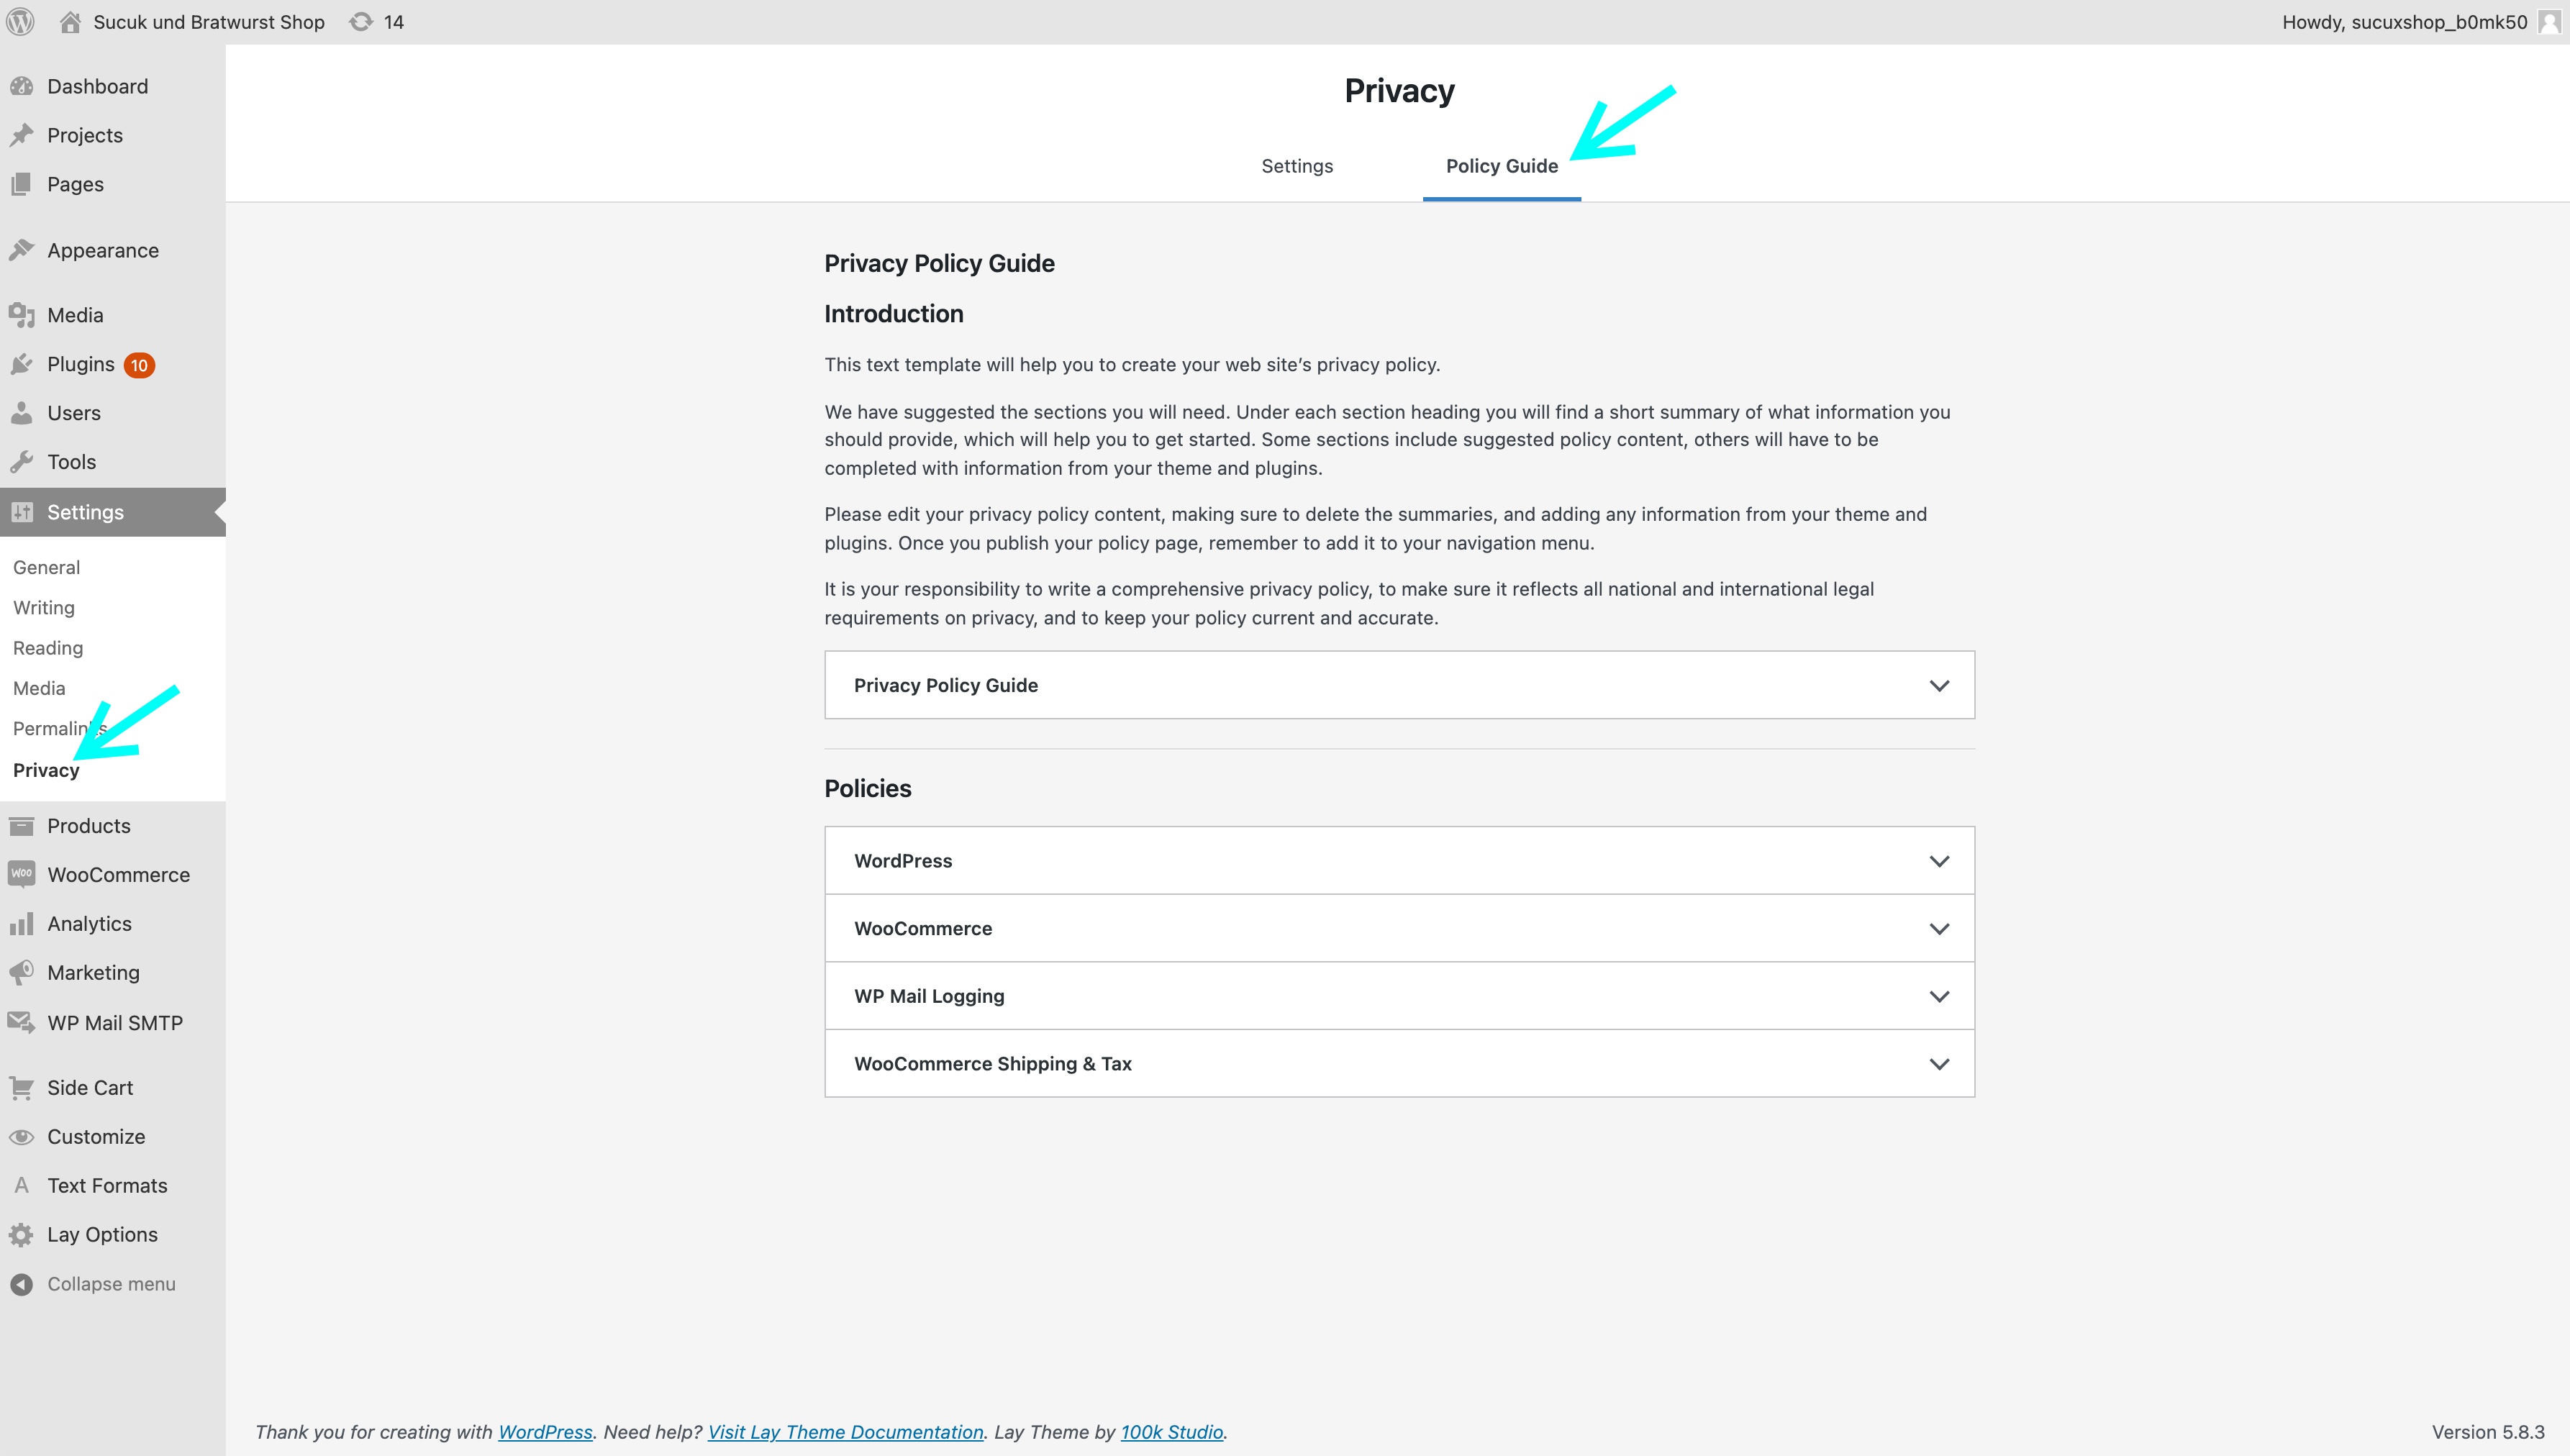
Also a plugin like "WP Legal Pages" can help you generate pages like "Privacy Policy", "Terms and Conditions" and "Returns".
11. Do a Test Purchase
Do a Test Purchase to see how it works.
The easiest way to do a test-purchase is to activate the payment method "Cash after Delivery" in "WooCommerce" → "Settings" → "Payments". Then do a purchase and choose that Payment Method during Checkout.
Or you could just set a very low price for one of your products.
12. Emails
After a test purchase is completed, you'll receive an email about your order to the email address you provided during checkout. You can customize your emails in "WooCommerce" → "Settings" → "Emails". You could for example change the default color which is purple.
If you haven't received an email your webserver might not be configured correctly to send out emails.
In that case you can contact your Webhost Support or read the WooCommerce email FAQ. For us using the plugin "WP Mail SMTP" worked well to fix this.
13. Shipping Labels and Invoices
For generating invoices and packing slips we recommend the Plugin "WooCommerce PDF Invoices, Packing Slips, Delivery Notes and Shipping Labels".
💫 Thanks to @sucukundbratwurst for letting me use their product images for the test shop. 💫