How I Build €10,000
Gallery Websites with AI
8th November 2026

Intro
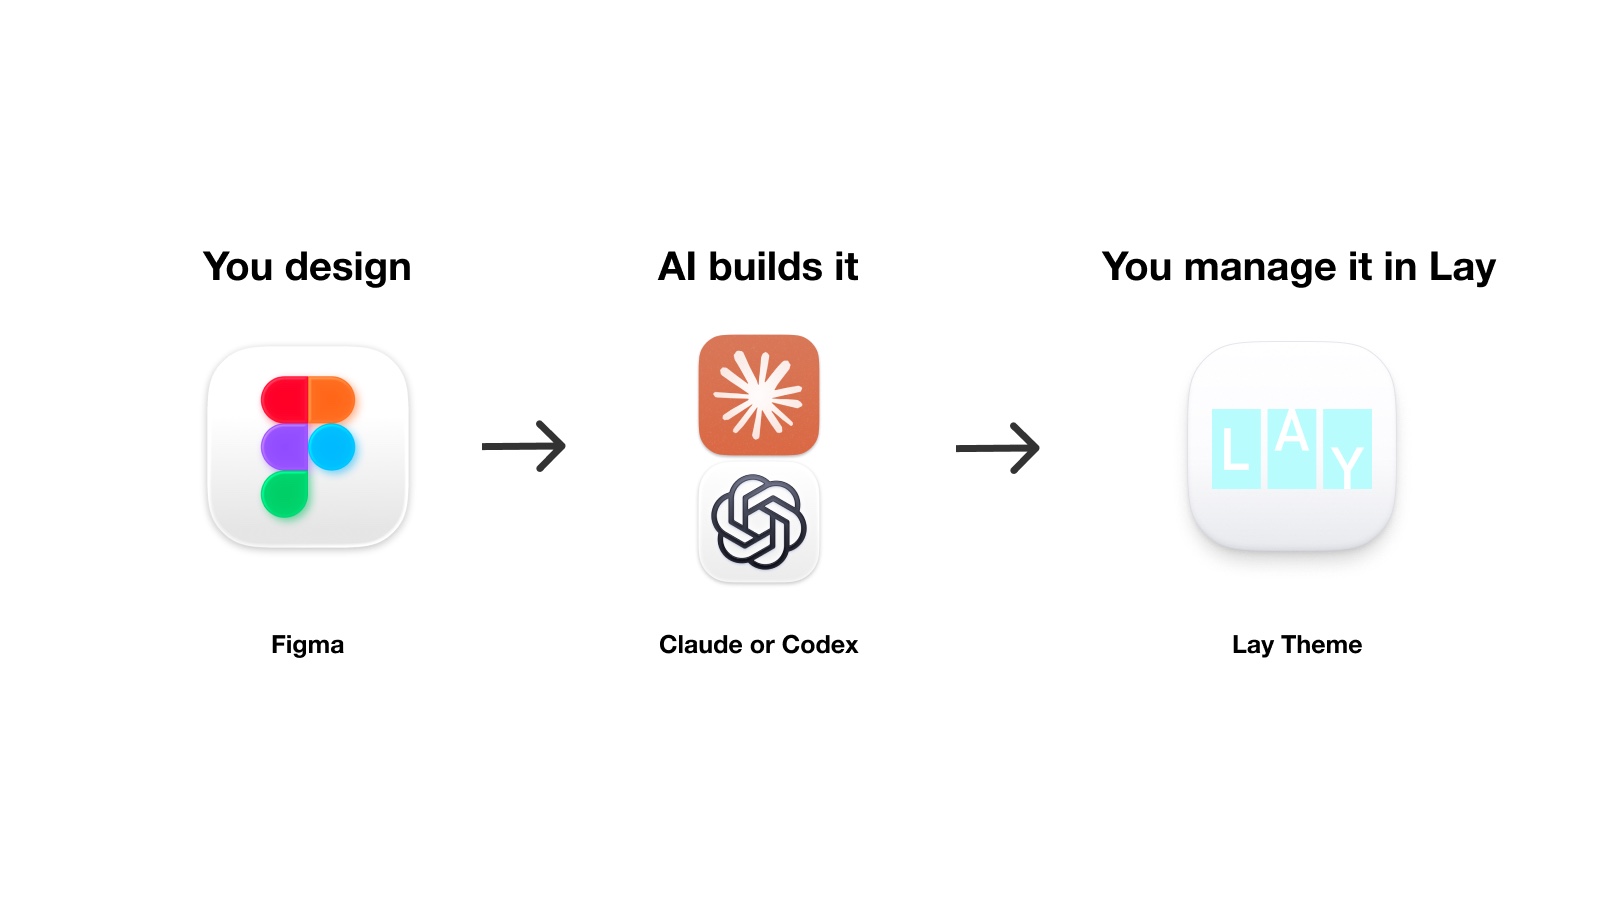
My world was turned upside down at the start of this year, when I realized: Yo, I read 50 pages of a C++ book daily all summer long when I was 22. I learned and practiced programming and Web Development for 15 years. And now, anyone with a Claude / Codex subscription can do everything I do.
BUT, I can still do what I did all my life and much faster: Making professional Websites, for budgets of 10k€ (mostly). Just faster and smarter, but still as professional as before. And now I teach you how to do that too.
The concepts are universal. Depending on the project, you may need a different CMS, platform or workflow. This tutorial focuses on agentic website building with Lay Theme, a website builder built on top of WordPress.
But just to be clear: Lay Theme is still a good tool for creating simple websites without AI, but now it has become much more powerful.
Anyways, lets go.
Disclosure
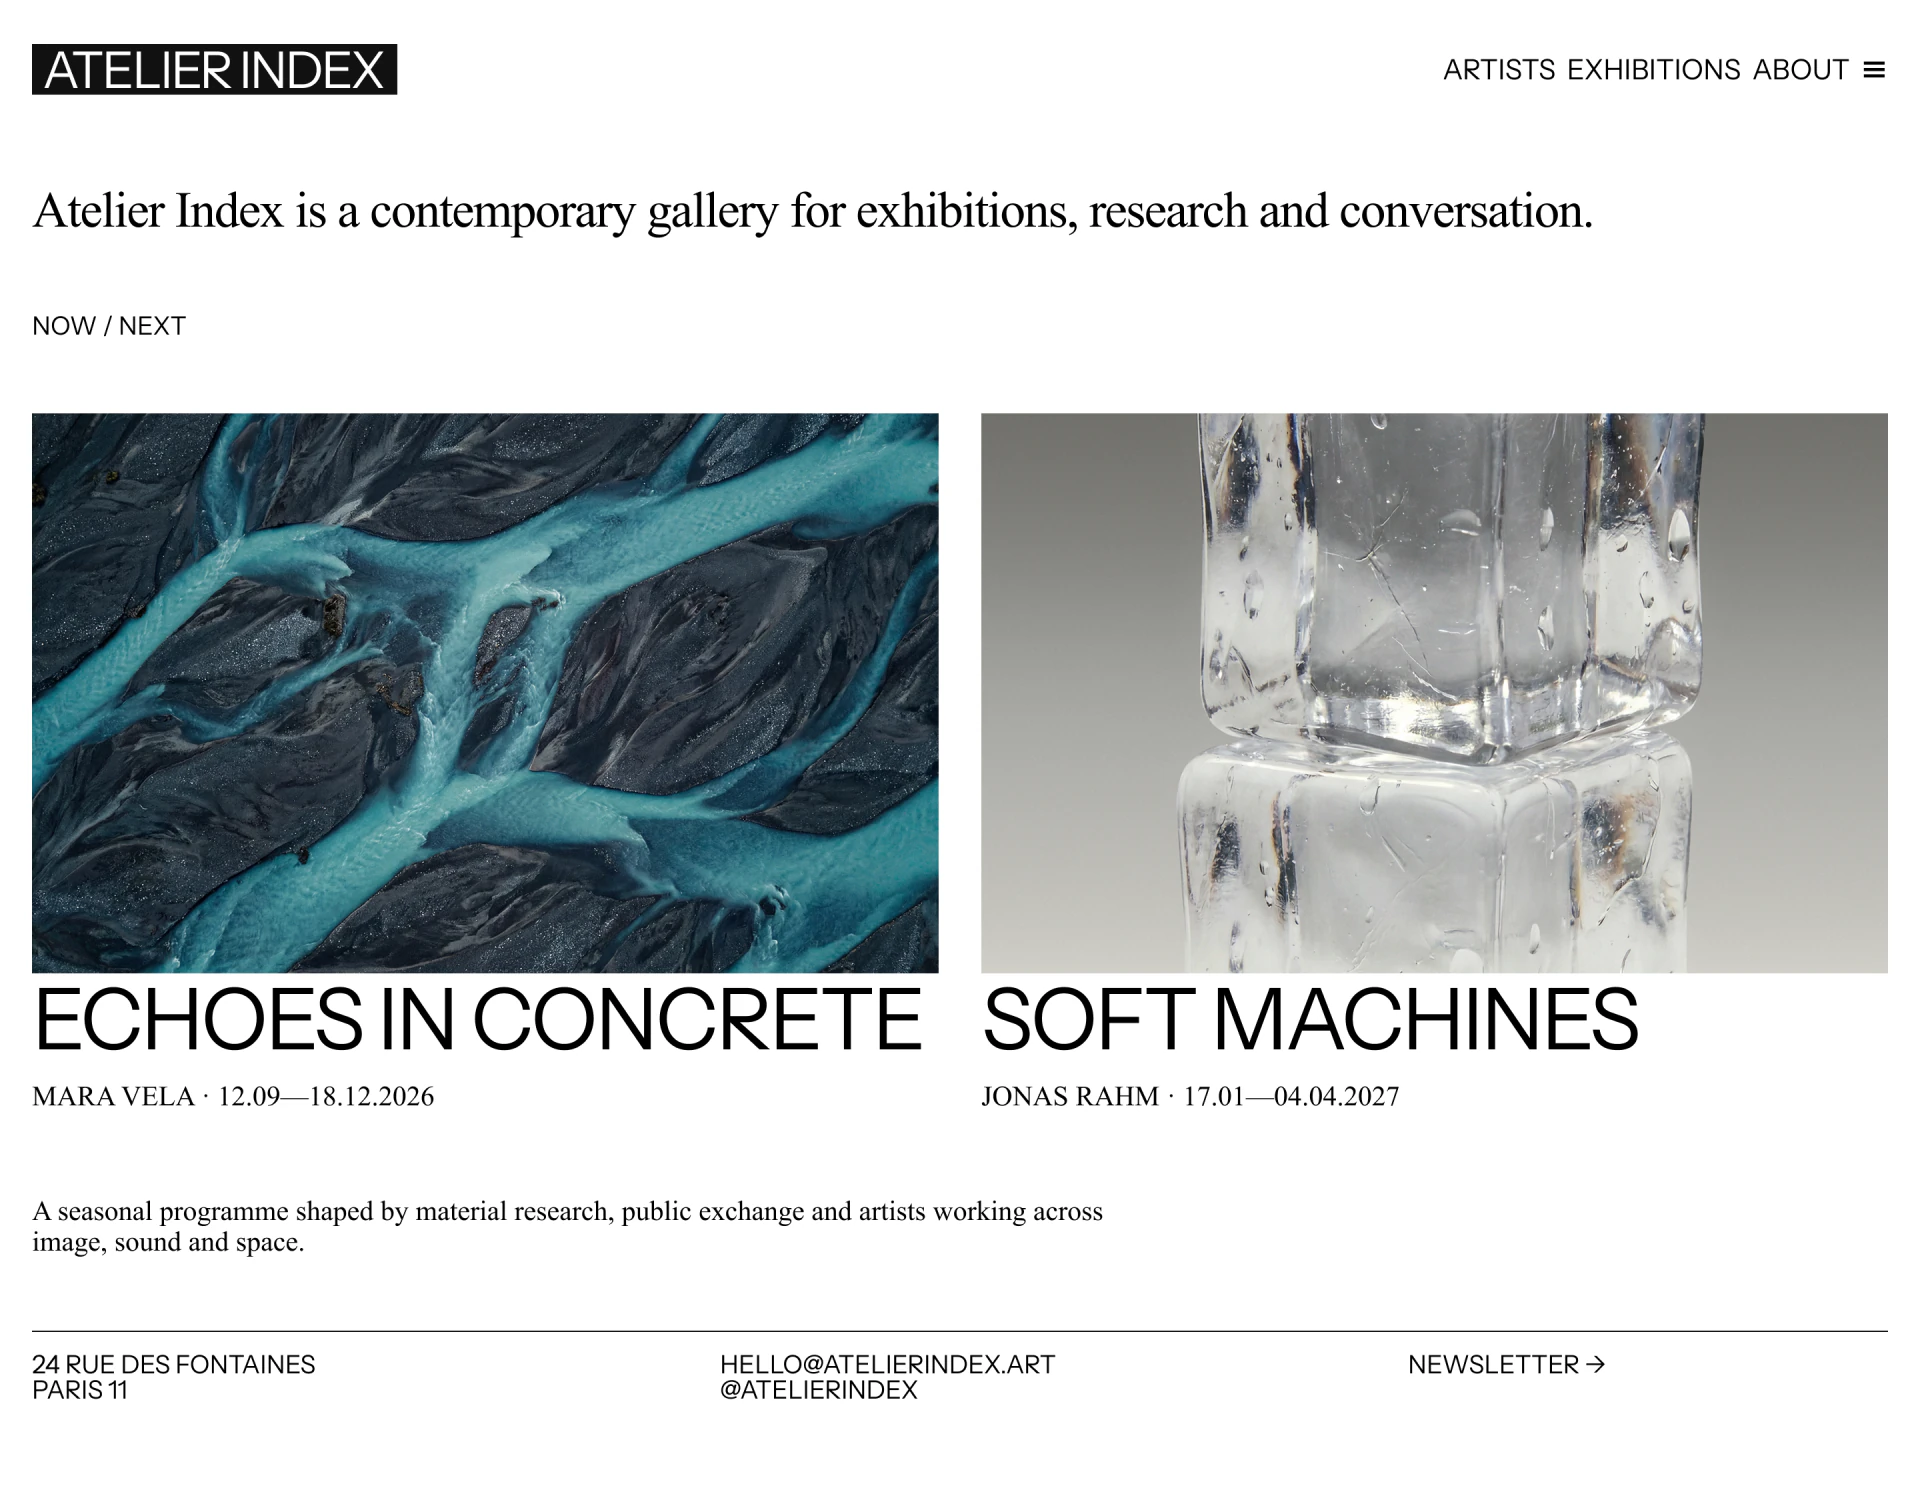
Yes, I really built a €10,000 gallery website with AI. The website in this tutorial is not that client's website. It is an example website. I want to keep the client anonymous, and I do not want the project to be connected to the idea that it was generated quickly or made with less care. It was a professional project. The example website lets me show you the same workflow without using the client's content.
For the real client project, professional designers prepared the design in Figma. I only implemented it in Lay Theme. In this tutorial, I also describe Agentic Design for Figma simply because I find the approach interesting. That is not how the real client's design was created.
The real website also included a shop, and I migrated all of the data from the old website to the new one using AI.
I know that AI is creating real uncertainty and making it harder for many people in our industry to find work. This tutorial is not meant as a flex. I hope it can help designers and developers explore another workflow, learn something new and expand the possibilities available to them.
Enable AI Mode and connect with
Claude or ChatGPT
First, enable AI Mode in Lay Theme.
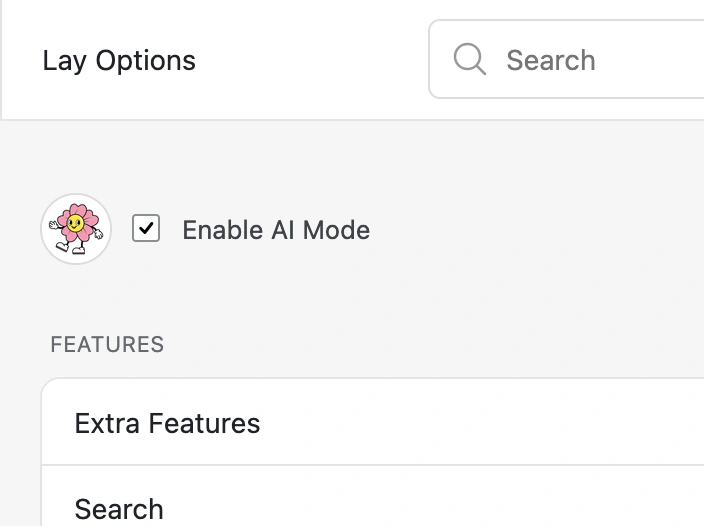
Then connect Claude or ChatGPT to AI Mode.
The Sitemap
You know what they say, if you fail to plan, you plan to fail :D. While I'm not sure that's true, I do know it makes it a lot easier to just plan a little before diving in to create a website that is a little complex.
Just so we're on the same page, this will be the sitemap of the Gallery Website:
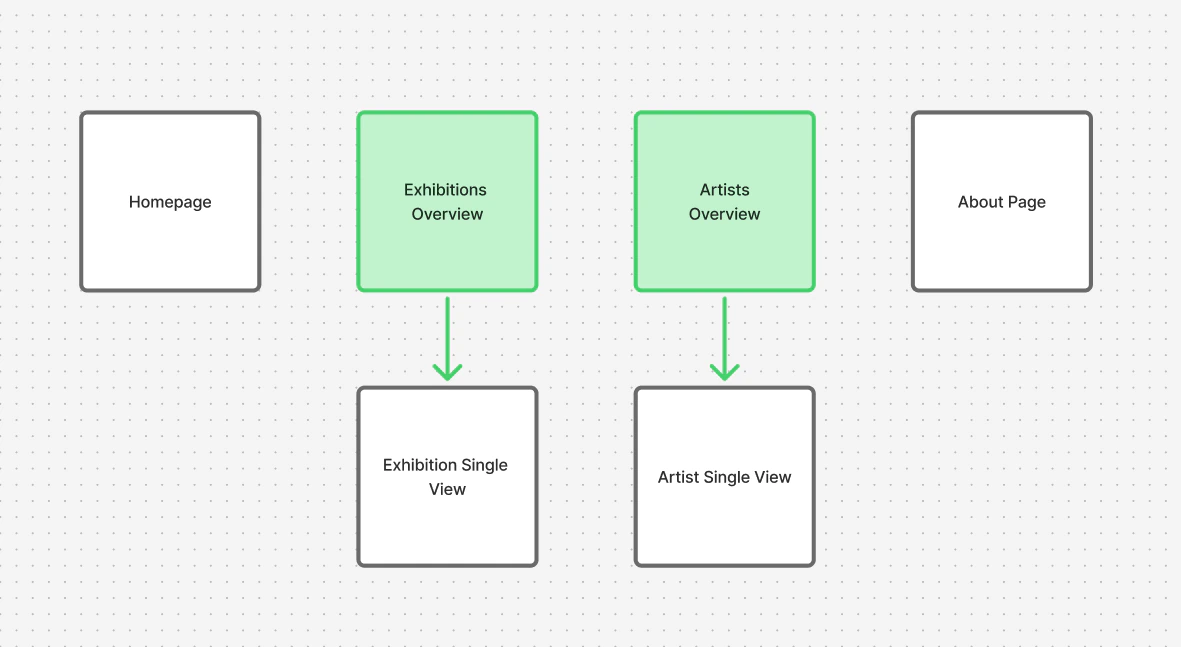
I made this with "FigJam" by Figma. Its really good to draw sitemaps during the concept phase.
The real website I built had more pages and also included a shop. I keep the sitemap smaller here so the tutorial doesn't become too complex.
If you want to add a shop to your own website, follow the Lay Theme Shop Setup / WooCommerce documentation. You can use AI Mode for the rest of the website and add the shop to the same project.
Agentic Design for Figma
AI should not be used to copy someone else's design. I use references to find a starting point, then change and develop the result until it becomes my own design.
I do think its best to have a design first, and not try to vibecode a design while building the site. Its just much faster to iterate on a design in Figma for example. When you can build a design that doesn't look generic and AI-made, I think that will become more and more valuable.
I'll build the basic design with AI.
First, I find a website that I like on browsingmode.com. In this tutorial, I call the reference website xxxxxx.it instead of naming the real website.
If you tell Figma make, Figma agents, or any AI tool that I found so far:
It will fail... It will just look generic and AI-made and look almost nothing like the reference website.
If you think about it, what does a webdesign largely consist of? It is the fonts, colors, spacing, grid, composition - the design system!
So the smart way to go about this is to open up Claude or Codex, then tell it:
If you don't have the Figma plugin installed yet in your Claude / Codex it will lead you through it.
Once finished, I got this Design. I'm not fully happy with it, but its a good starting point:
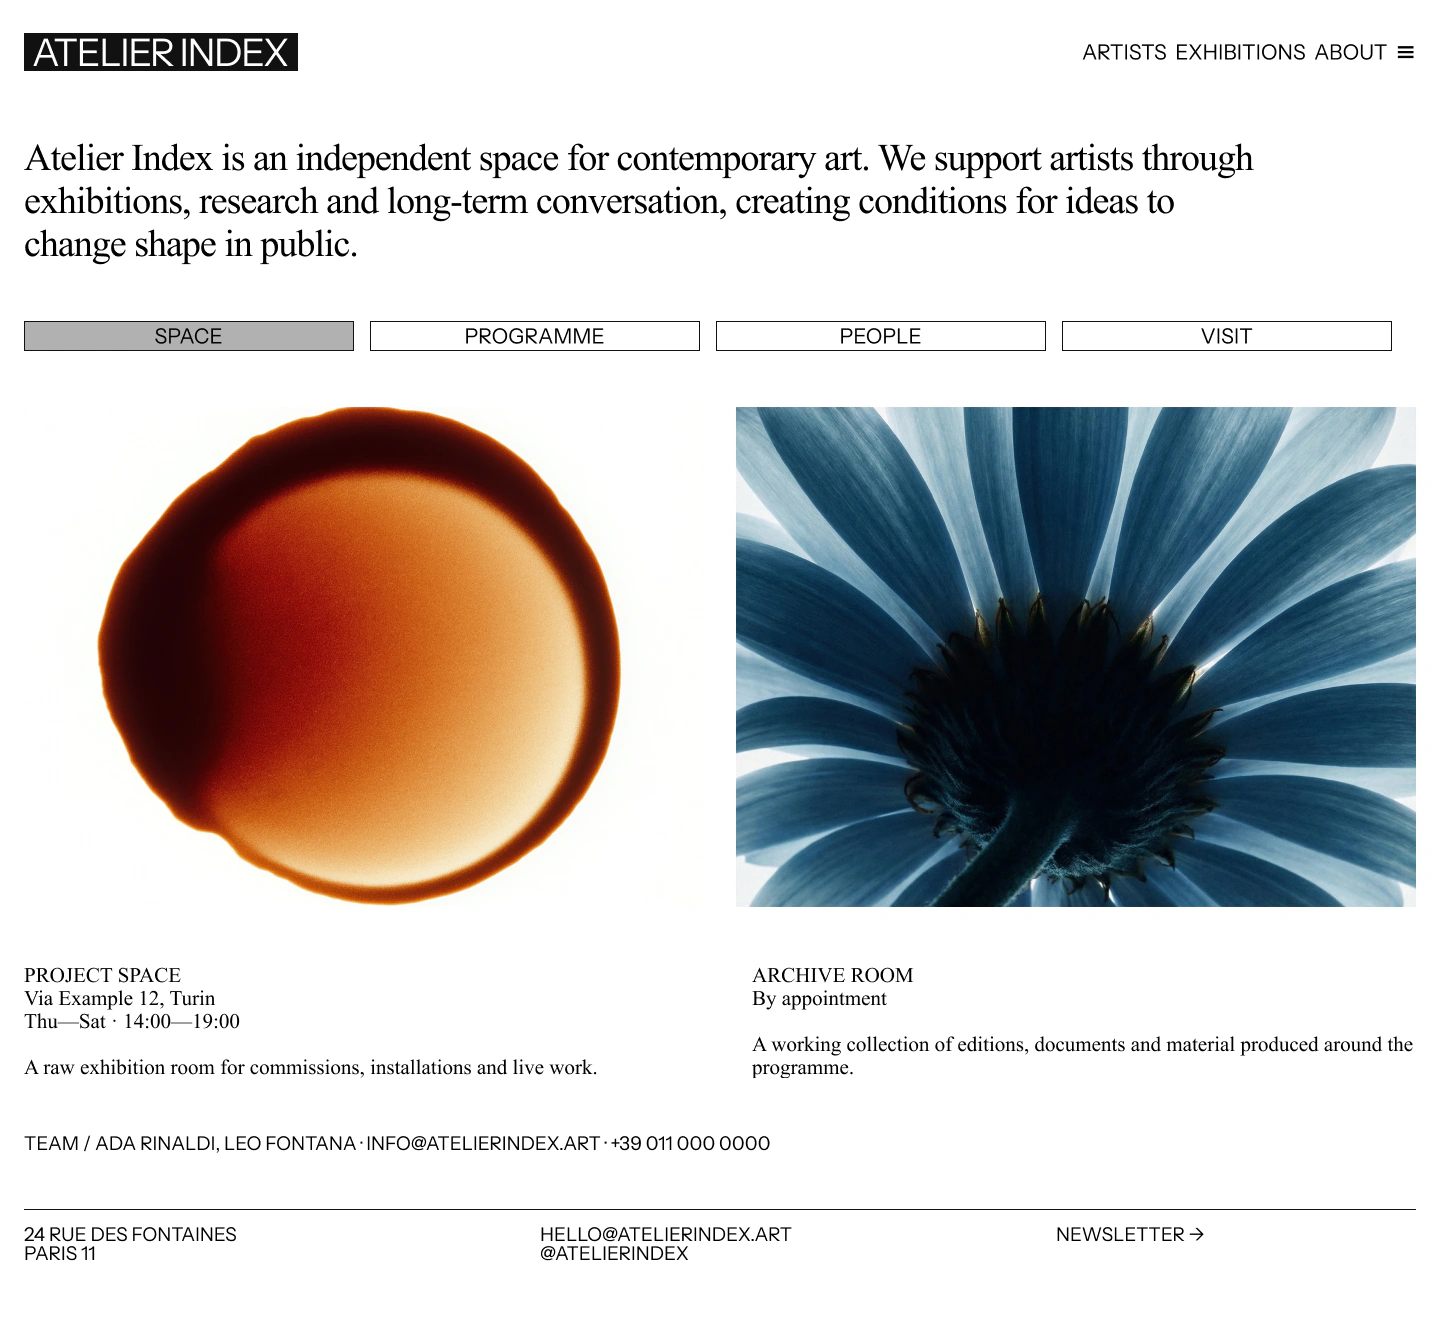
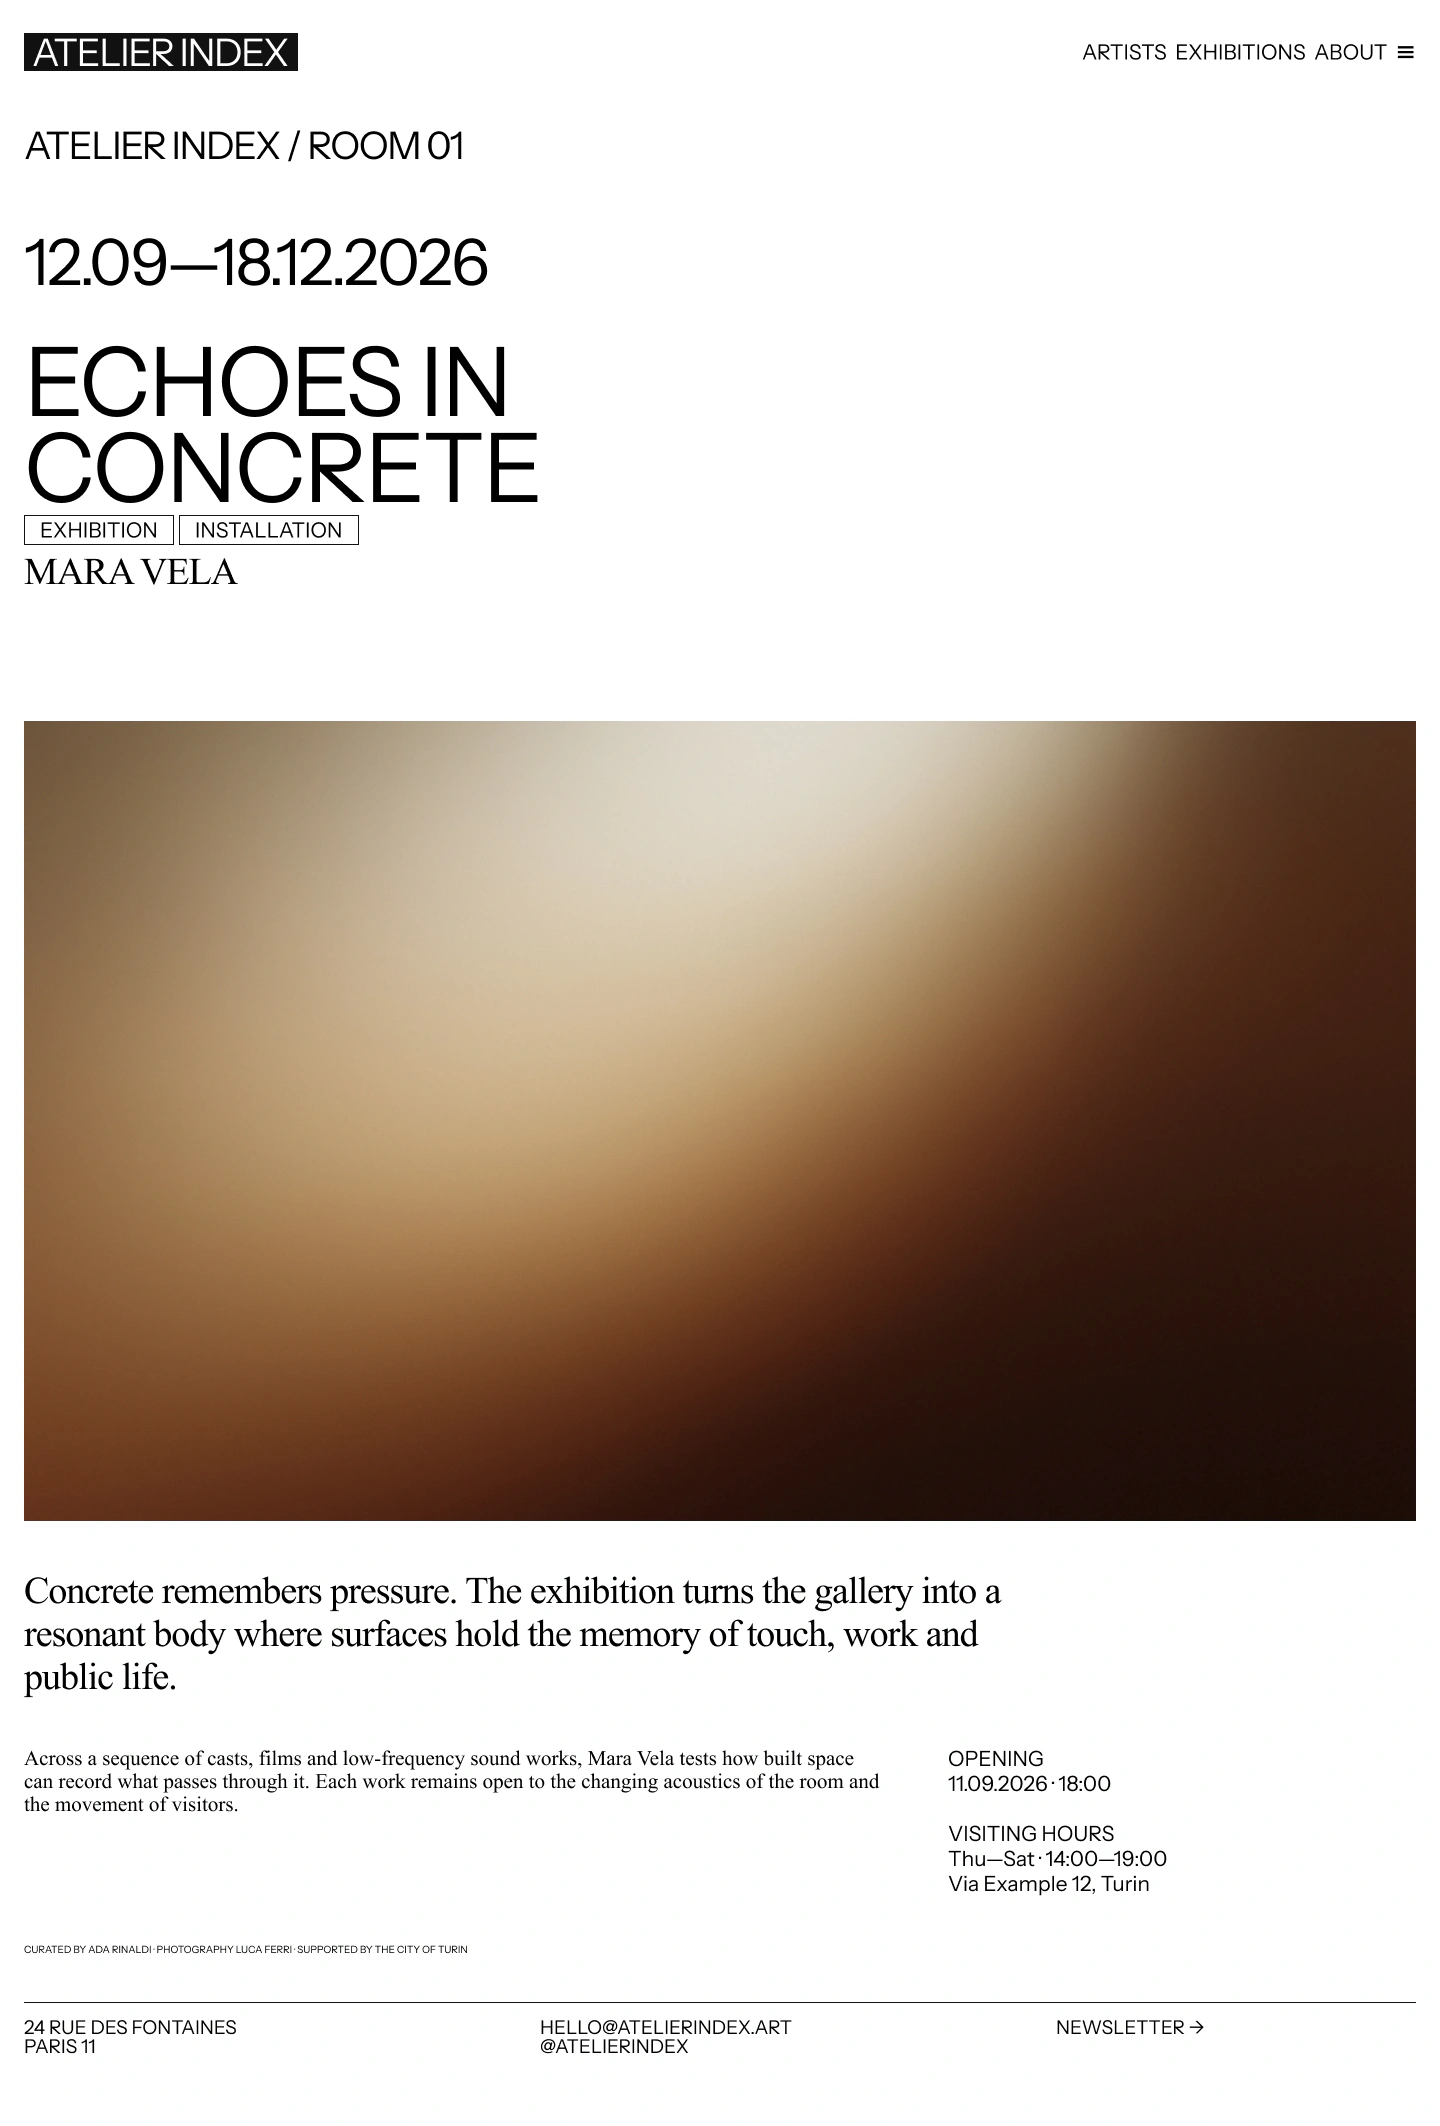
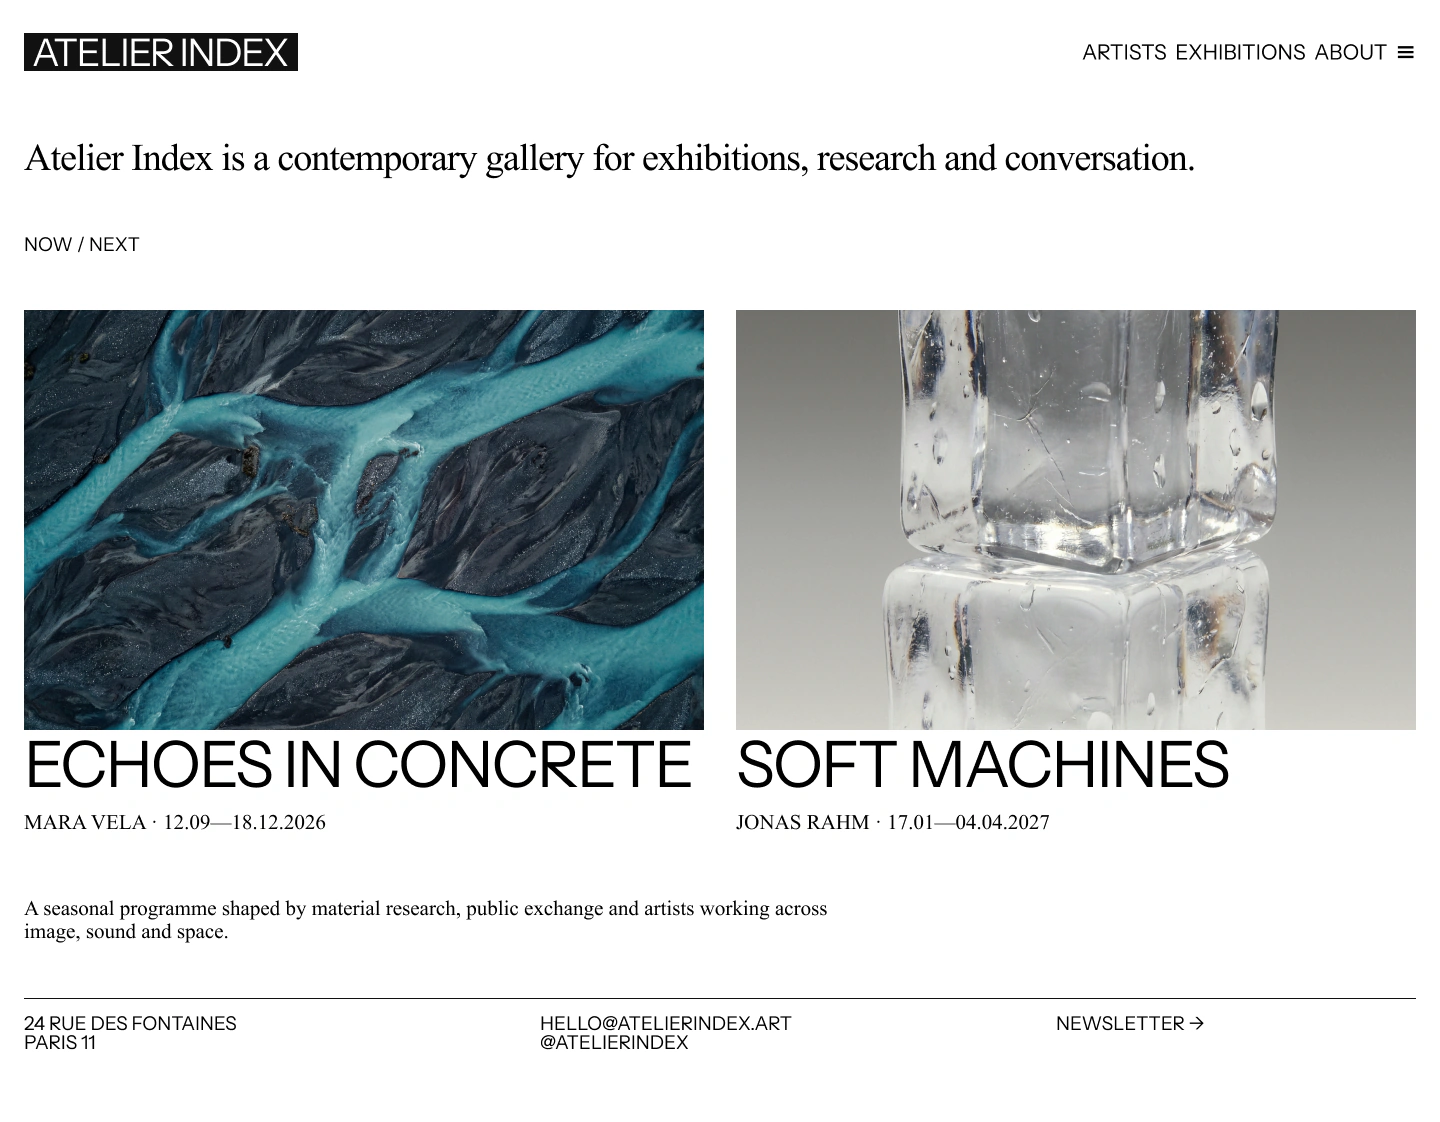

In my experience, coming up with a good design, that is fully made with AI is pretty hard. I believe AI can help with the first structure and groundwork, but coming up with a great design requires you to do manual work. So feel free to tweak the design in Figma and talk to your client and see if they like it.
For the purposes of this tutorial, I'll just take the design as it is.
But if I was you, with the goal of building a 10k€> website, I would tweak the design more.
Once the design is finished, we can move on with the implementation.
New Post Types with AI
There will be Artists. And there will be Exhibitions. So, we're first going to tell our AI:
And voilá:
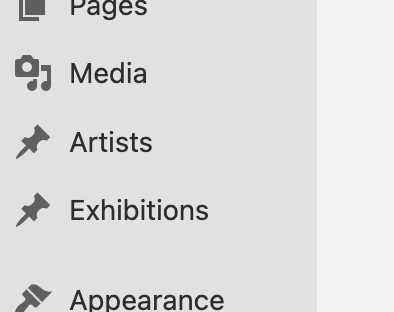
Refresh your wp-admin and you see two new Post Types: Artists and Exhibitions.
Now you can create any new Artist and Exhibition Posts, and they come with the Gridder (our Layout tool) included:
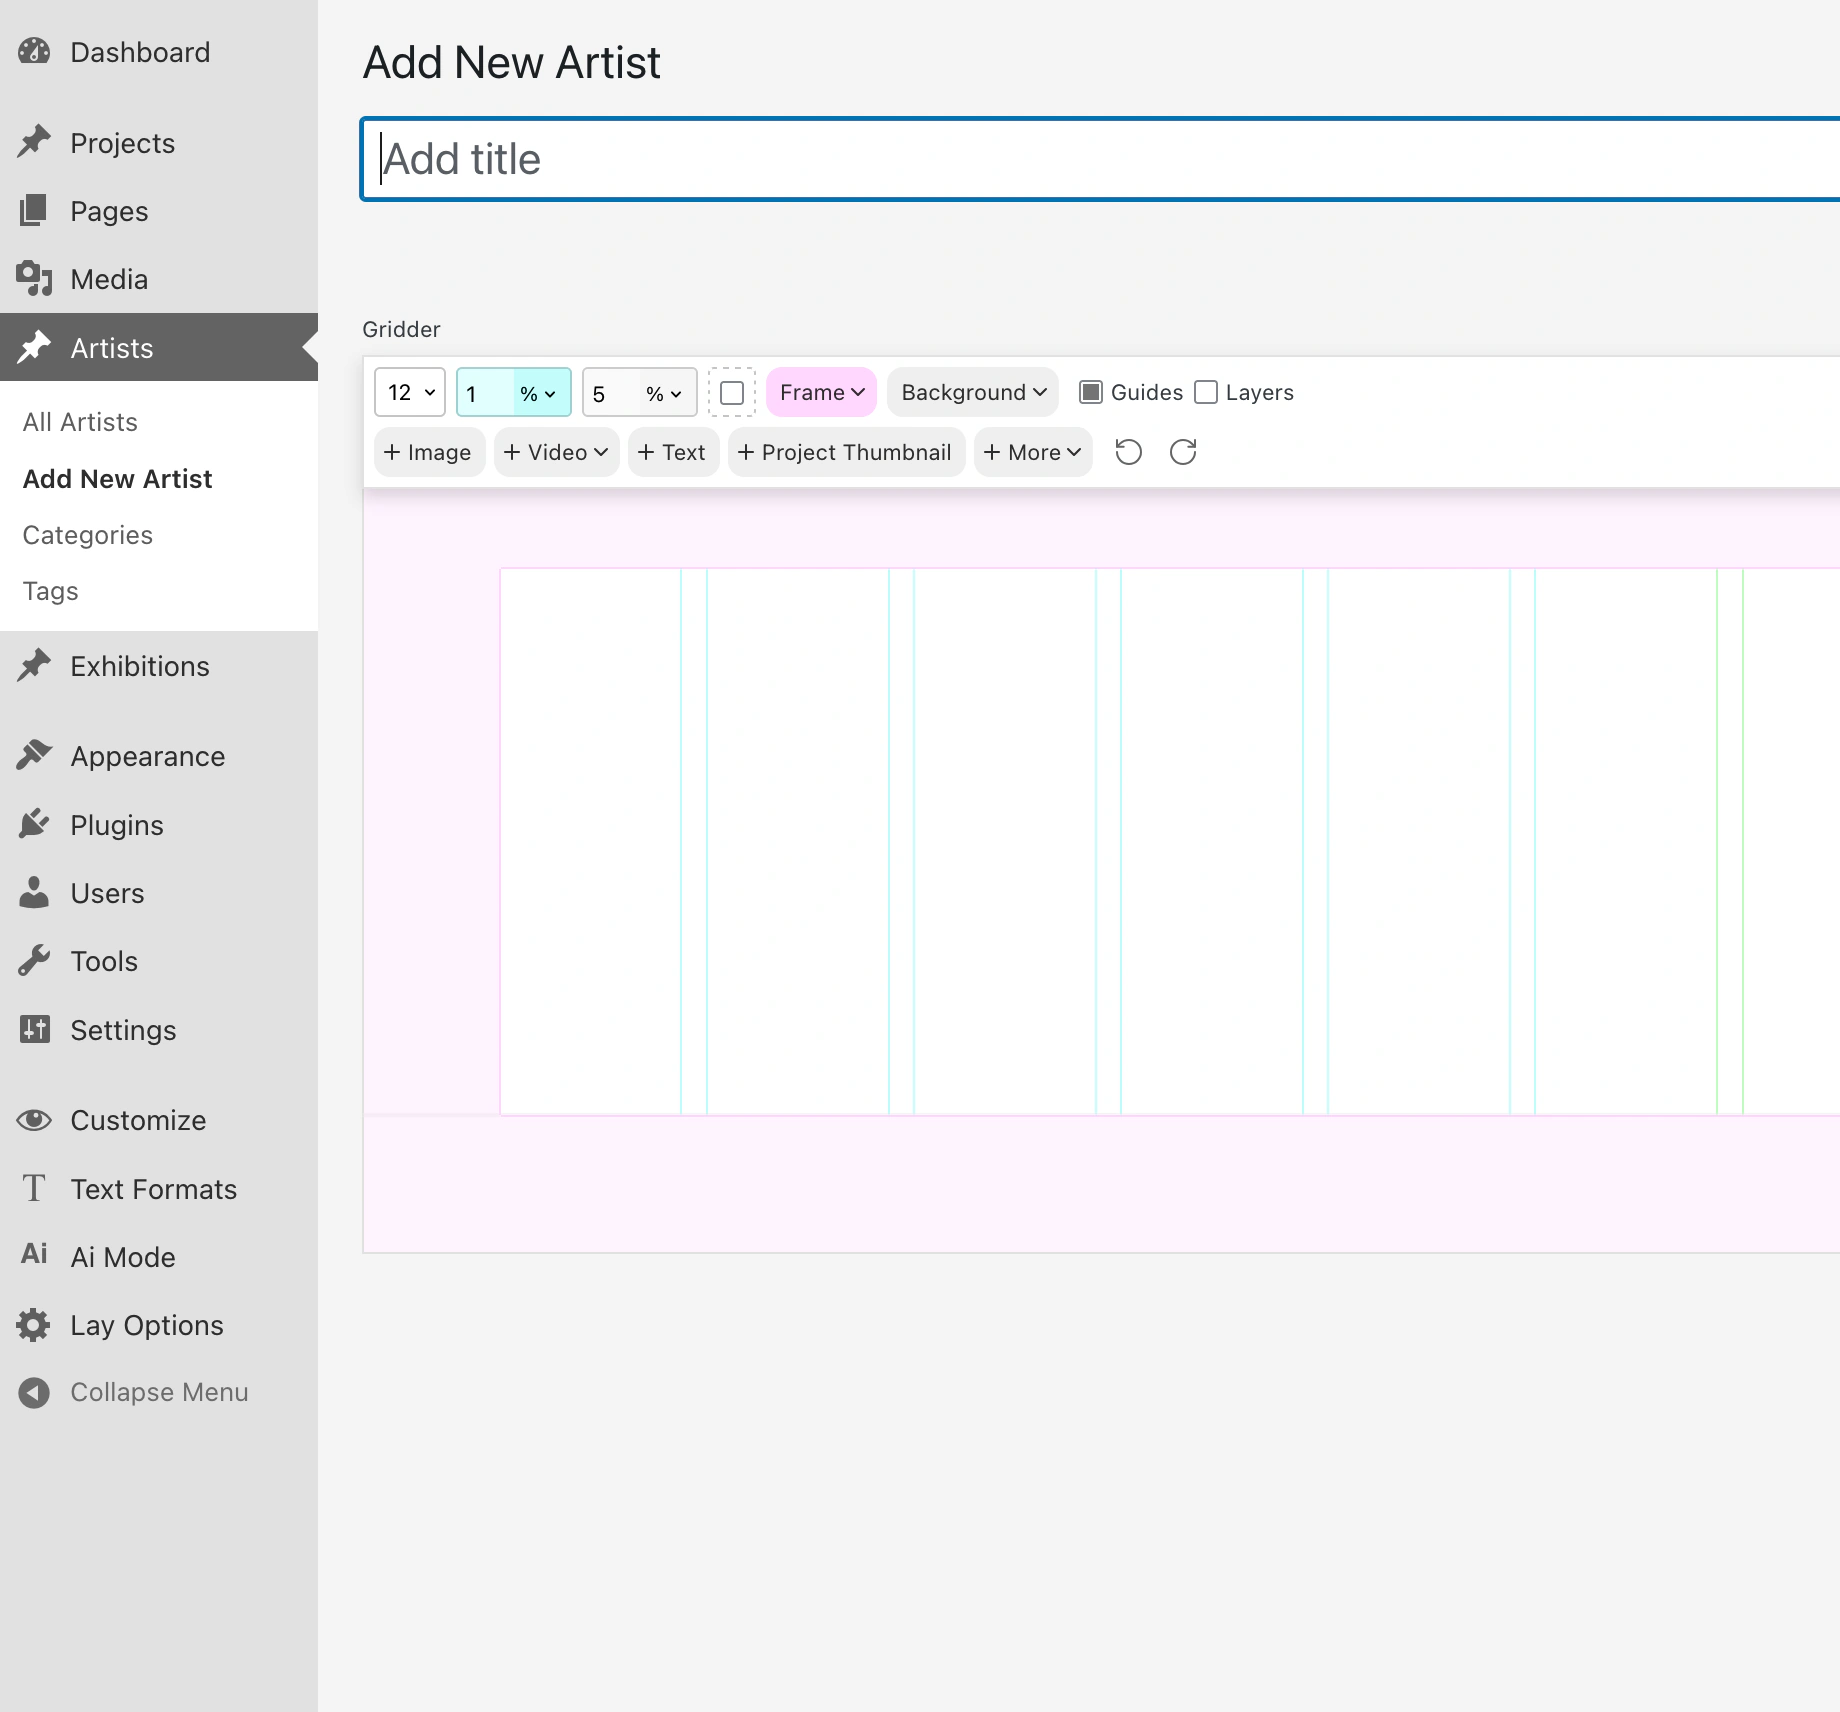
Now let's check out how we can create a relationship between them.
Create a Relationship
Let's check out an easy relationship that will be part of our Gallery Website:
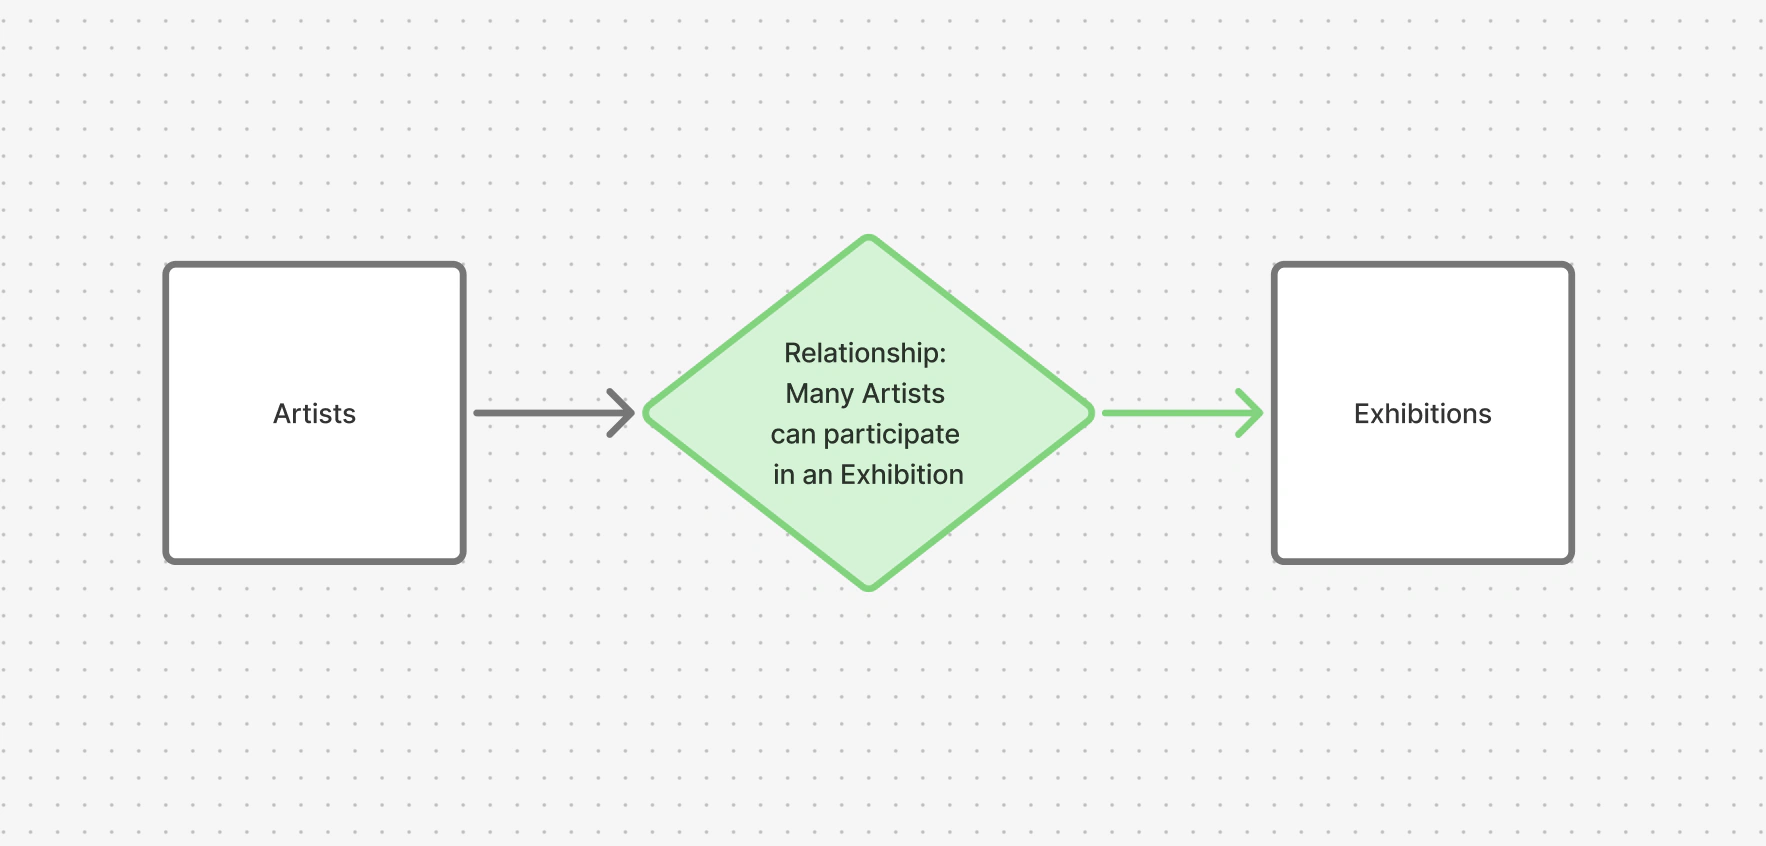
Multiple artists can take part in an exhibition. Tell your AI:
And the result is:
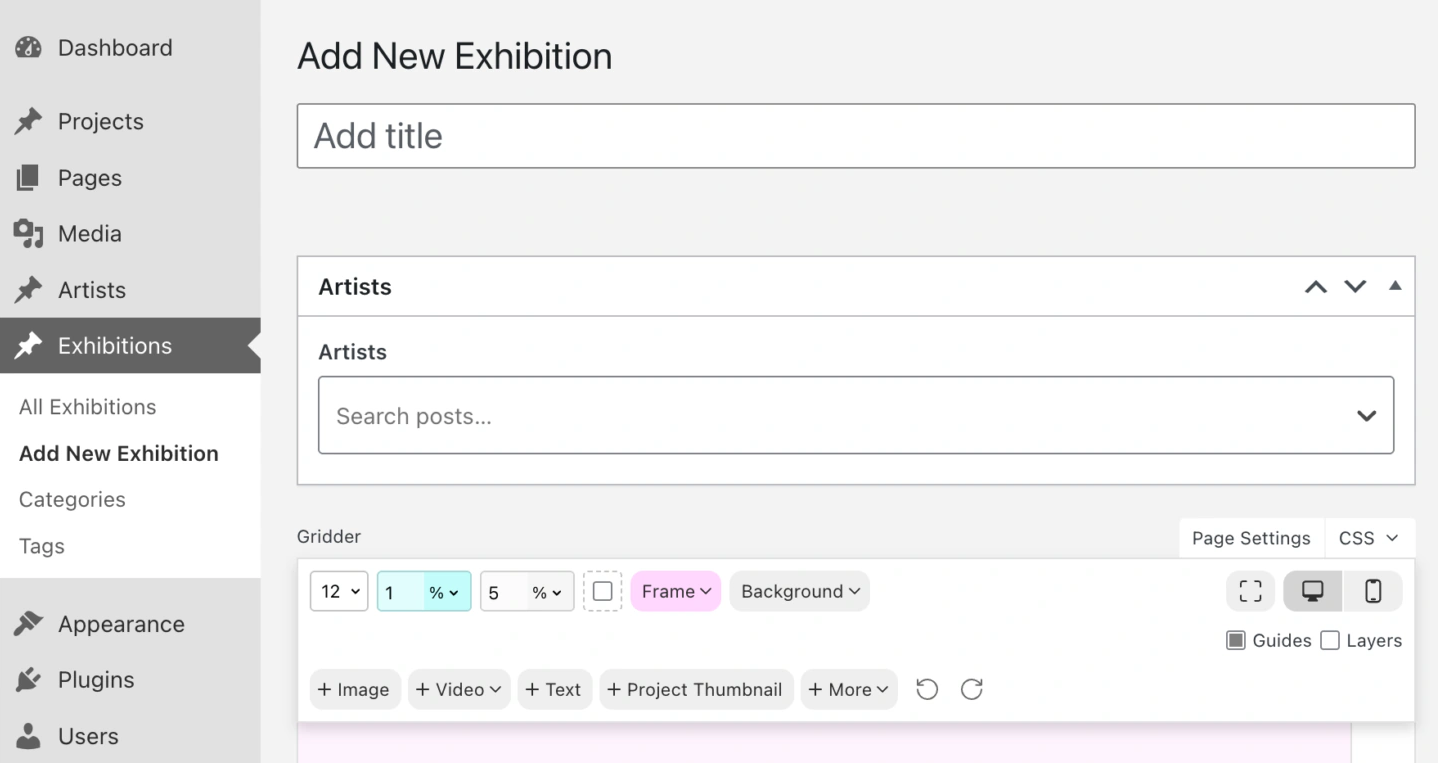
See, in the "Artists" Field you can now choose Artists that are part of that Exhibition.
But wait, we don't have any Artists to choose from. Right, that part comes next!
Batch create Posts & more Relationship work
Lets say the Gallery you're making the website for gave you a list of artists.
OR, they have an old website where all artists are listed.
You could just tell your AI:
And it creates all Artist posts:
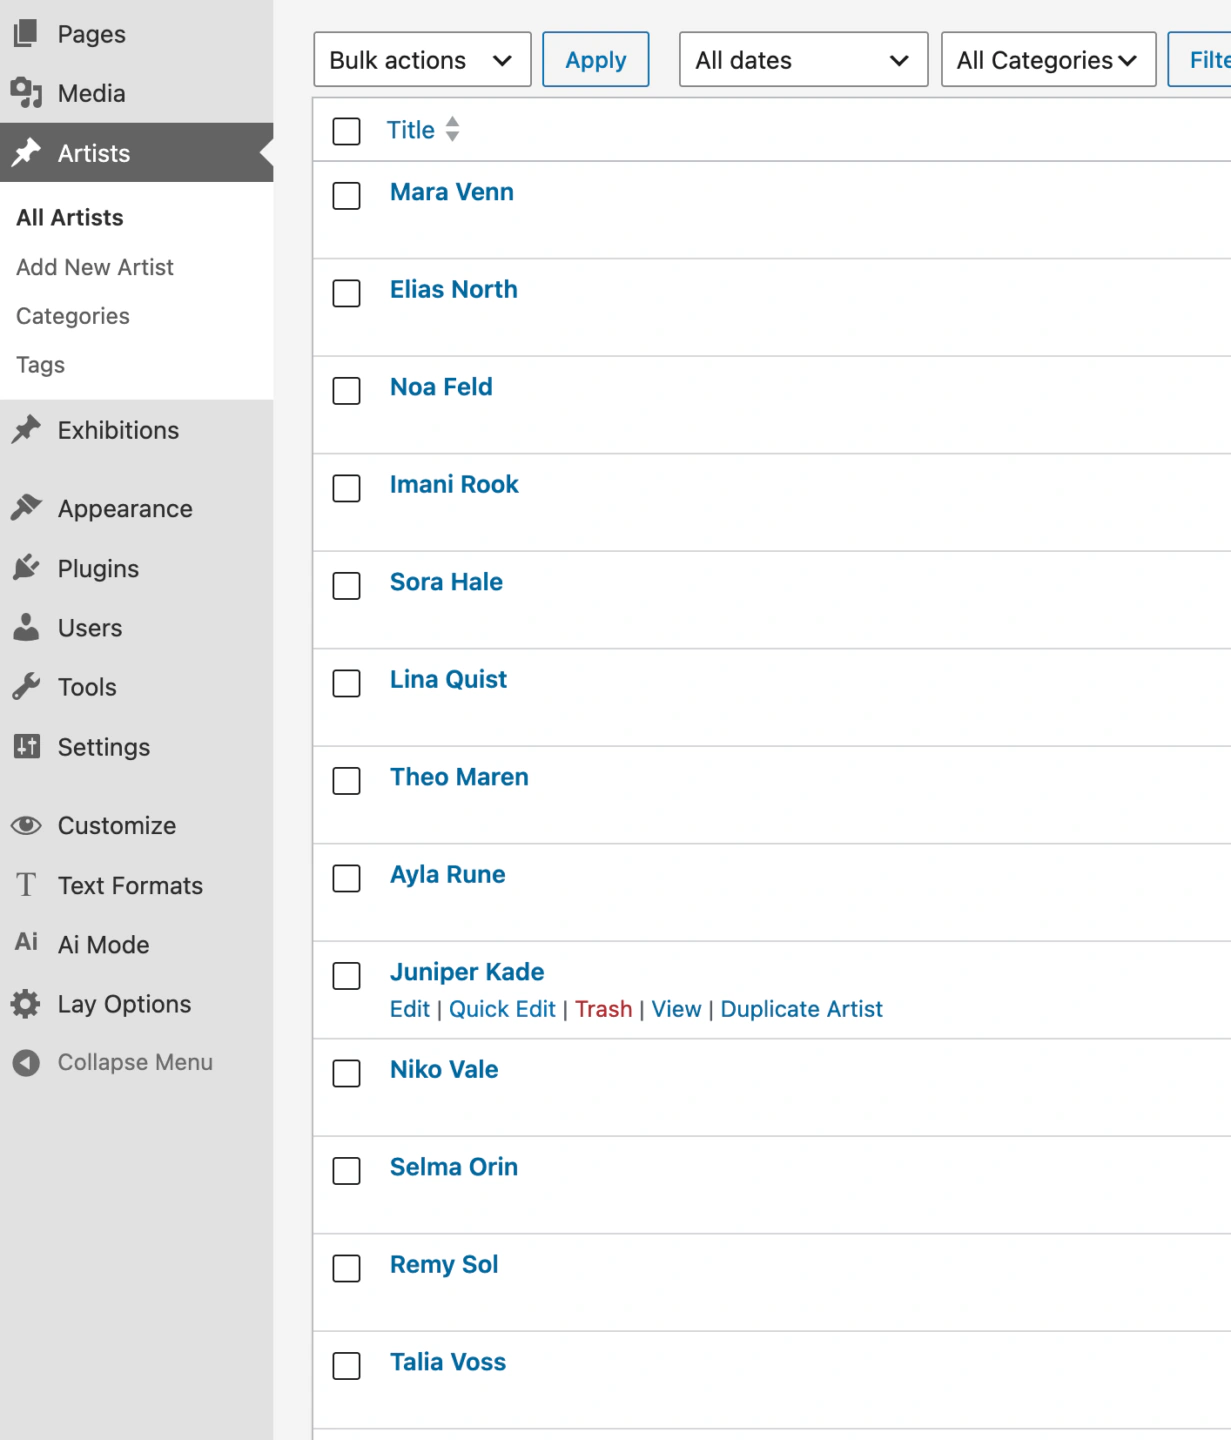
Now we can create an Exhibition and actually configure the relationship for it.
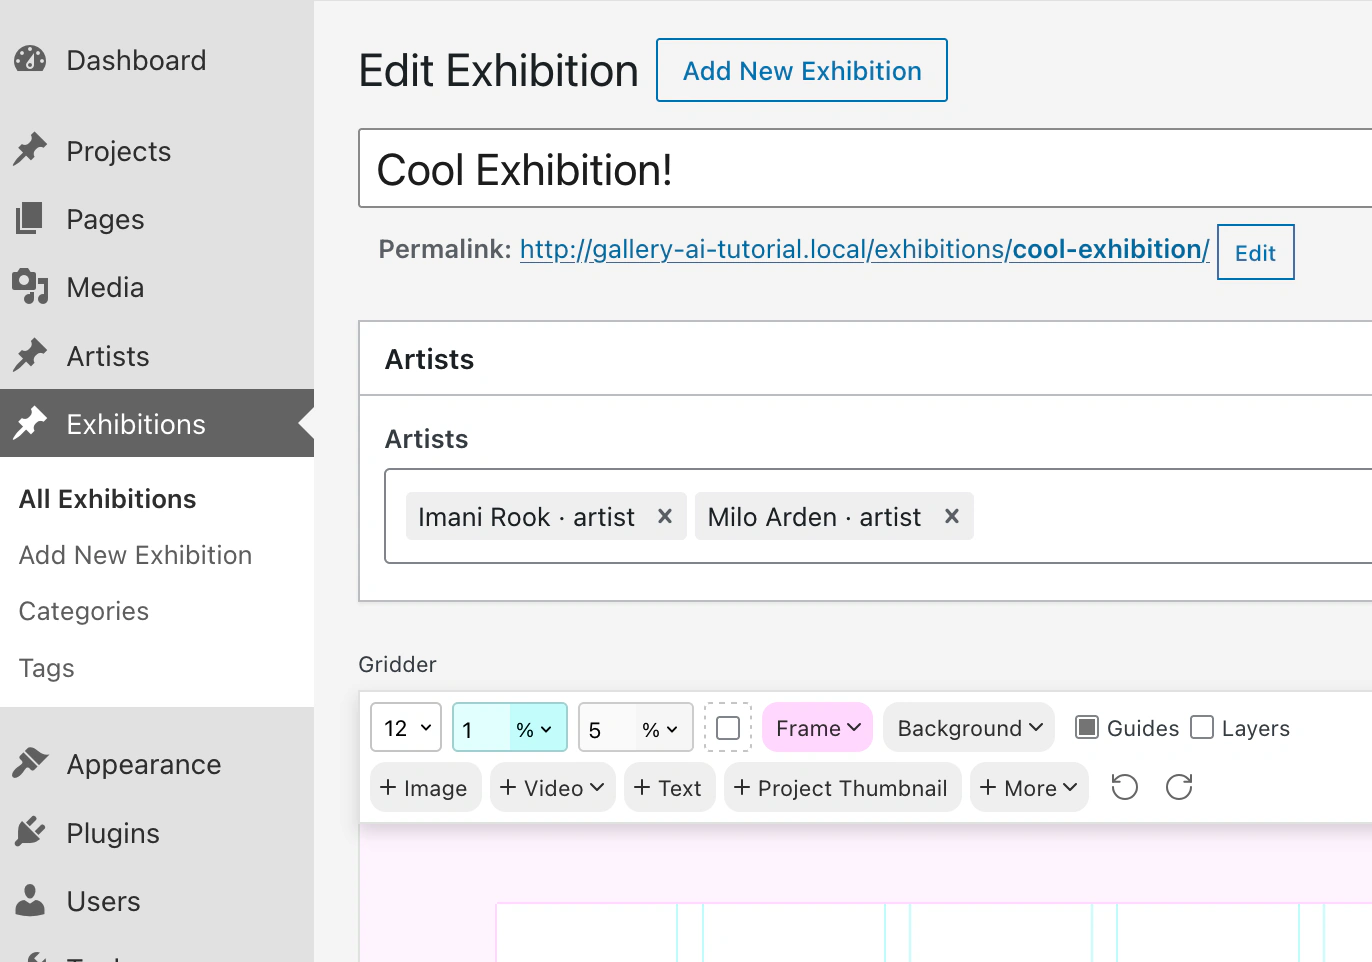
See, I added two Artists to the Relationship field: "Imani Rook" and "Milo Arden".
Alright, lets move over to the design implementation part.
Custom Fields for the Artist Single View
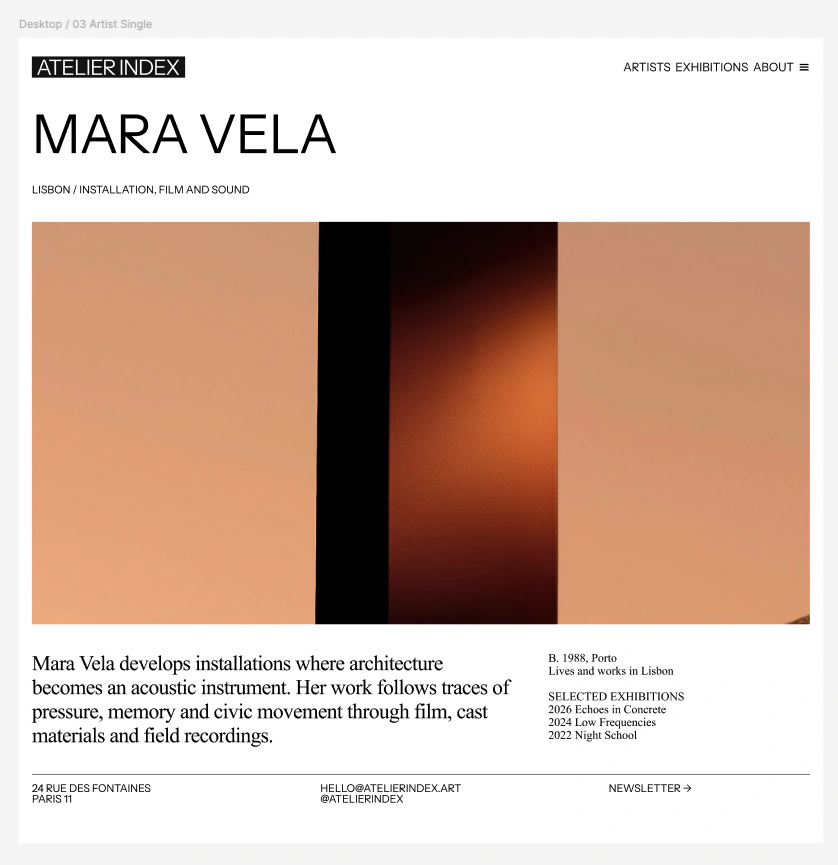
This is our Artist Single View, lets start with that. We got:
- The Artist Name,
- Country,
- What "Art forms" they use (Installation, Film, Sound),
- A Gallery / Slideshow of their work,
- A bio,
- A small CV text
- A "Selected Exhibitions" list.
And of course underneath we got the footer. And all the way at the top we have the header that contains the site title and menu.
For an overview of all available field options, see Custom Field Types in the AI Mode tutorial.
This is what the edit-screen of our Artist post type looks like currently:
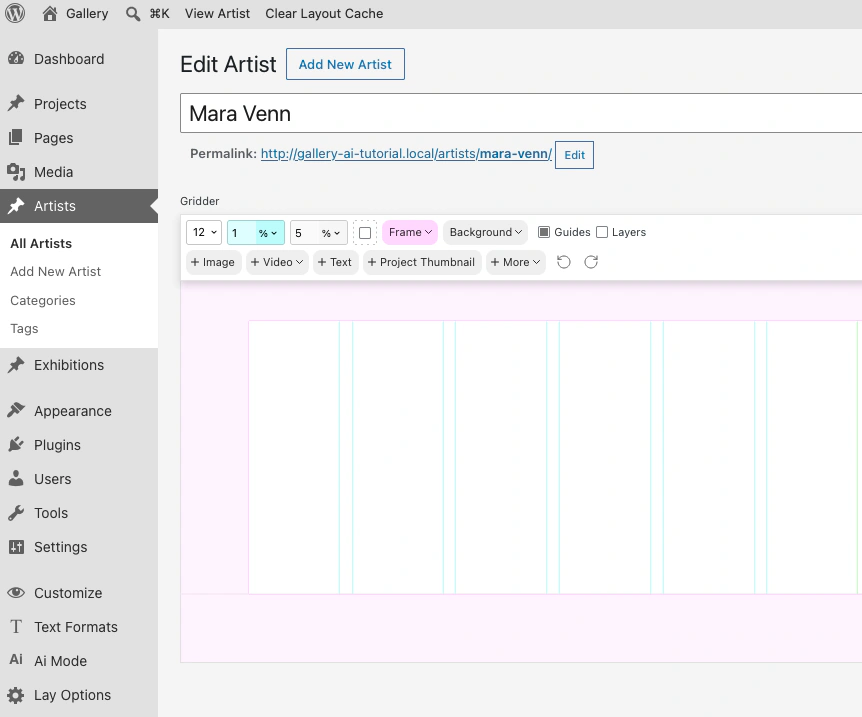
Now, we'll build the fields that will hold the Artist's info! Let's tell our AI:
Now when we look at the Artist Edit screen we see:
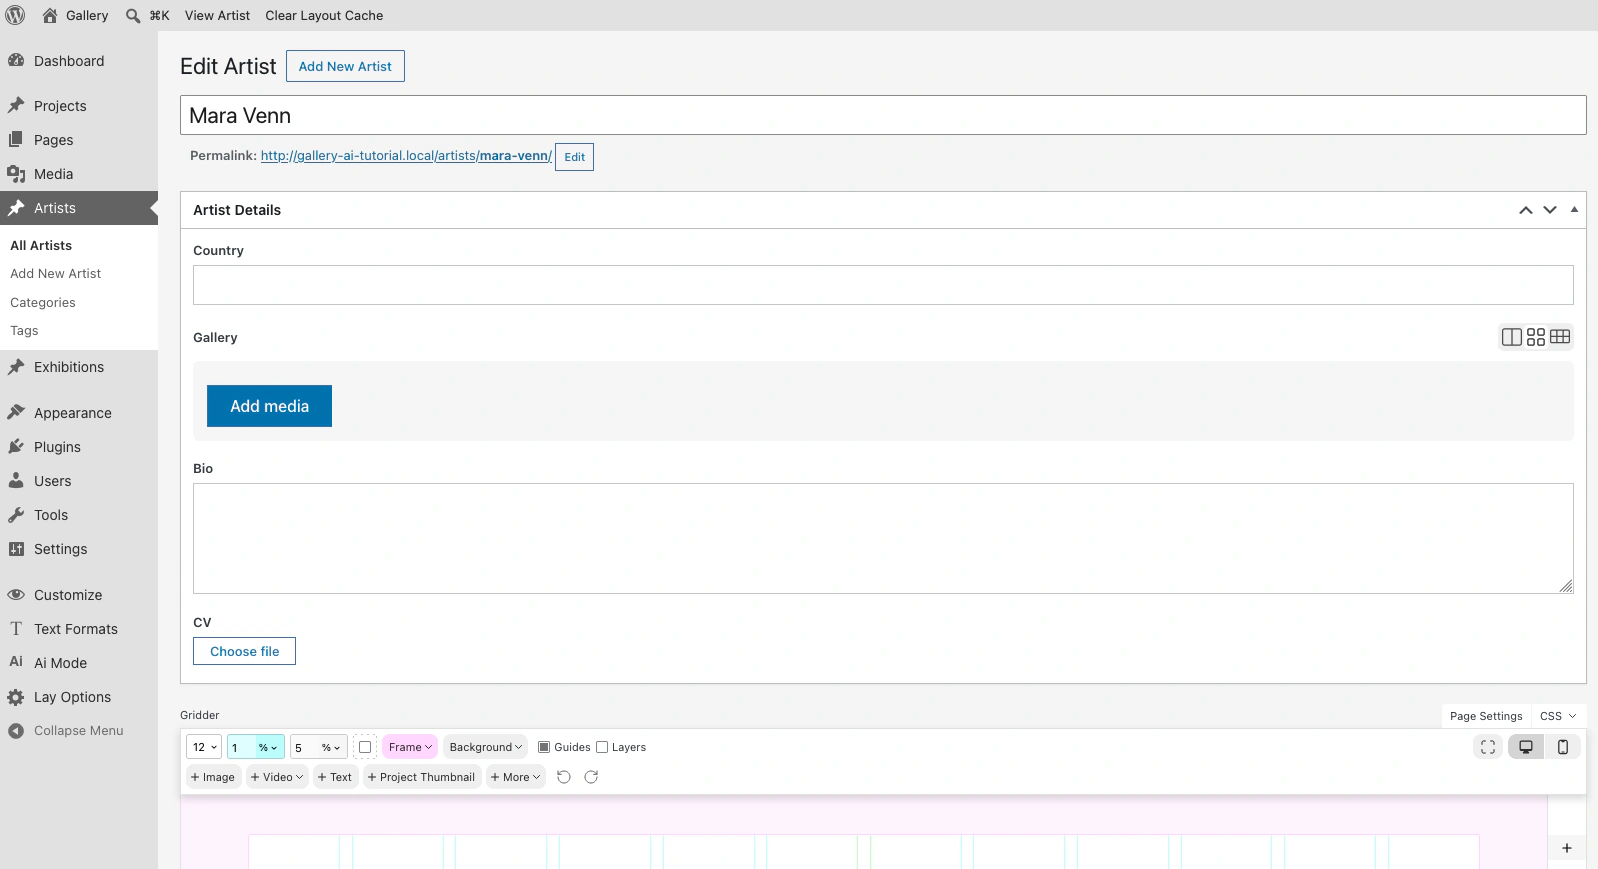
New fields above the Gridder! The CV seems to be a file field. I'll fix this:
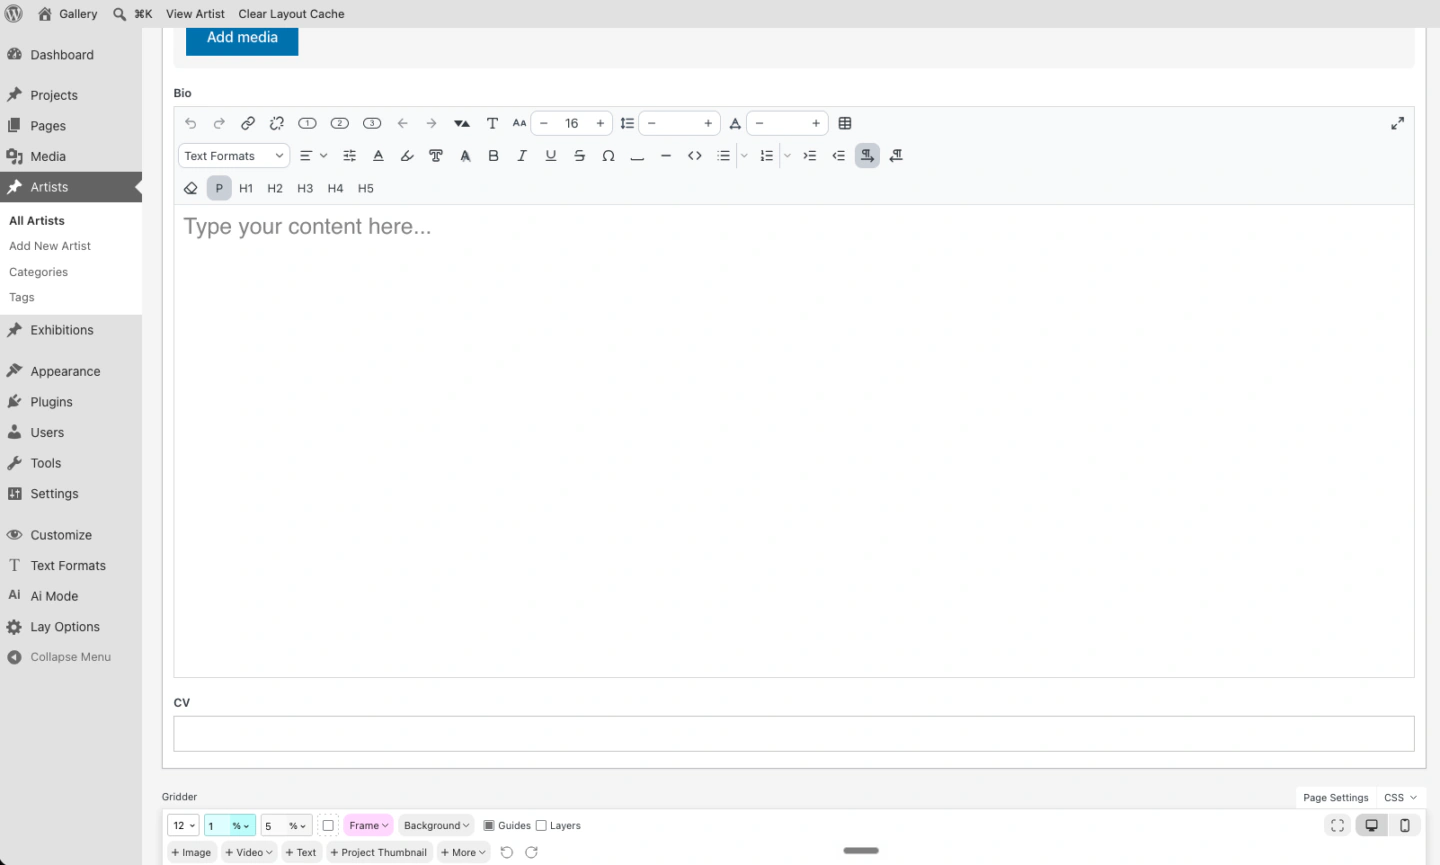
Yea, thats better. By the way, lets say we want to put links into the Bio text. Tell your AI:
Looks better:
Next up: Custom Taxonomies
Custom Taxonomies
Remember how Posts can also have custom taxonomies?
Taxonomies are things like "Category" or "Tags".
For the "Art forms" the artist works in, we could just use "Category". But just so you've seen it - Let's create a custom Taxonomy called "Art Forms".
Tell your AI:
And here it is:
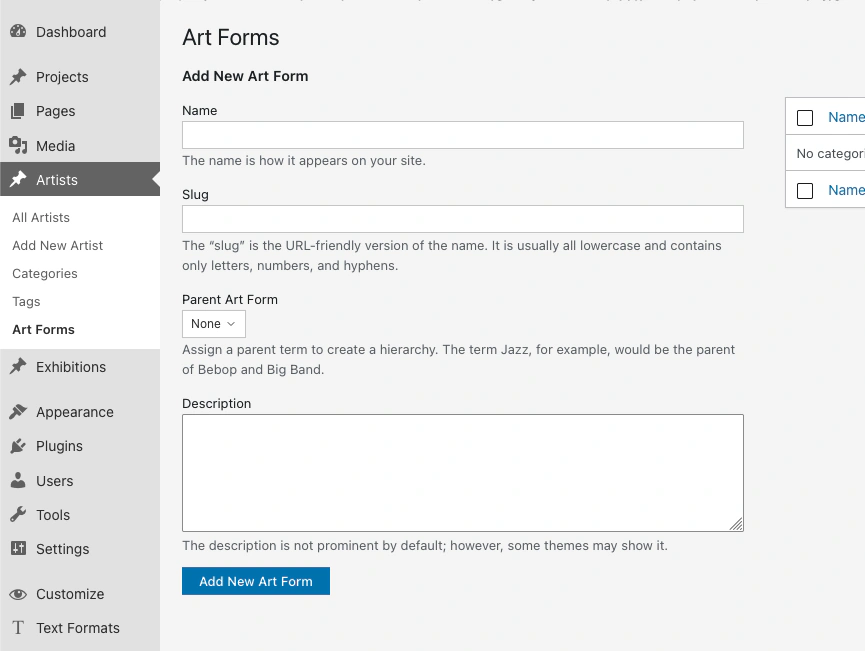
Every Artist can now have an "Art Form" Taxonomy applied to them.
Let's move to the exciting part: Implementing the Design for the Artist Single View.
Building the View, Design to Code
This is the exciting part.
First thing:
We need to fill out the custom fields for an artist.
We can do so using the fields we just created:
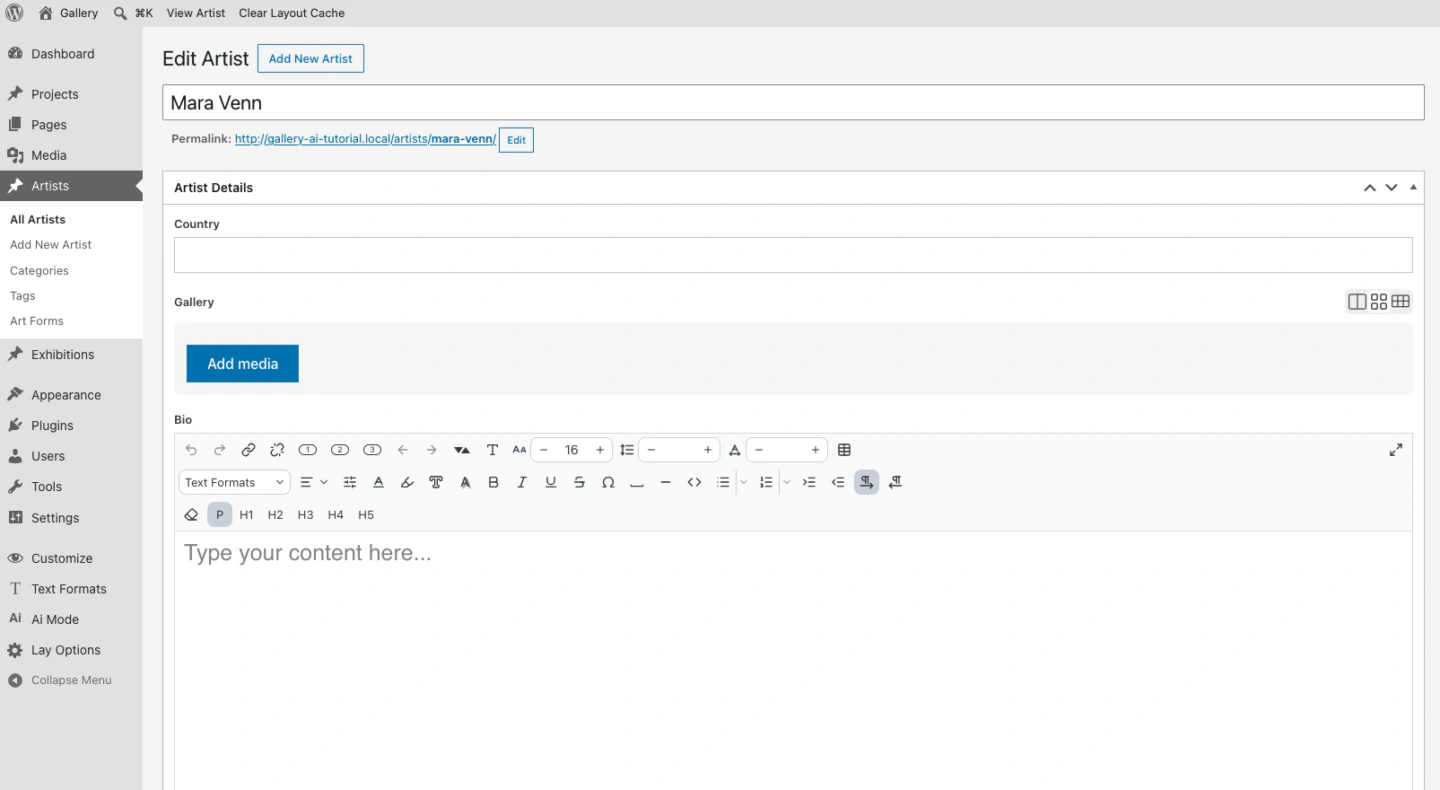
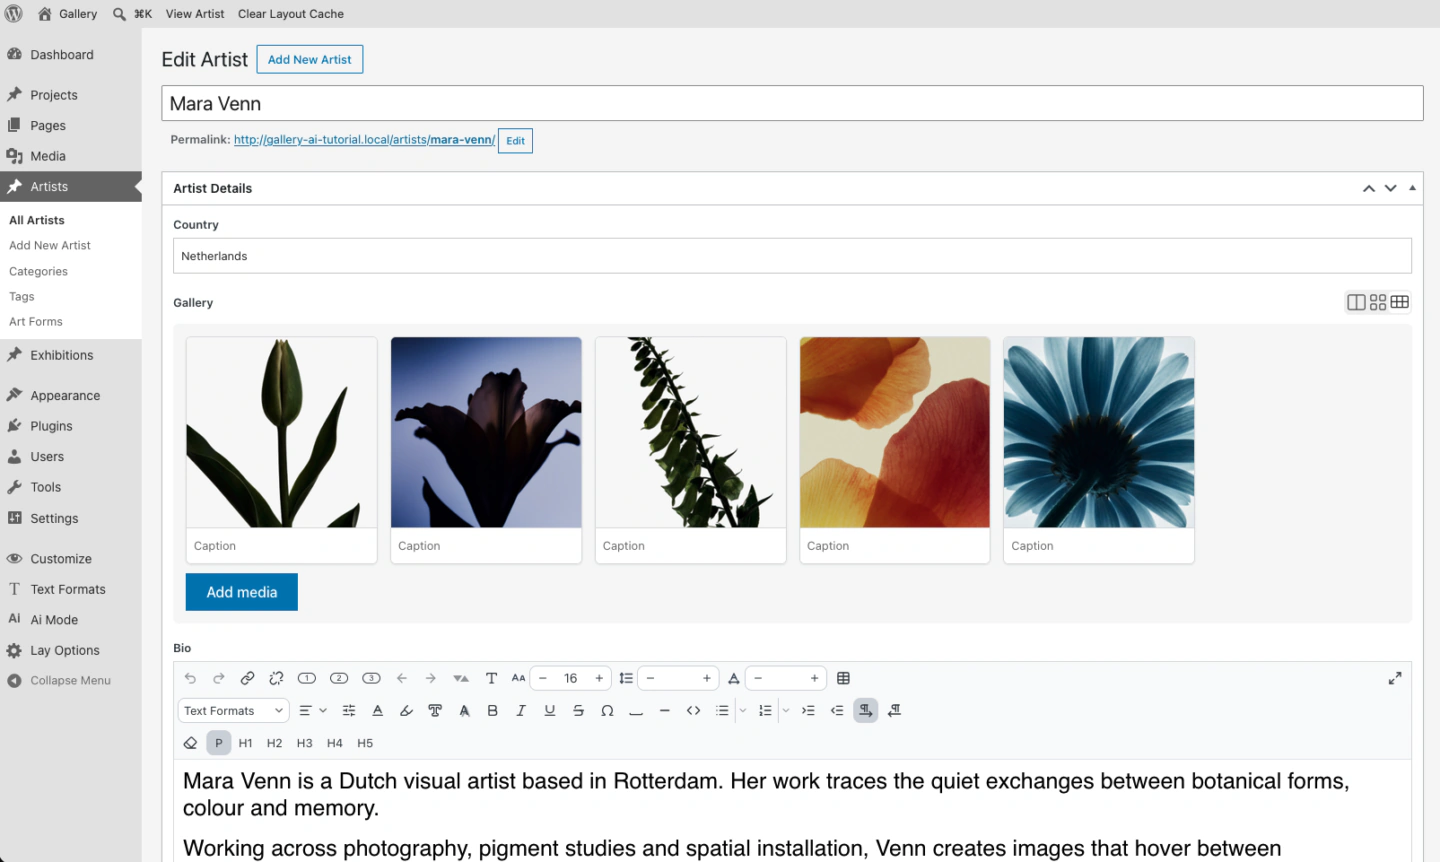
Or I tell my AI to do it for me:
Of course your prompt would look a little different (different URL and different image location). Filled out, it looks like this:
Now about the design to code:
We could just tell our AI: "Build a stylish frontend for the Artist Pages based on the Custom Fields we have!" But it would come up with a generic Ai-looking design.
Since we already have our design, lets use that instead. In Figma, go to the Development mode. In the bar at the bottom, click the dev mode button, on the right.
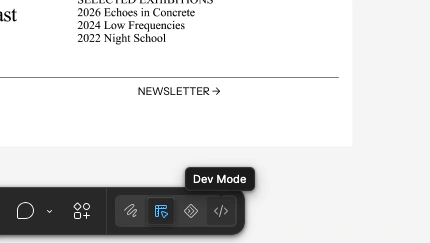
It leads you to dev mode. You'll need the figma subscription to use dev mode.
In dev mode, click on the Artboard of our Design.
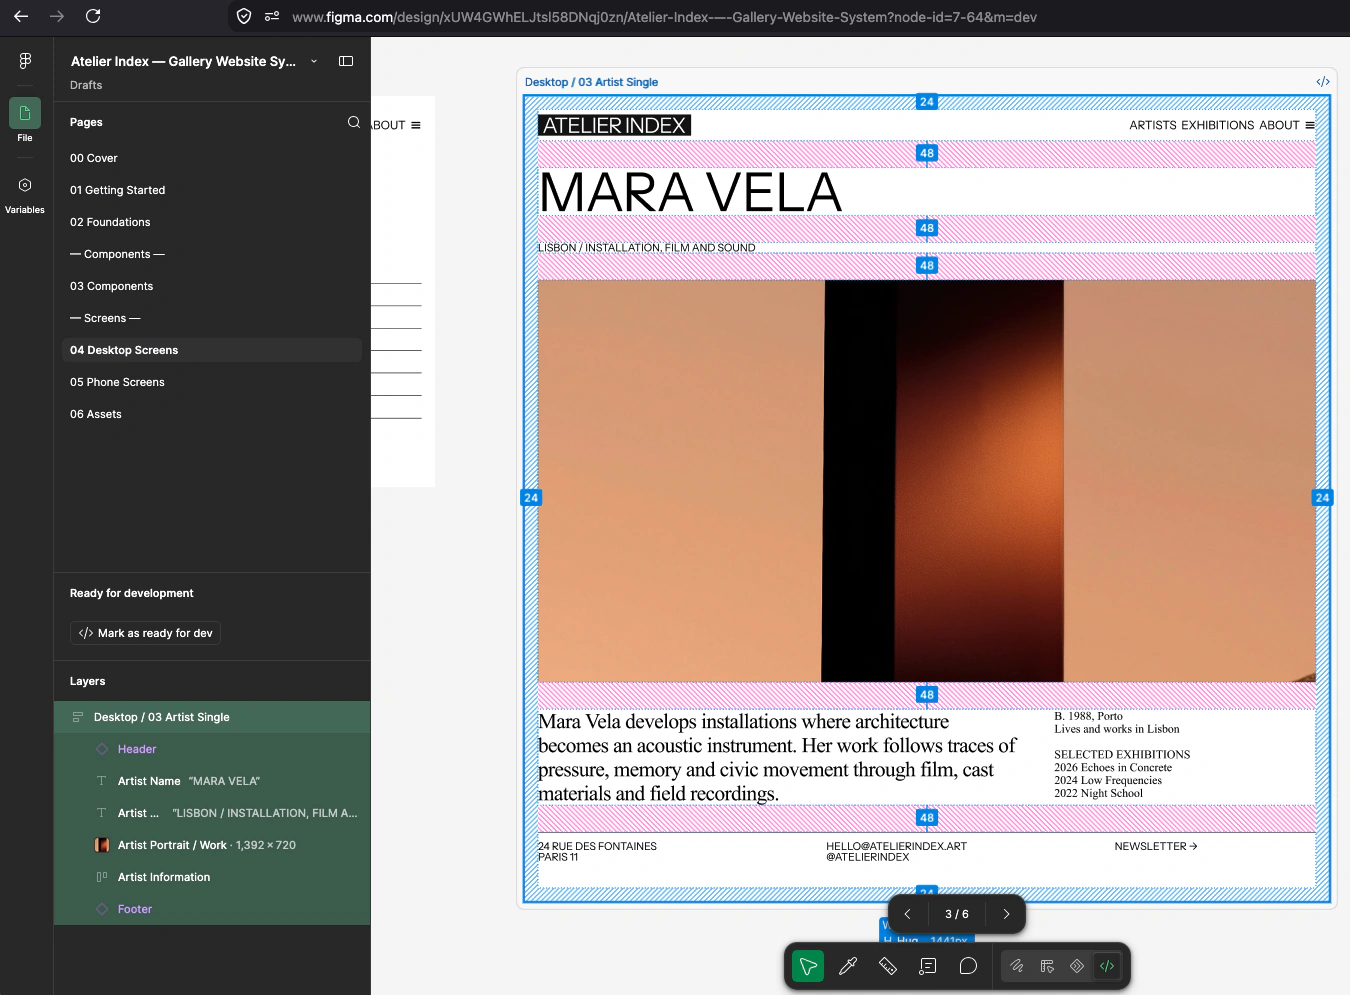
Copy the URL, for me, it is
https://www.figma.com/design/xUW4GWhELJtsl58DNqj0zn/Atelier-Index-%E2%80%94-Gallery-Website-System?node-id=7-64&m=dev
Lets tell our AI to build the frontend of the site (what the visitor will see) based on the design. But it shouldn't build the header and footer yet. This will be separate because those are the same for all pages.
So we tell it:
As you can see, I'm telling the AI quite a lot about how things should work, how things are supposed to be sized, positioned and responsive. Currently, the figma dev mode creates pixel-perfect implementation since it gives the Ai all neccessary CSS values.
However, it does not create responsive designs and does dumb things like make texts fixed heights. So that's why I'm very descriptive here.
Ok lets check it out:
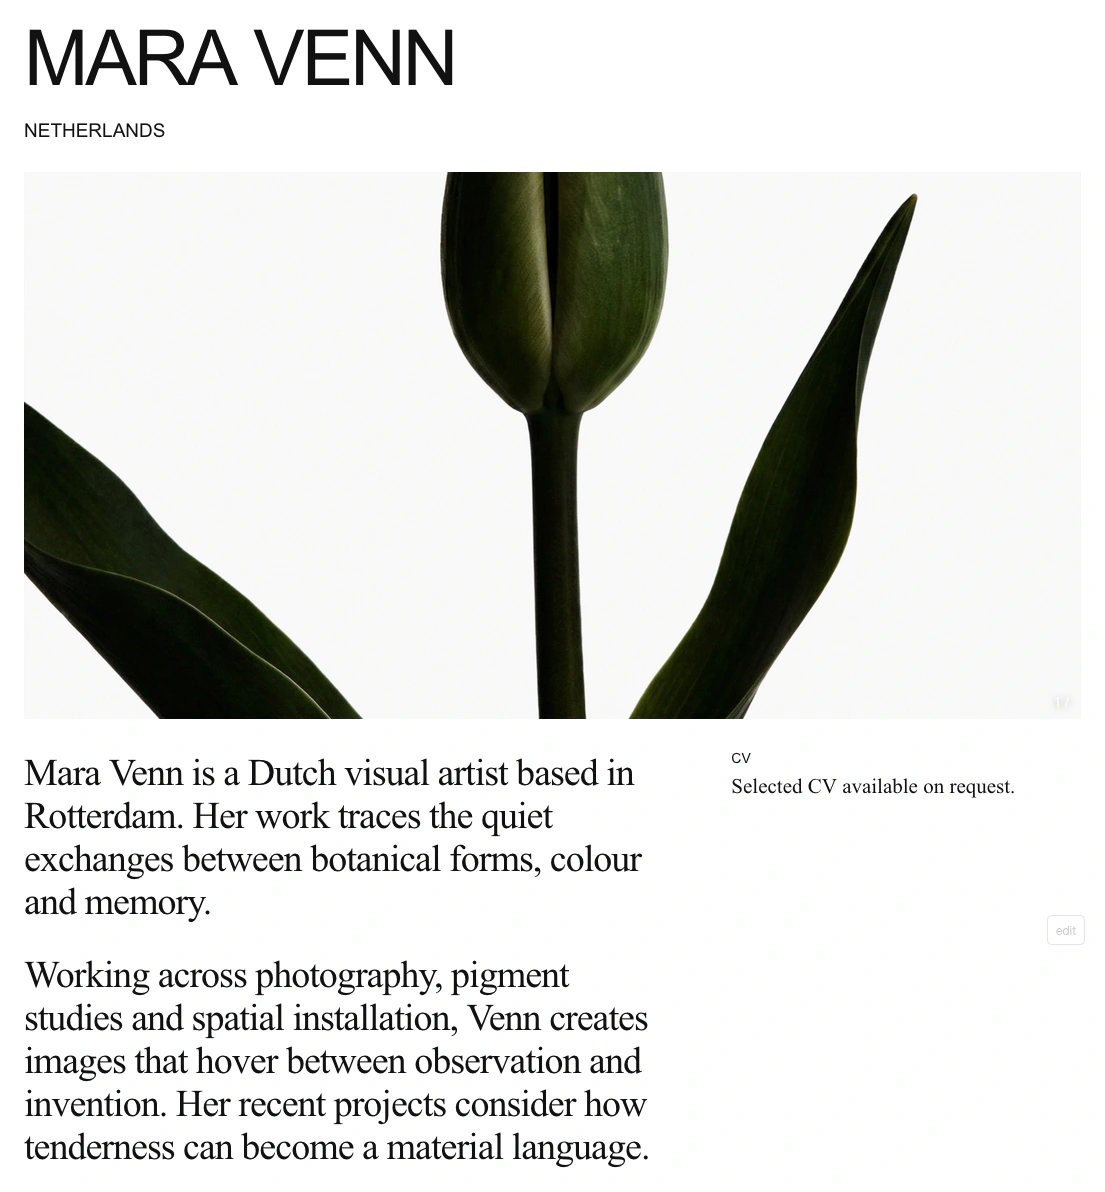
This is the built website frontend!
It uses the fields we filled out for the artist. Pretty nice :))
Custom Elements in the Gridder
Just one thing: For the following we could have also just used a Custom View...as explained on the last page. But with Custom Elements you can be a little more flexible because they can be placed in the Gridder. Ok let's go:
In the last chapter we designed the individual page for an Artist and the individual page for an Exhibition.
Now I want to build the overview pages that list all Artists and Exhibitions. For this I use Custom Elements and content that updates automatically.
The term dynamic content sounds more technical than it is. It simply means that the page takes its information directly from WordPress. When I add or edit an Artist, the list on the website updates with it.
A Custom Element is a section of the website that can be designed once and placed anywhere in the Gridder. In this example, the complete Artists list is one Custom Element.
I call this element Artists Index. "Index" is simply the name for the complete overview list. The Exhibitions Index works in the same way for Exhibitions.
Place a Custom Element in the Gridder
Once a Custom Element has been created and published, I can place it in the Gridder like an image or a text element.
I open the page where I want to use it and click + Custom Elements in the Gridder toolbar.
The menu shows the available Custom Elements. I select Artists Index and it appears inside the Gridder, where I can position and resize it.
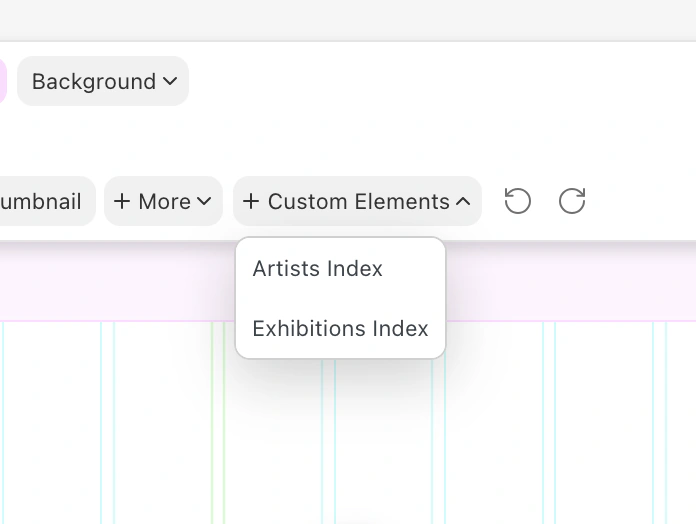
AI Mode can also insert the element on the page for me. The result is the same: the Custom Element becomes part of the Gridder layout and can be moved like the other elements on the page.
What does "loop through the posts" mean?
Each Artist and Exhibition we created earlier is stored as a separate entry in WordPress. You can think of them like individual cards in a collection.
The Custom Element goes through all these entries one by one and creates a row for each of them. Imagine placing a stack of Artist cards on a table, picking up each card and adding its name and country to the list. In programming this is often called a "loop".
For us it simply means that we do not have to type and link every row by hand. The information in each row comes from the fields we already created. For example, the Artist name comes from the title and Base comes from the Country field.
An Exhibition also has an Artists field where we select the participating Artists. Lay Theme calls this a Relationship field because it connects one piece of content with another.
The overview uses that connection to show the correct Artists beside each Exhibition.
When I add a new Artist later, the overview updates by itself. In the next chapter, I will use the Figma design to create the Artists Index and Exhibitions Index with AI Mode.
Building Automatic Overview Pages
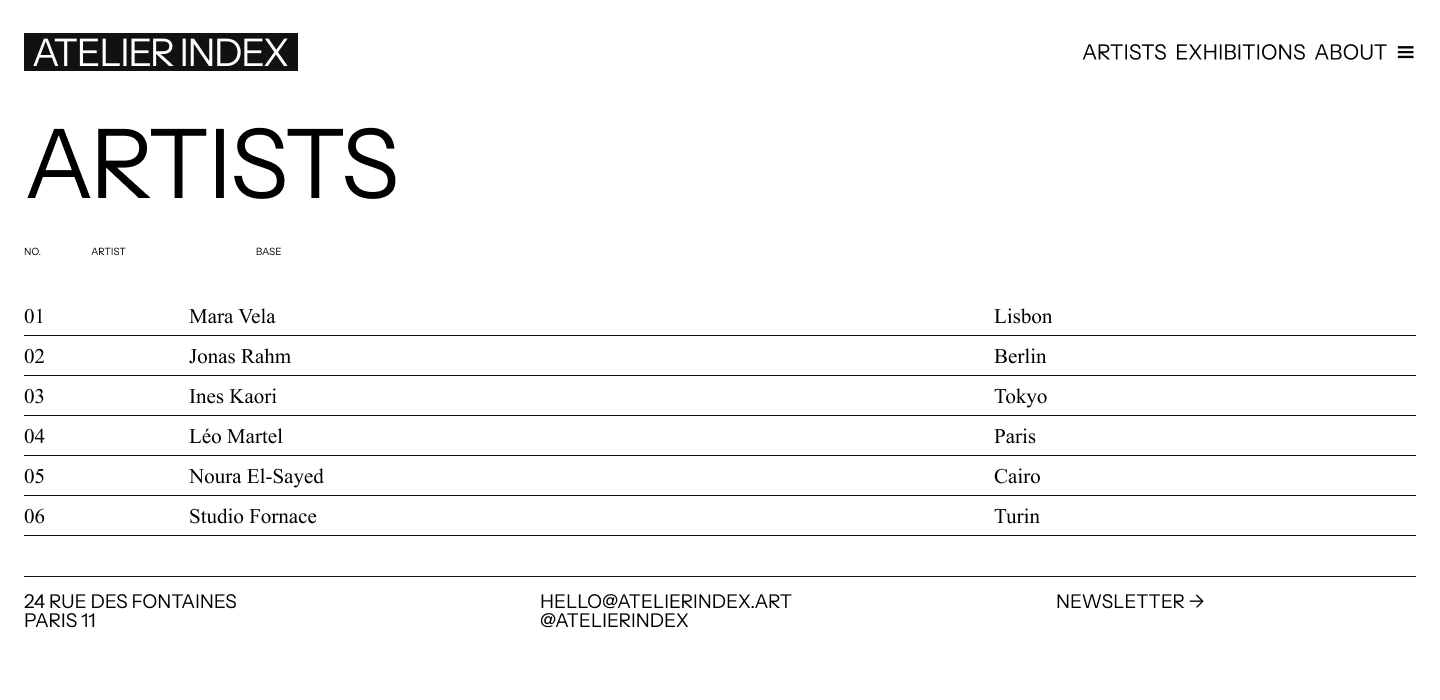
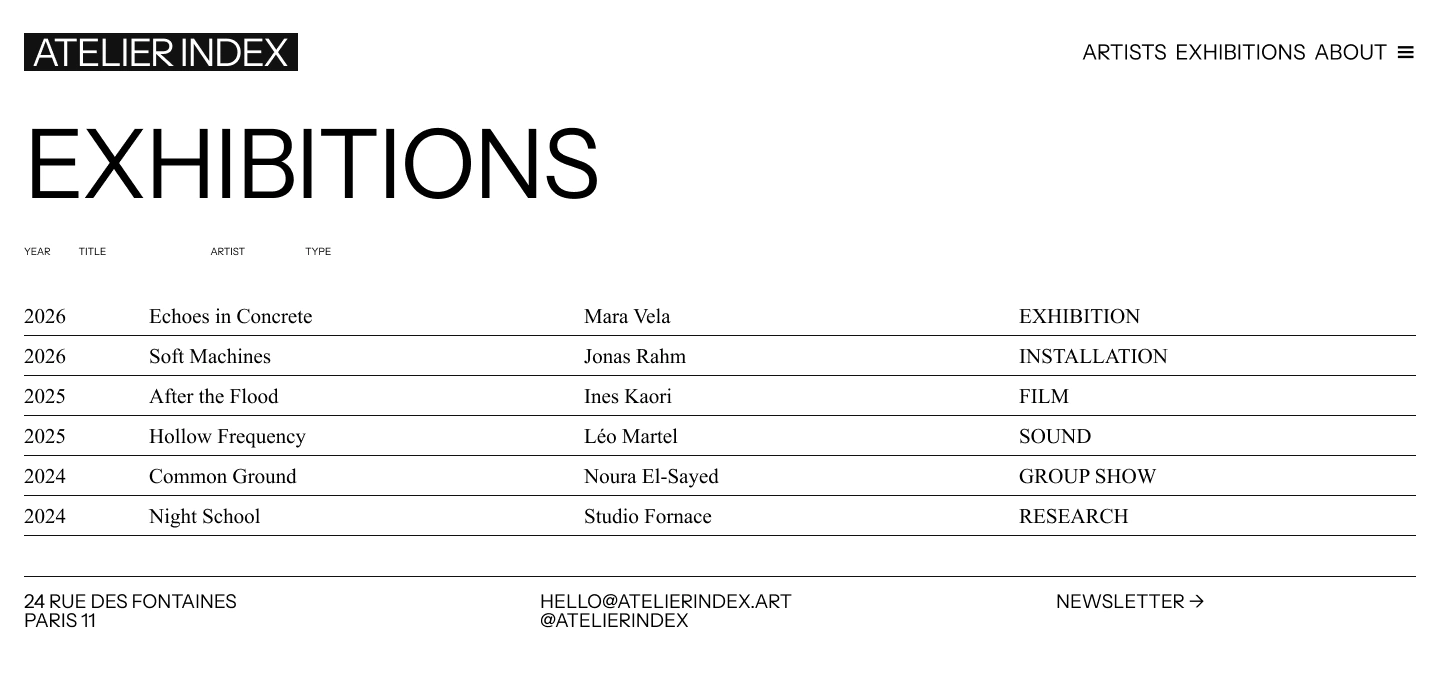
The design has two overview screens. One lists all Artists with their base. The other lists Exhibitions with year, title, artists and type.
Use Figma Dev Mode links
I open the screens in Figma Dev Mode and copy the Dev Mode links for the Desktop and Phone frames.
The links must come from Figma Dev Mode. A normal Figma link is not enough. The Dev Mode link gives the AI the exact selected frame and the design information it needs for the implementation. Then I send this prompt:
AI Mode creates the two elements and inserts each one on the correct page.
I can now find them under AI Mode -> Custom Elements. The preview is useful because I can switch between Desktop, Tablet and Phone without opening the page every time.
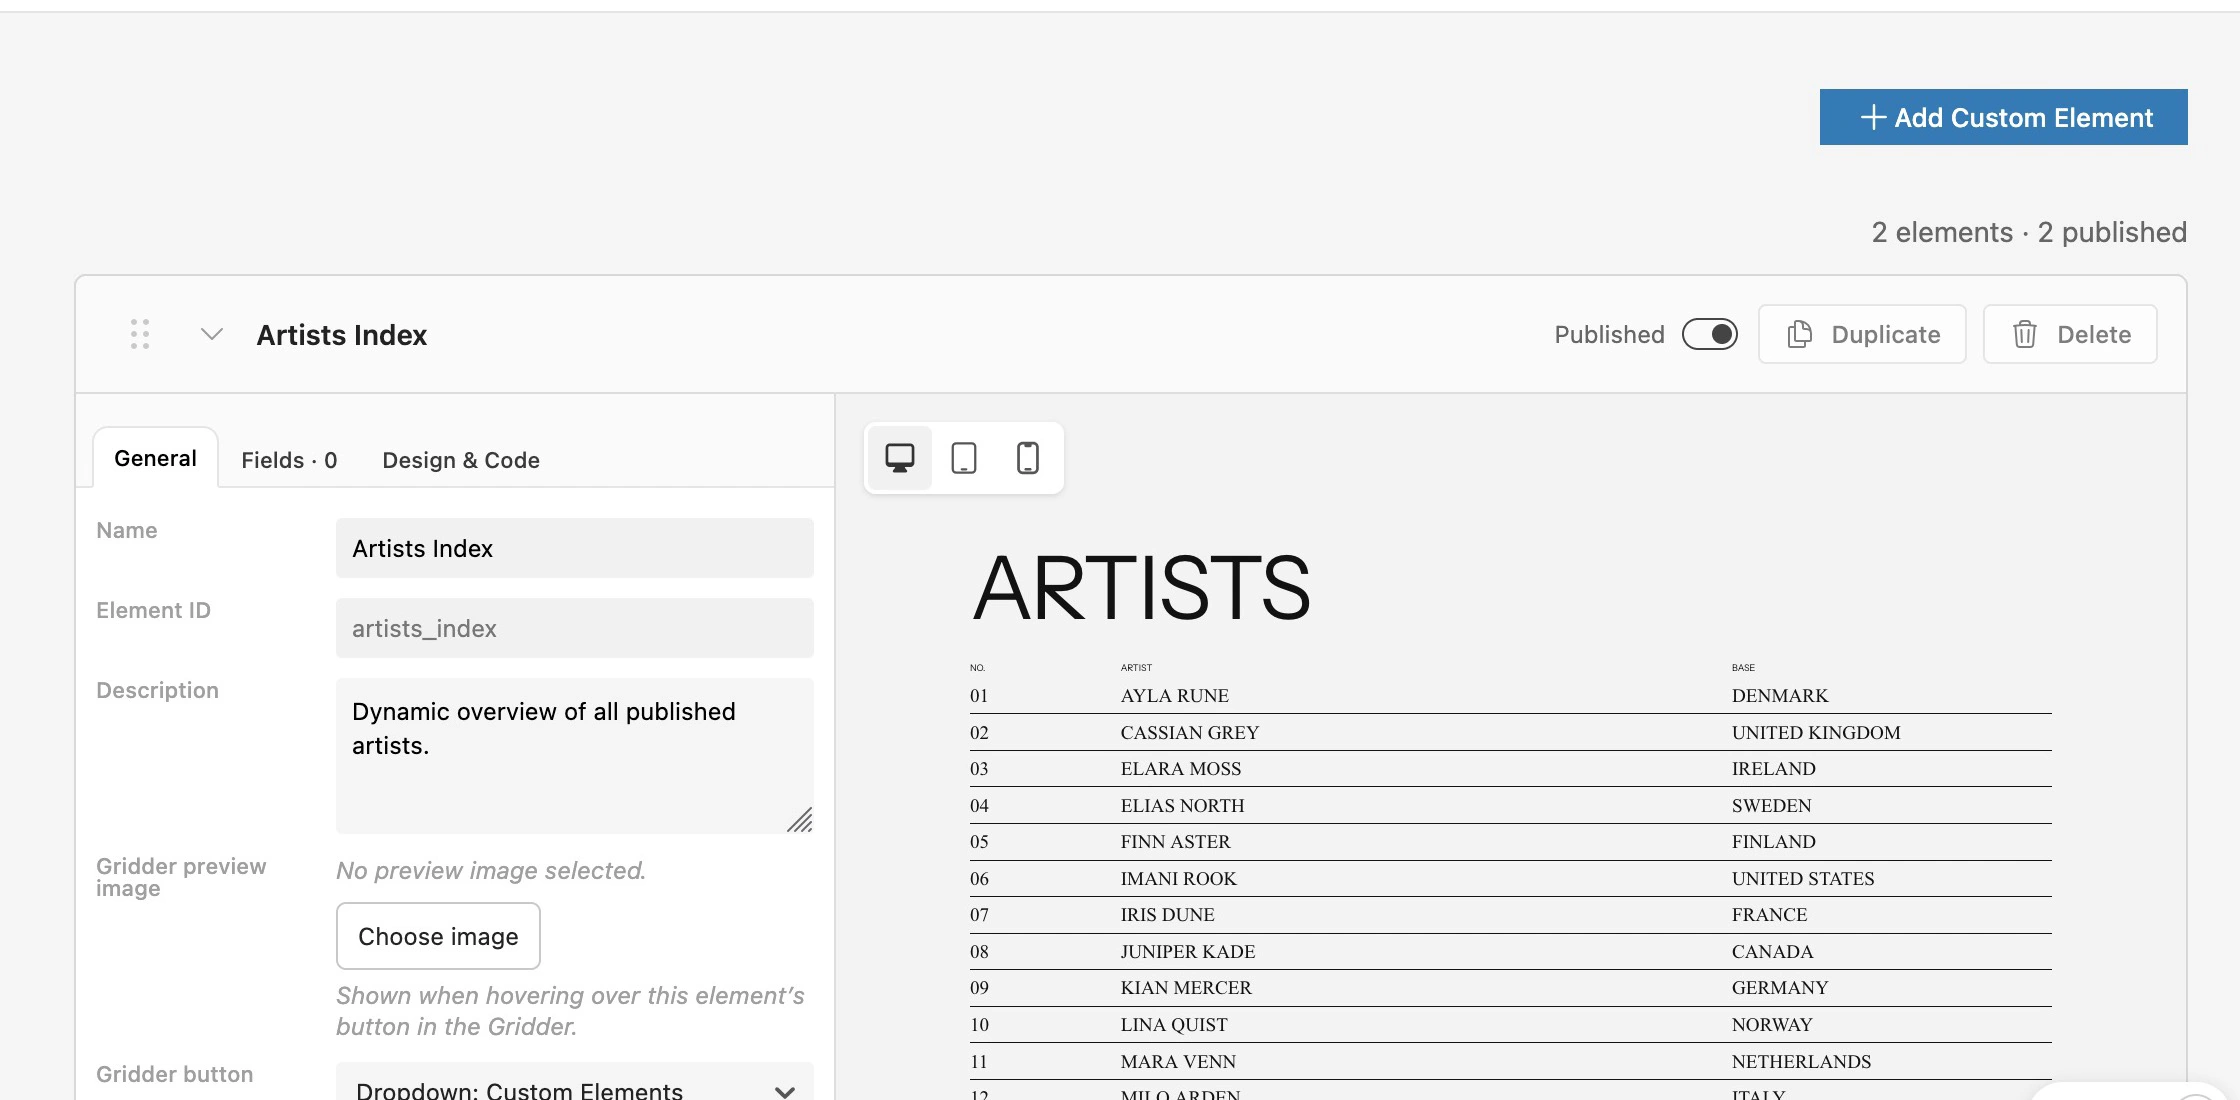
The Artist names, countries and Exhibition Types still live in their normal WordPress fields. The Custom Element decides how this information is arranged on the page. I can continue editing the content in the familiar WordPress forms.
Fill missing content
My first result showed that several Artists had an empty Country field. I also only had two test Exhibitions. I used a second prompt to make the overview feel like a real website:
This gives the design enough real content to judge the layout.
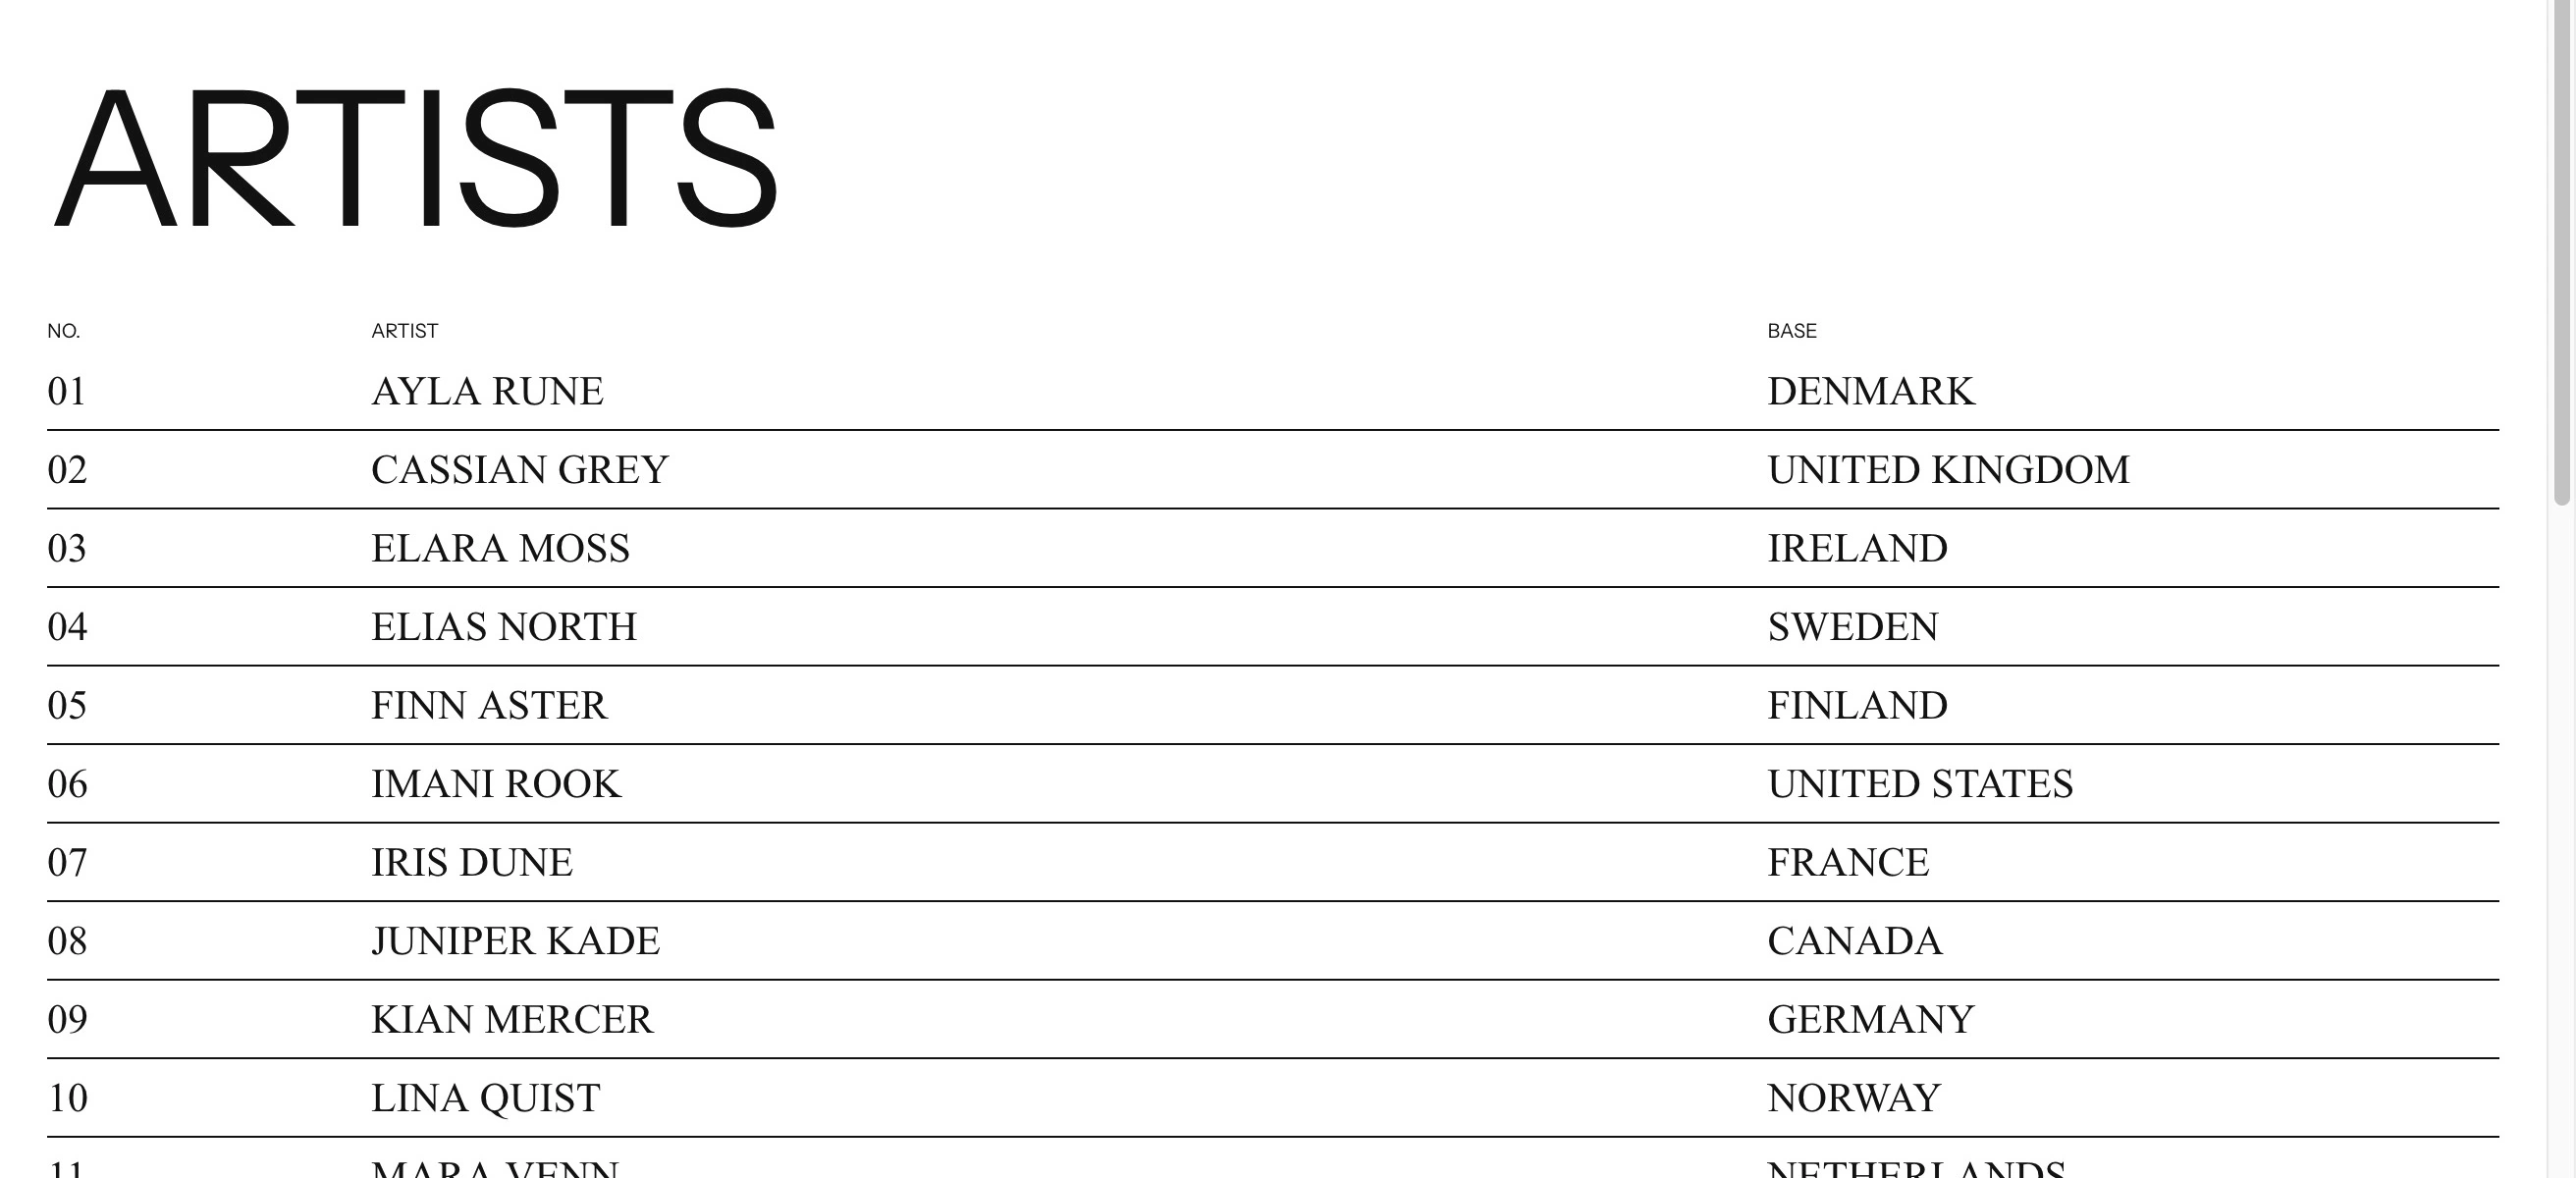
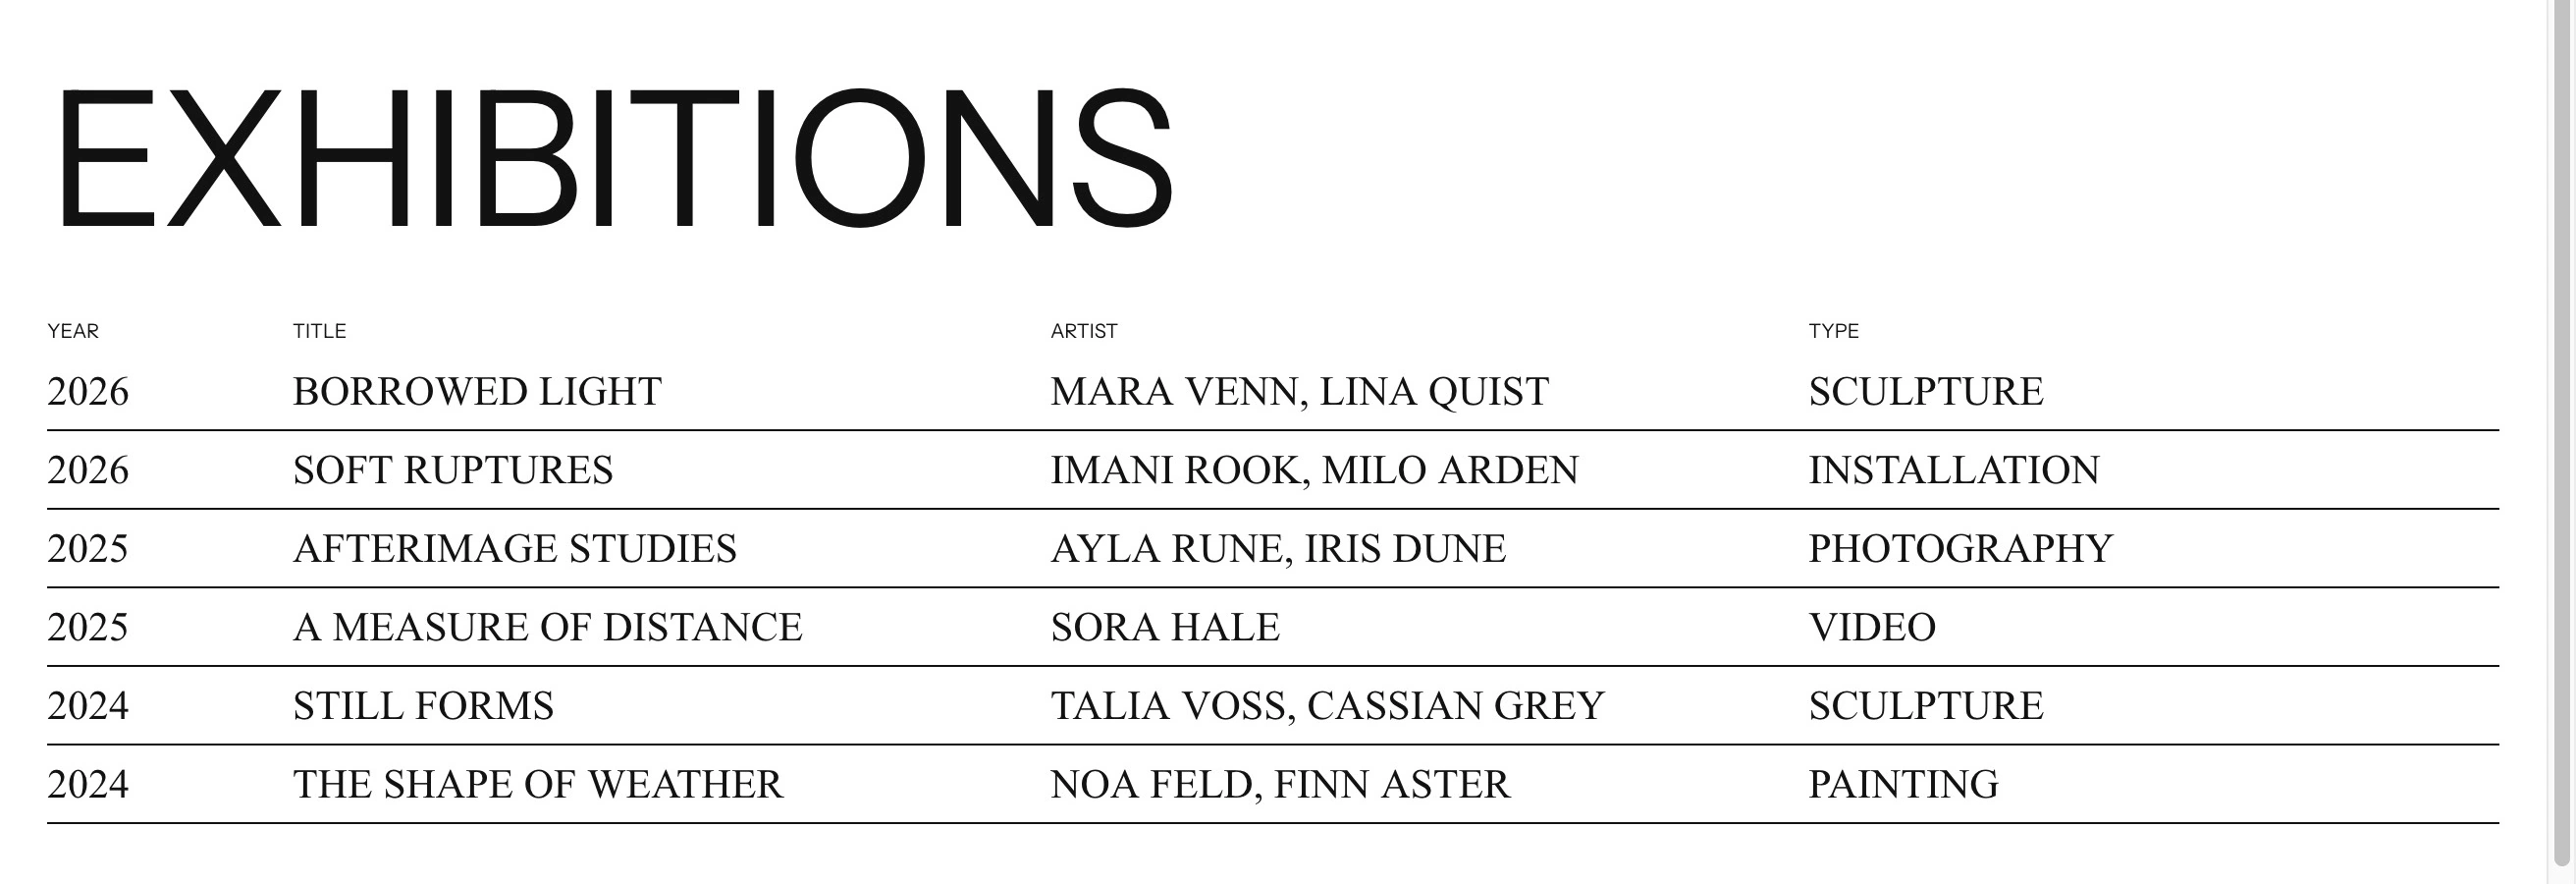
The overview pages now stay connected to WordPress. New Artists and Exhibitions automatically appear in the right place. In the next chapter, I will compare the result with the Phone design.
Responsive Layouts
The Artists and Exhibitions overview pages are working. Now I want to check how the same content behaves on smaller screens.
Use the Phone Figma Dev Mode link
The best way to build the Phone layout is to design it in Figma first. In Figma Dev Mode, select the Phone frame and copy its Dev Mode link, just like we did for the Desktop design.
I have a Phone frame for both overview pages. They use fewer columns and smaller type. The Exhibitions Overview drops the Type column so the title and artist still have enough room.
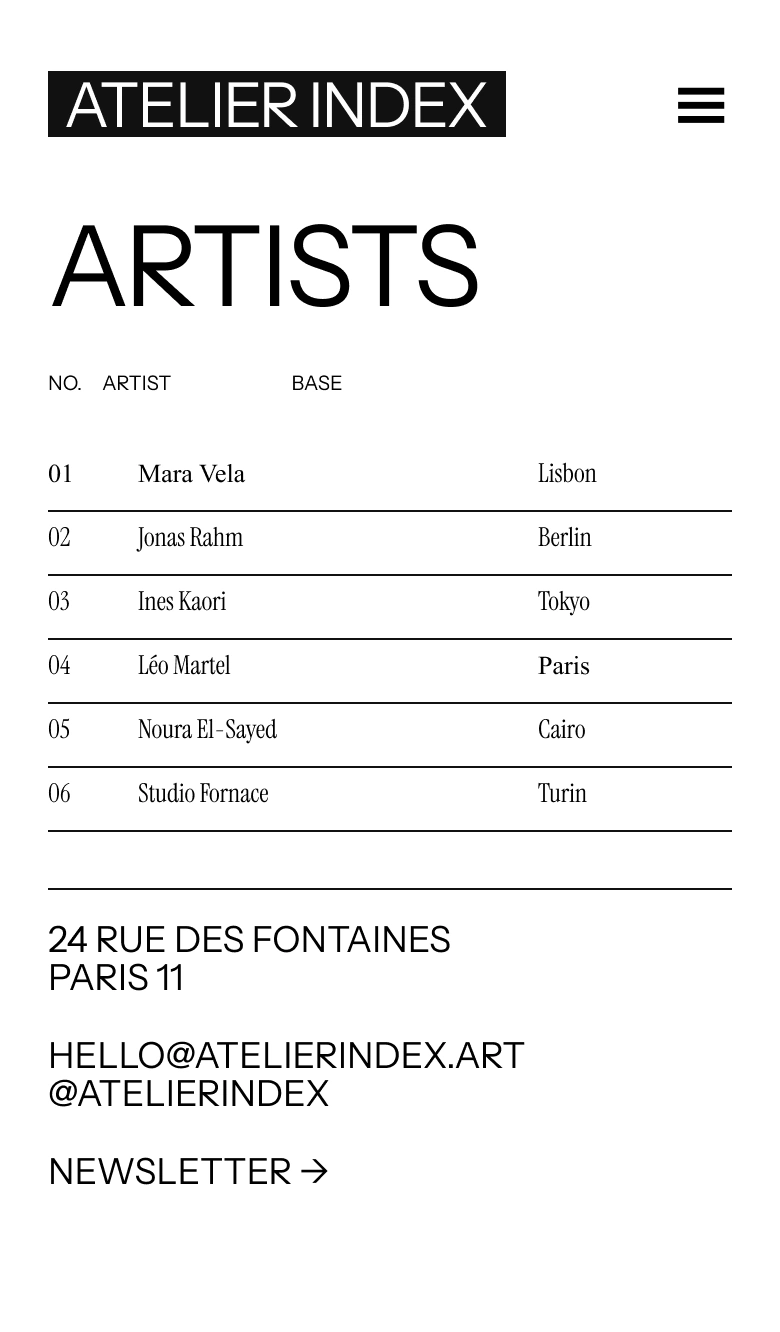
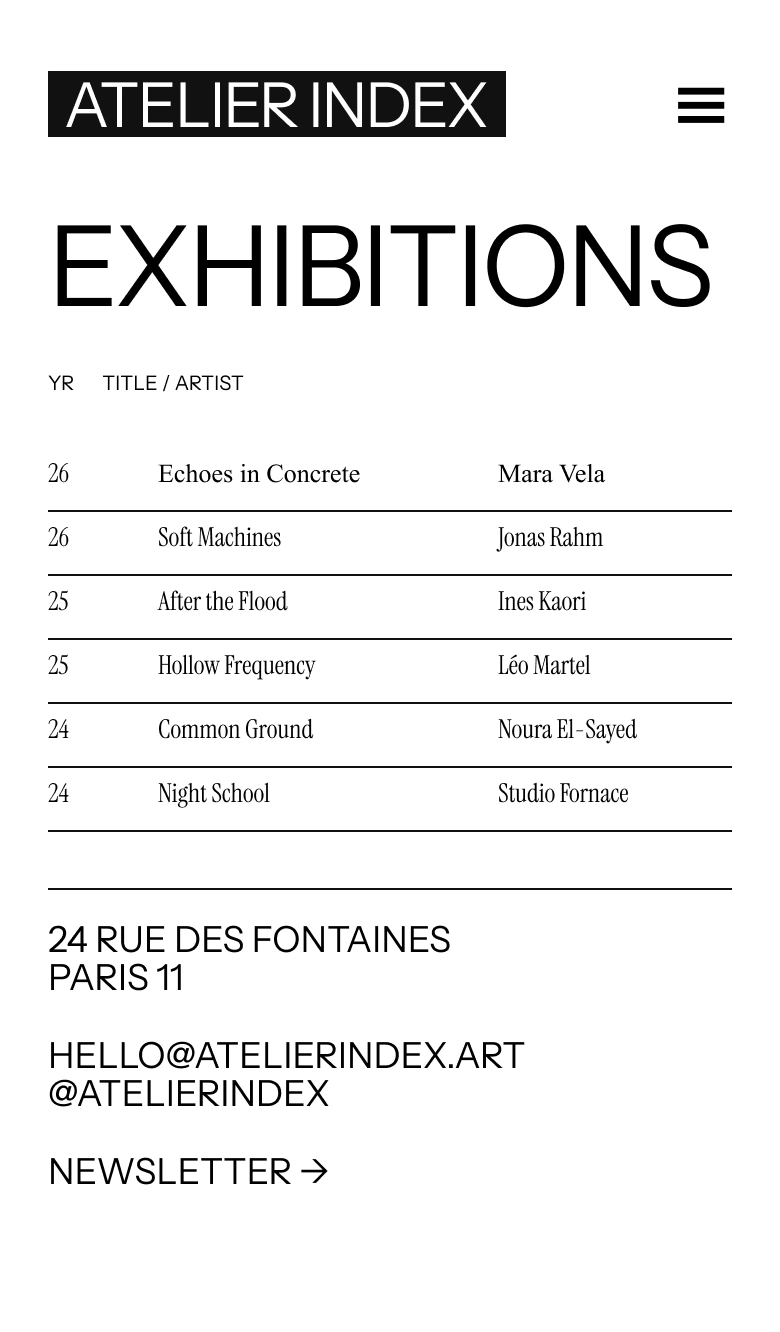
I send AI Mode the Desktop and Phone Dev Mode links:
If you do not have a Phone design in Figma, you can also describe how you want the layout to work. Tell AI Mode which columns should remain visible, what should be hidden and how the content should be arranged. This can work, but a Phone design with a Figma Dev Mode link gives AI Mode a much clearer reference.
I also ask it to check long names. A layout can look correct with short example content and still break when a real Artist or Exhibition has a longer name.
Change History
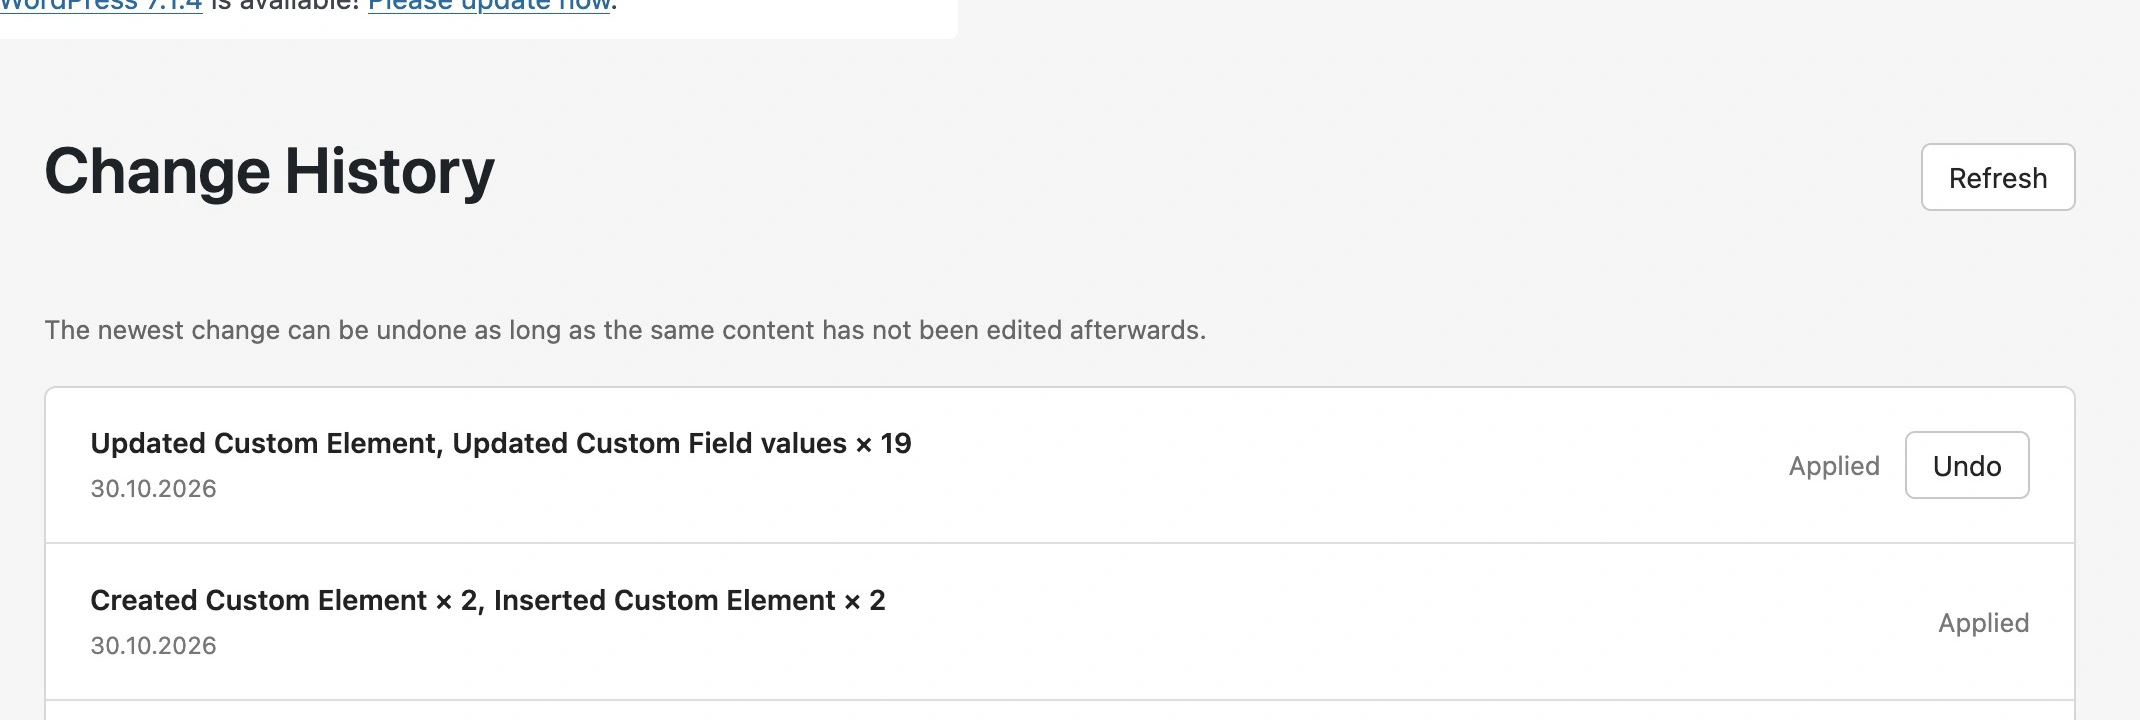
Every group of changes made through AI Mode appears in AI Mode -> Change History. If something went wrong, you can use the Undo button to undo the newest change, as long as the same content has not been edited afterwards.
Developing Locally
I normally build a new website locally with Local. This gives me a complete WordPress installation on my computer, so I can develop and test everything locally before moving the website to a staging server.
While I am building the website, I usually upload the current local version to a staging server about once a week. I then show the client what is new and explain the current state of the project in a call or by email. This is my preferred way of working instead of developing directly on an online website.
To move a website between the local installation and a staging or production server, you can use a migration plugin. I like WP Migrate Lite. You can also browse other migration plugins in the WordPress Plugin Directory or follow the Lay Theme moving guide.
Local development sites, for example websites created with Local, do not count toward your Lay Theme project limit. You can activate your Lay Theme license key locally while developing without using one of the website projects included in your license.
Updates and Keeping Client Websites Stable
For large and important client websites, I usually disable Lay Theme updates after launch. Every update can introduce a new bug, and a production website should not change unexpectedly. Lay Theme is mature now, so fundamental changes and update-related problems are much less common than they used to be. The goal is not to never update. It is to update deliberately instead of changing the website whenever a new update appears.
Go to Lay Options -> Updates and enable Disable Updates for Lay Theme. See the Lay Theme update settings documentation for the complete explanation.

I recommend agreeing on paid maintenance with the client once or twice a year. During a maintenance session, create a fresh backup, check that the website works before making changes, review which updates are actually useful or necessary, apply them under your supervision and test everything again afterwards.
Check the important pages on Desktop and Phone, test the WordPress editing workflow, forms, navigation, media and any custom functionality. If an update causes a problem, you can fix it immediately, restore the backup or ask me for help in the Lay Theme Support Forum. This is much safer than the client or developer installing individual updates every few weeks without checking the complete website.
Tell the client not to install Lay Theme, addon or plugin updates on their own. You take responsibility for the maintenance, test it properly and charge for that work. If there is an urgent security issue, handle it sooner. Otherwise, keep updates inside the planned maintenance schedule.
WordPress normally installs security and maintenance releases automatically, so you usually do not need to install every WordPress core update manually right away. These security fixes are more important than constantly installing every feature update. Also keep the website's PHP version on a currently supported version, because PHP updates are an important part of hosting security.
When handing the website over, you can also enable Client Mode with define( 'LAY_CLIENT_MODE', true ); in wp-config.php. Client Mode keeps content editing available, but hides and blocks site-wide Lay Theme settings. It also disables updates for Lay Theme and Lay Theme addons, so the client cannot accidentally change these parts of the website.
Backups
Regular Backups after Launch
For an important WordPress website, I always set up automatic backups that are stored outside of the website's own server. I use UpdraftPlus and connect it to Dropbox or Google Drive.
Depending on how often the website changes, I schedule a complete backup every week or every month. The backup should include the database, plugins, themes, uploads, the complete Media Library and any other files needed to restore the website. Do not keep the only backup on the same server as the website. If that server fails or is compromised, the backup could disappear with it.
Attackers are also getting better with the help of AI, so you should always assume that a WordPress website could eventually be hacked. A recent complete backup can turn a serious incident into a manageable restore. Without one, cleaning and rebuilding the website can take a professional web developer a long time and can quickly cost €500 or more.
After setting it up, run a manual backup once and check that every part arrives in the connected cloud storage. A backup plan is only useful when you know the files are actually there and can be restored.
Backups during Development
Database backups are also useful while you are developing the website. The Custom Elements, configurations and other changes created through AI Mode are stored in the WordPress database. If a large change goes wrong, a recent database backup gives you another way to return to a working state.
Do not rely completely on Change History. Before asking AI Mode to make a large or complex change, create a database backup with UpdraftPlus or another backup plugin. You can find more options in the WordPress Plugin Directory.
You do not need to create a complete backup after every small edit. But before major structural work, save a database backup and give it a clear name or date so you know which version you can restore.
Client Handoff
Before handing over a website, I recommend creating documentation for the client. It should show where they log in, where each type of content lives, which fields they need to fill out, how they replace images and which parts of the website they should leave untouched. This gives the client one clear place to look whenever they forget how something works.
You can let AI create most of this documentation. Ask it to go through the finished WordPress and Lay Theme admin, follow the actual editing workflow, take screenshots and explain step by step where the client enters each kind of content. It can then organize everything into a clear documentation website. The result should describe the real website and its specific fields instead of becoming a generic Lay Theme manual.
You can host the documentation website on Cloudflare or Railway and protect it with a password. Cloudflare offers free hosting for static HTML websites. On Railway, hosting a small documentation website can cost only a few cents per month, depending on usage. Setting up Cloudflare or Railway can be a little complicated at first, but AI can also guide you through the setup, deployment and password protection step by step.
This keeps the instructions private while making them easy for the client to access and update later. Do not include WordPress passwords, hosting credentials, API keys or other secrets in the documentation itself.
Planning and Consulting
You can hire me to help plan a larger Lay Theme project. I can review the brief or Figma design, check the technical feasibility, create diagrams for the content structure and recommend which Lay Theme and WordPress features to use for each part.
See Building Complex WordPress Websites with AI for a complete content-model example. For consulting and project planning, email me at info@laytheme.com.
Vibe Coding with Lay Theme
AI Mode is a way to vibe code inside an established WordPress system. Instead of asking AI to invent an entire content management system, it can configure WordPress, create Custom Post Types, Custom Fields, Taxonomies and Relationships, and then build the frontend with HTML, CSS, JavaScript and Liquid.
Liquid is the open-source templating language also used by Shopify themes. In Lay Theme, Liquid connects the design to content stored in WordPress. One template can automatically render many Artists, Exhibitions or Projects while every entry remains editable through its own content fields.
This gives vibe coding a structured foundation. WordPress handles the database, media, users and editing interface, while Liquid renders the dynamic frontend. You still need to plan the content structure, review the result and test the website, but you do not need to build the complete CMS and admin interface from scratch.
JavaScript, Animation and 3D
Every Custom Element and Custom View can contain its own HTML and Liquid, responsive CSS and JavaScript. This means they are not limited to static layouts. They can include animations, interactive interfaces, WebGL or 3D experiences and other custom behaviour. The creative possibilities are extremely broad.
For a complicated element, it can be easier to build and test the idea outside of Lay Theme first. Ask your AI to create it as a standalone HTML prototype. Work on it until the Desktop, Tablet and Phone versions are finished and the animation, interaction, JavaScript or 3D behaviour works exactly as intended.
Once you are happy with the prototype, give the finished files to AI Mode and ask it to turn them into a Custom Element or Custom View. The frontend can stay as it is, while the content becomes editable through Custom Fields and Liquid.
Use a Custom Element when you want to place the result freely in the Gridder. Use a Custom View when it should become the automatic frontend for a Post Type, post, taxonomy or term.
Conclusion
The gallery website is not completely finished. It still needs the final content, testing, design polish and a Site Title, Navigation and Footer. AI Mode can also build these parts as completely custom elements, independently of the existing Lay Theme settings.
You now know the core workflow: plan the structure, create Custom Post Types, Fields, Taxonomies and Relationships, turn a Figma design into editable pages, build automatic overview pages and create responsive layouts.
You also know how WordPress and Liquid work together, how to prototype JavaScript, animation or 3D, and how to deliver the website professionally with local development, Change History, backups, controlled updates and clear client documentation.
From here, you can build on this structure and add whatever your own project needs.